Case Study:
Wine Cooler Design
for VinoQ
The goal of this case study is to provide insights in what to expect from a collaboration with Ridzert Design.
Using the real-life example of design for manufacturing for two wine coolers for the VinoQ brand, it guides you through the following steps:
Design Brief
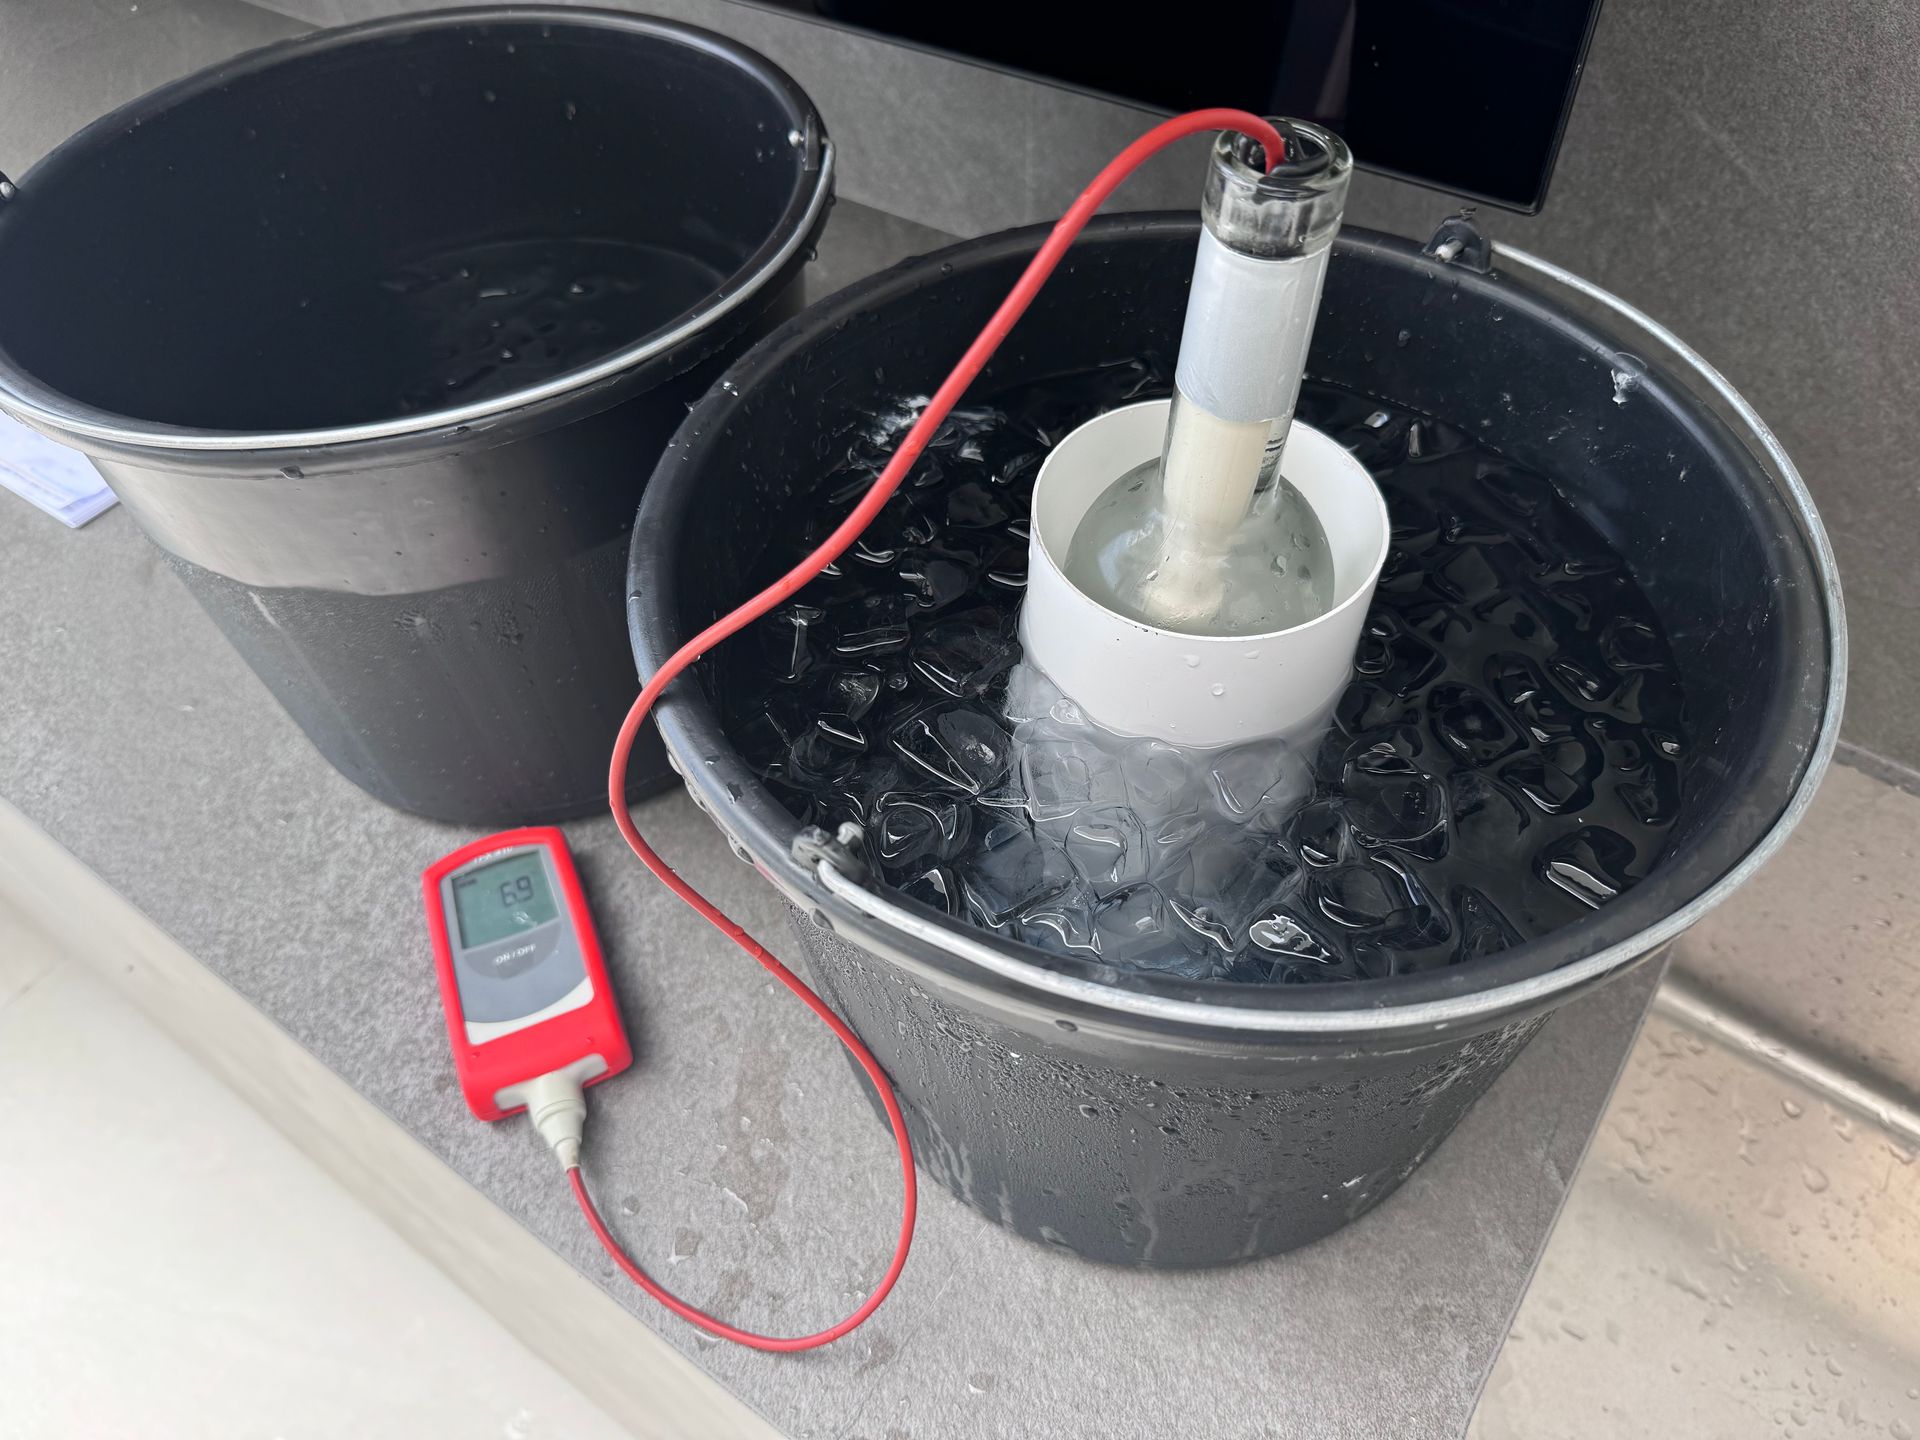
The founder of VinoQ came up with the idea to design a wine cooler featuring a separate cylinder for the bottle, nestled within an ice compartment. He conducted thorough research to validate the effectiveness of this method.
The innovative setup with an additional cylinder offers several advantages:
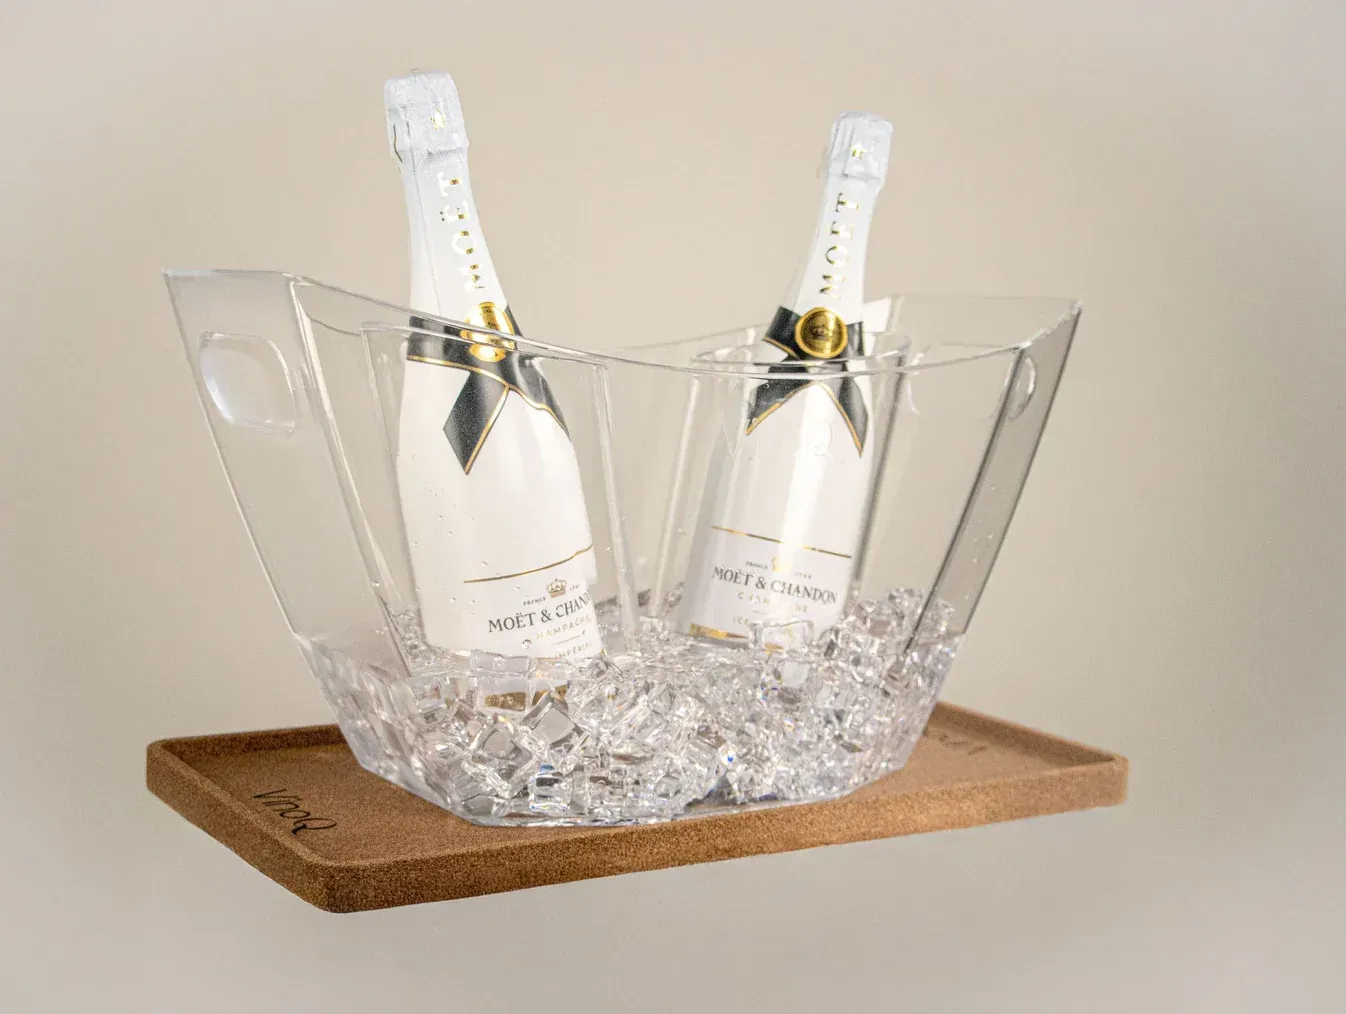
• The bottle maintains a consistent temperature for hours, unlike traditional setups in which the bottle is directly chilled in ice. This is particularly important for wine connoisseurs, who don't want to cool down wine, but prefer to preserve the wine's ideal temperature.
• The bottle remains free from condensation and the product therefore eliminates the need for drip catchers or wine drip collars/napkins.

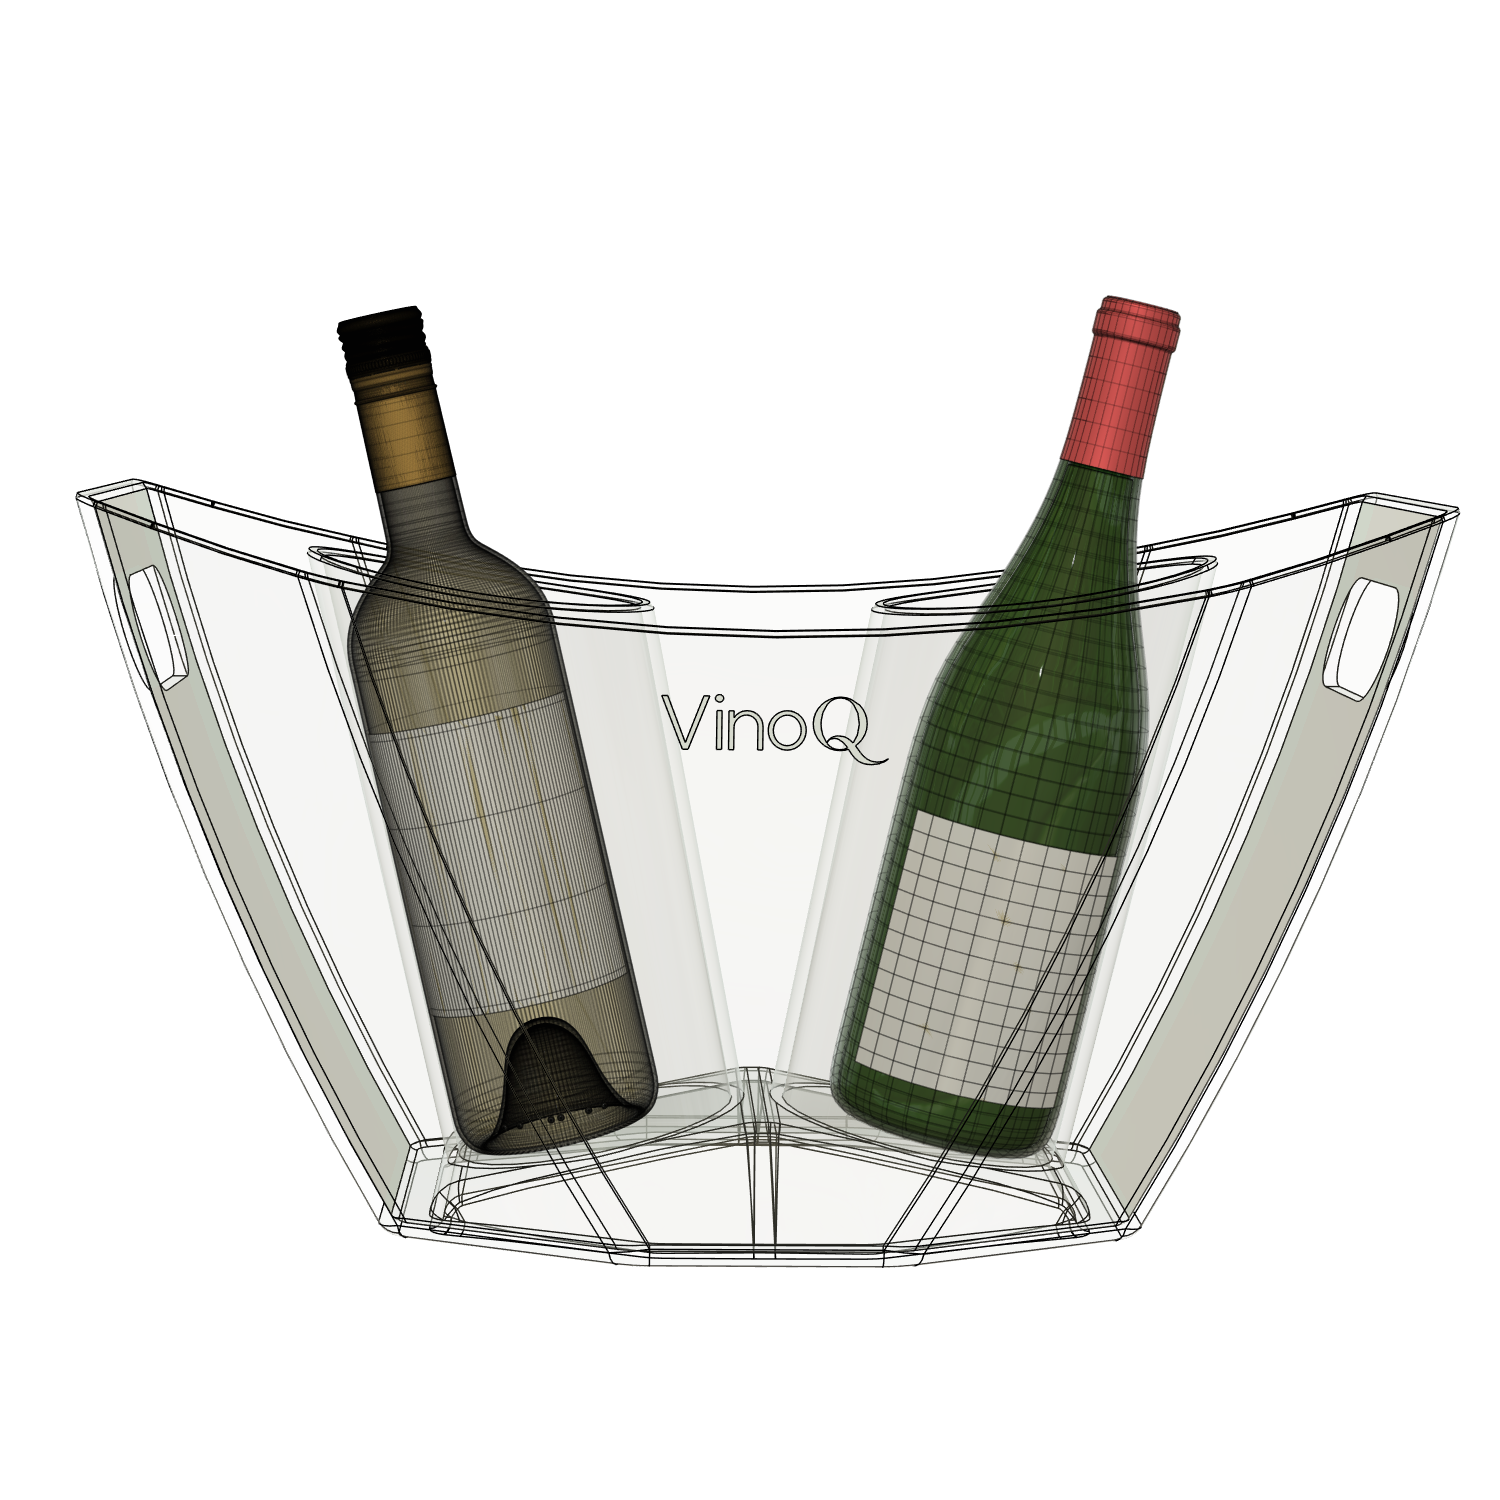
The client asked for the design of an acrylate wine cooler complete with handles. He requested an elegant design that exudes luxury.
From the outset, he was looking for both a one-bottle and a two-bottle version.
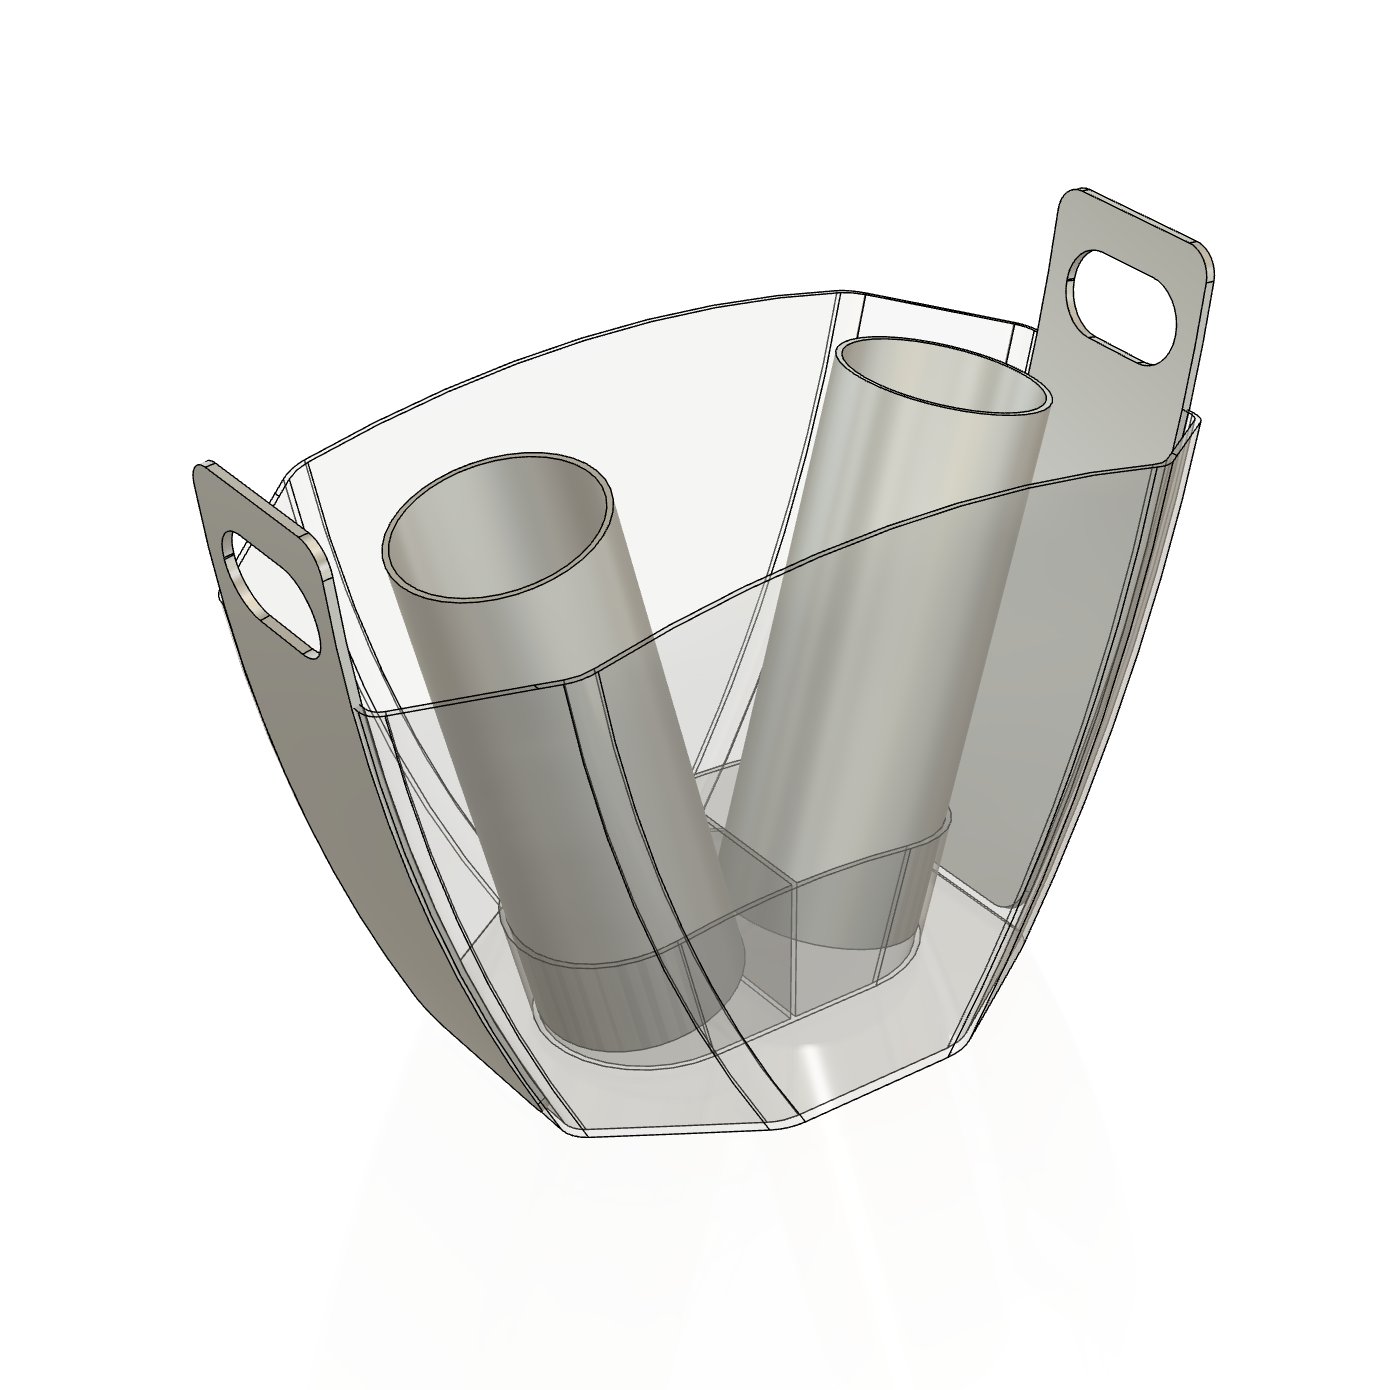
As part of the brief, he provided the sketch shown here to illustrate what he envisioned.
If you are thinking of collaborating and don't have a full brief ready, we can talk about it to get a clear picture of the desired outcome.
Idea Phase
In the idea phase, I come up with several options of what the product could look like. Depending on the brief, the ideas could be relatively similar to each other or completely different. I take manufacturing and ergonomics into account, although the focus of this phase is on initial exploration of possibilities.
Idea Phase Output
For the products, I came up with many different ideas.
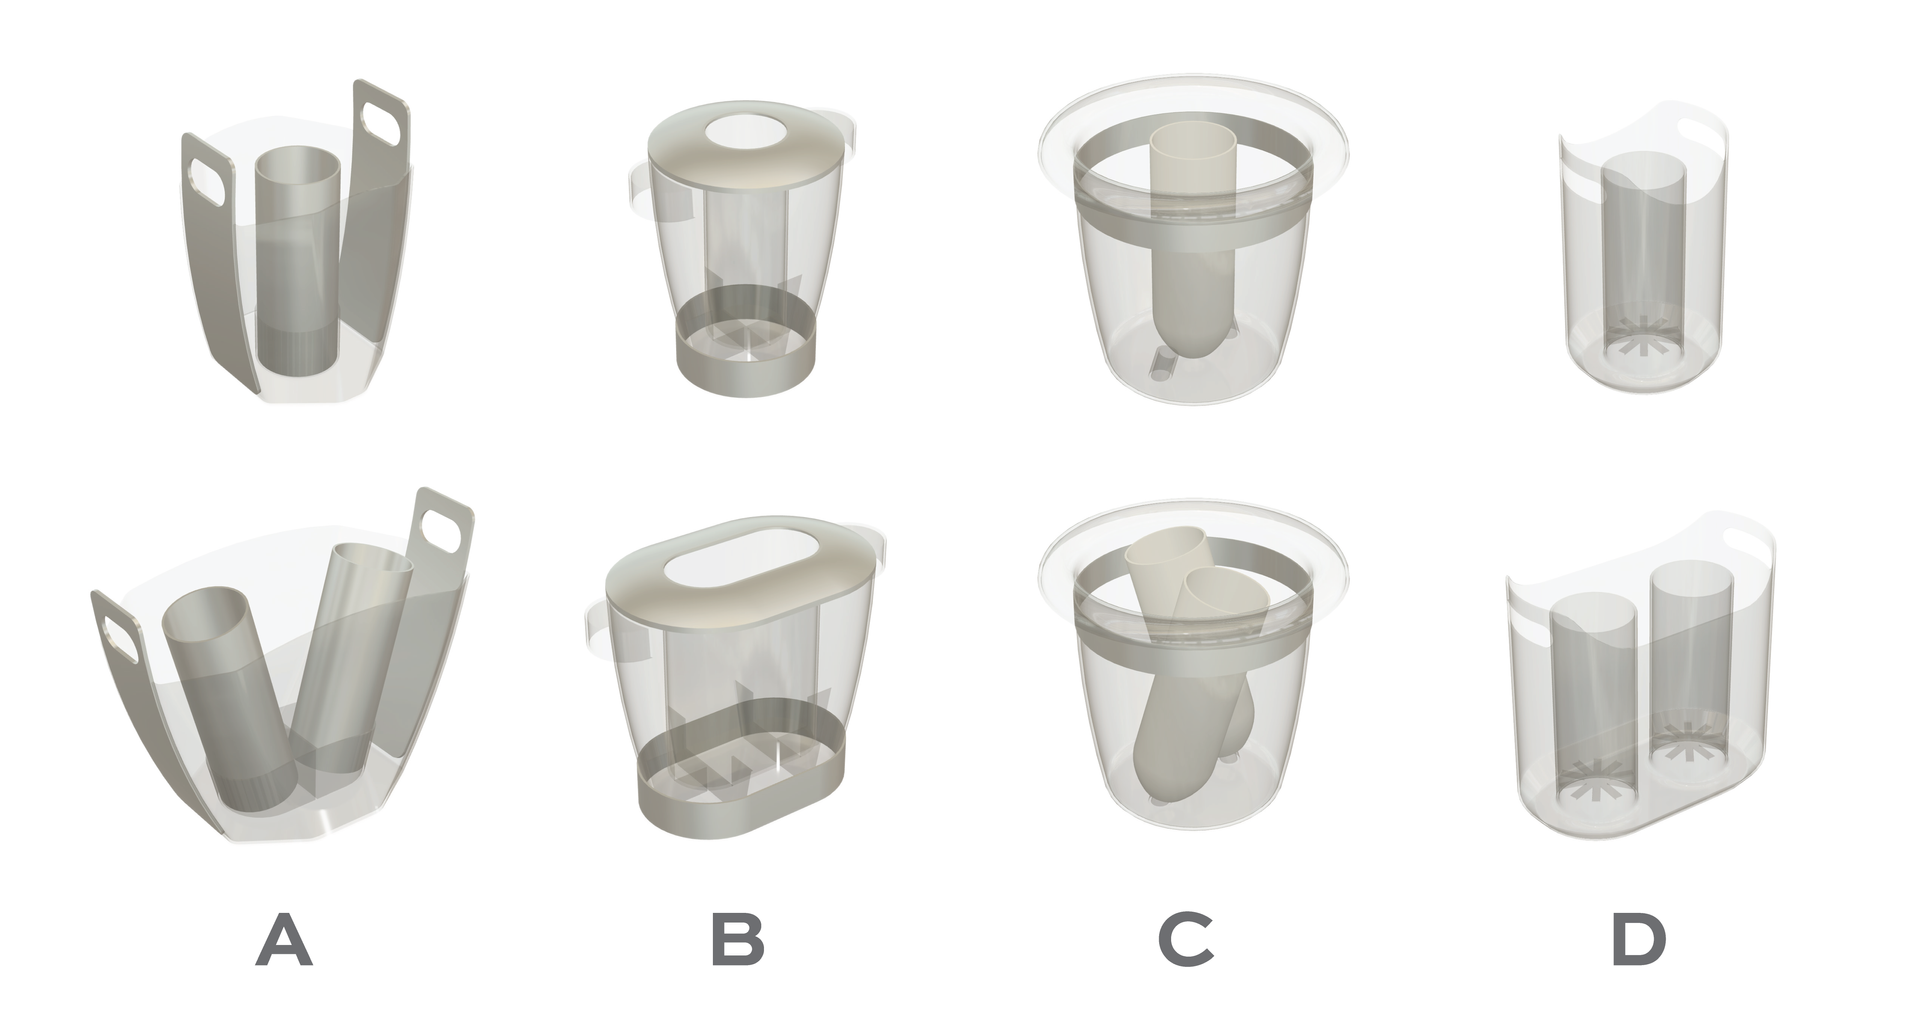
I chose and combined the best ones to distill everything in 4 ideas:
Idea A
To add contrast, this idea features silver colored panels on the sides. Handles are integrated in these sides. The cylinders for wine bottles are also silver colored.
Idea B
The lid and foot of the product are silver colored. They could be either metal parts or acrylate with a coating. The handles enhance the organized character of this version.
Idea C
A classic outer shape for this wine cooler idea. A metal ring provides a nice space for engraving a logo. Both the single and the double cooler use the same parts, with only two differences:
• one extra cylinder is used for the two-bottle version
• positioning of the cylinders is different
Idea D
For this idea, only one mould is needed to produce the complete product. The product has a partly open floor for the bottle to rest on. All functions are combined in only one part.
Concept Phase
In the concept phase, I re-evaluate my client's favorite idea. I take client feedback into account and check what else I can improve.
Client feedback
The VinoQ founder chose to continue with idea A.
Further client feedback:
• Use fixed cylinders (like in idea D)
• Use transparent cylinders (like in idea B and D)
• Place the cylinder of the single version at an angle too
• Elaborate the sides of the cooler
Client discussion
With my client, I discussed some options for the contrasting sides of the cooler:
• Using coatings
• Going for two-component injection molding
• Creating a subtler contrast by making the side surfaces a little rougher instead of applying a coating
We went with the last option. It's a durable option and it can be included directly in the mold, so that no extra steps are required during production for adding the contrast.
Concept Phase Output
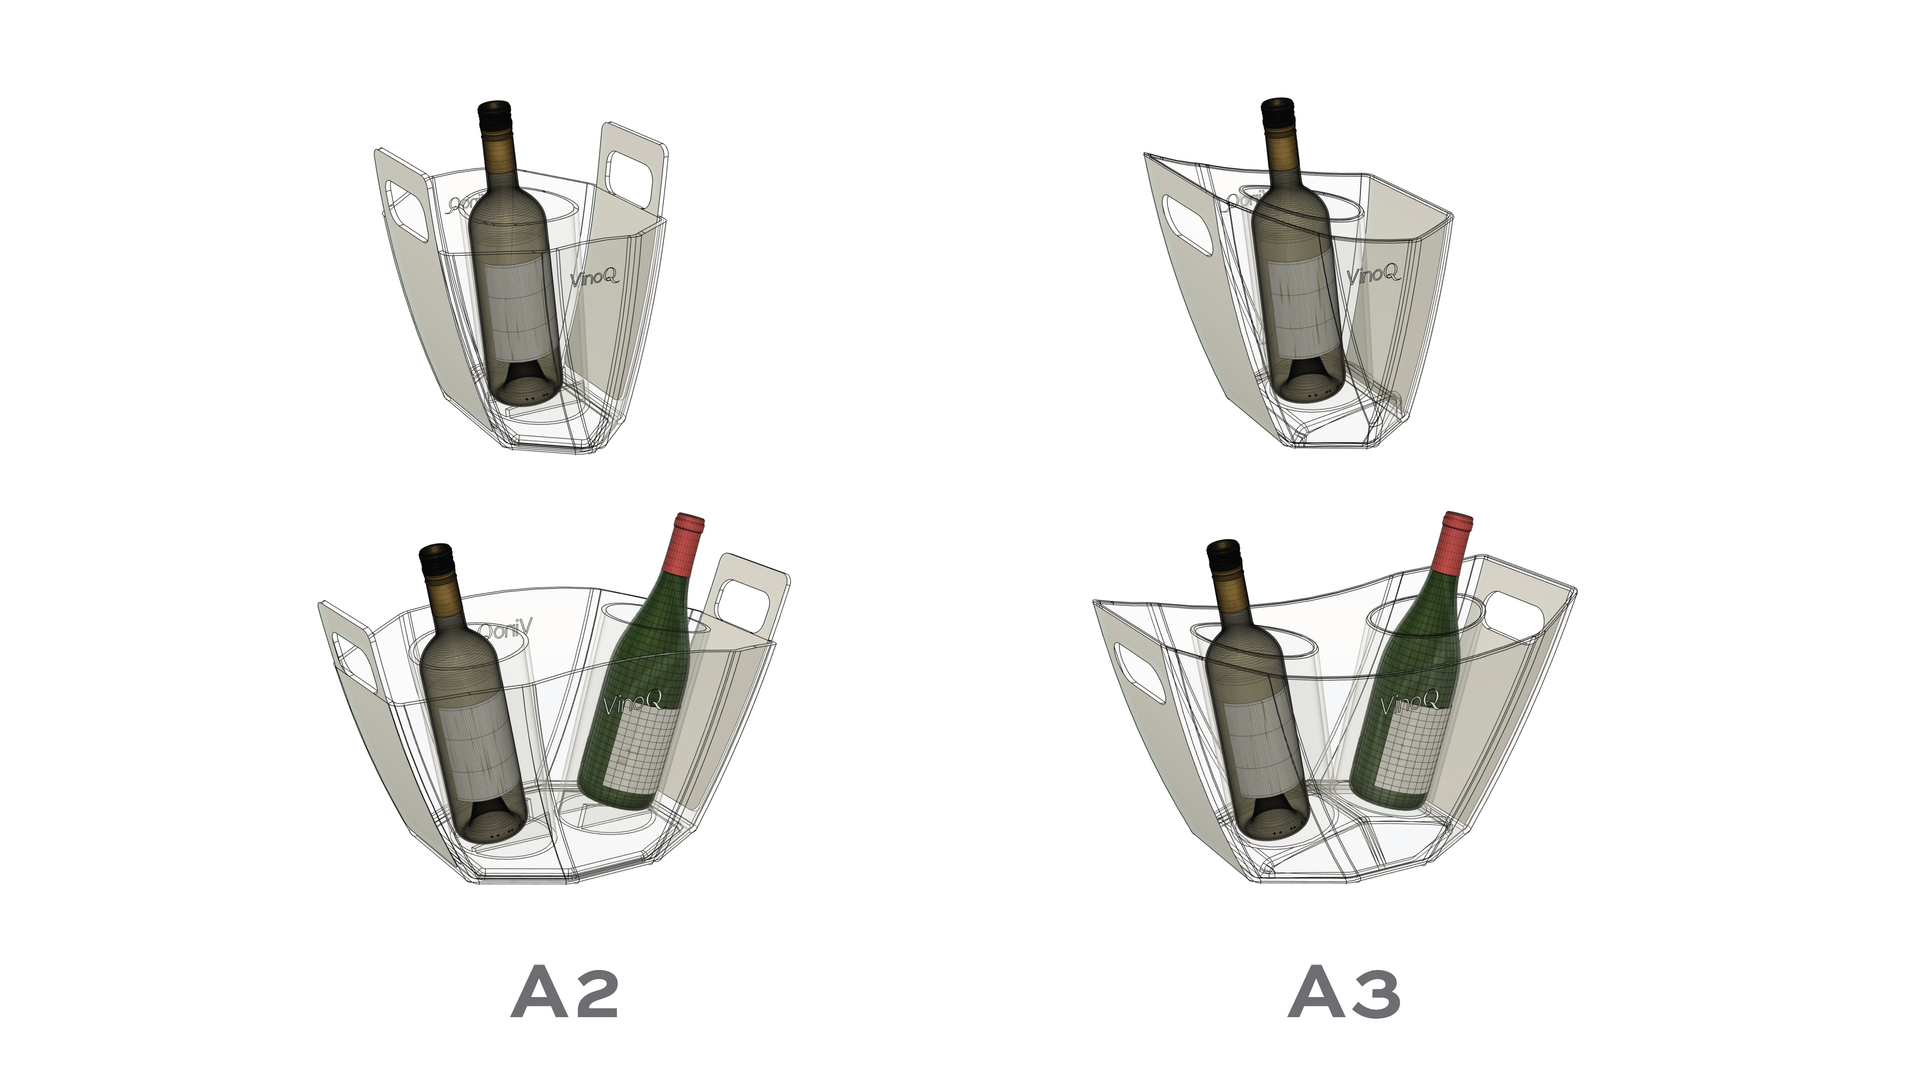
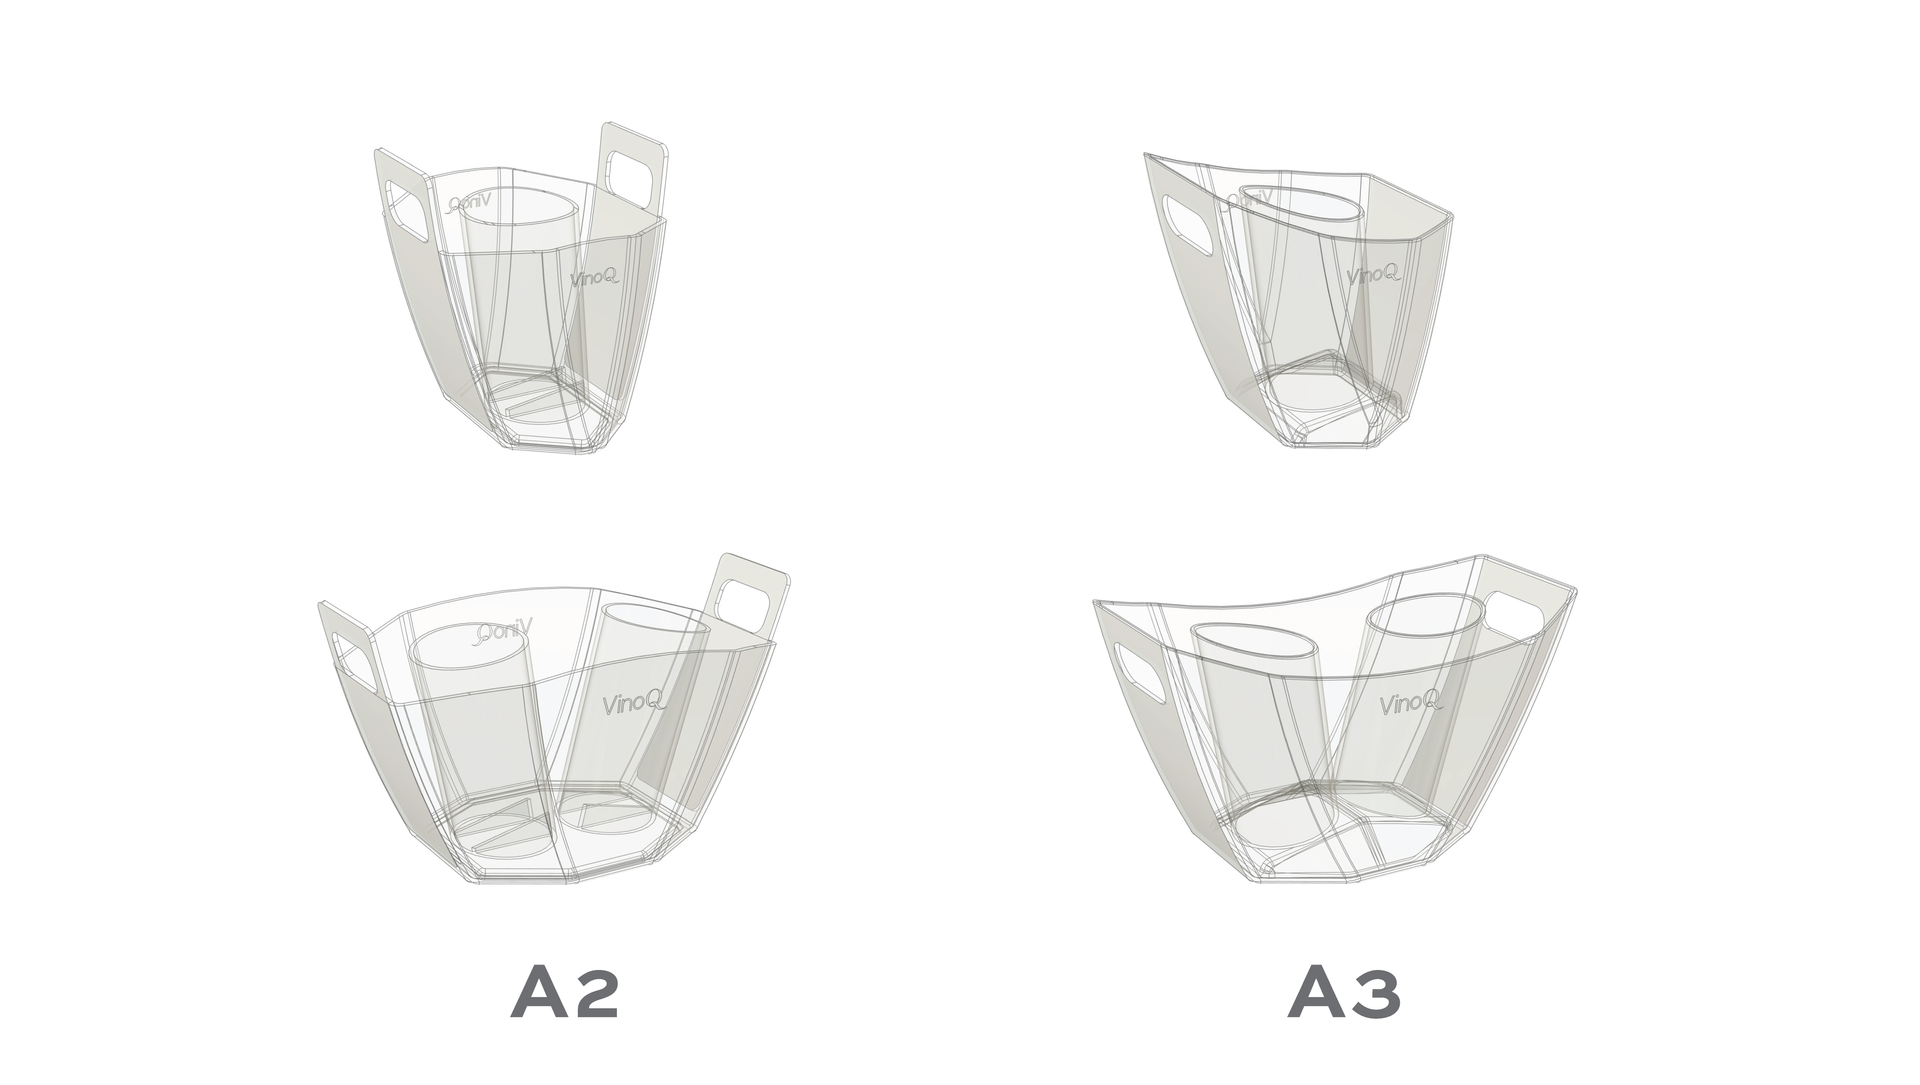
In this phase, I developed several iterations and improvements based on idea A. I chose the most promising findings and combined them in 2 concepts: A2 and A3.
For both concepts, I:
• Fixed the cylinders in the products
• Included draft angles (which are required for production, they help loosening the products from the molds)
• Changed the look of the side panels
• Had a closer look at the dimensions, for example: I lowered the products a bit to make it easier to remove wine bottles from the cylinders
Concept A2
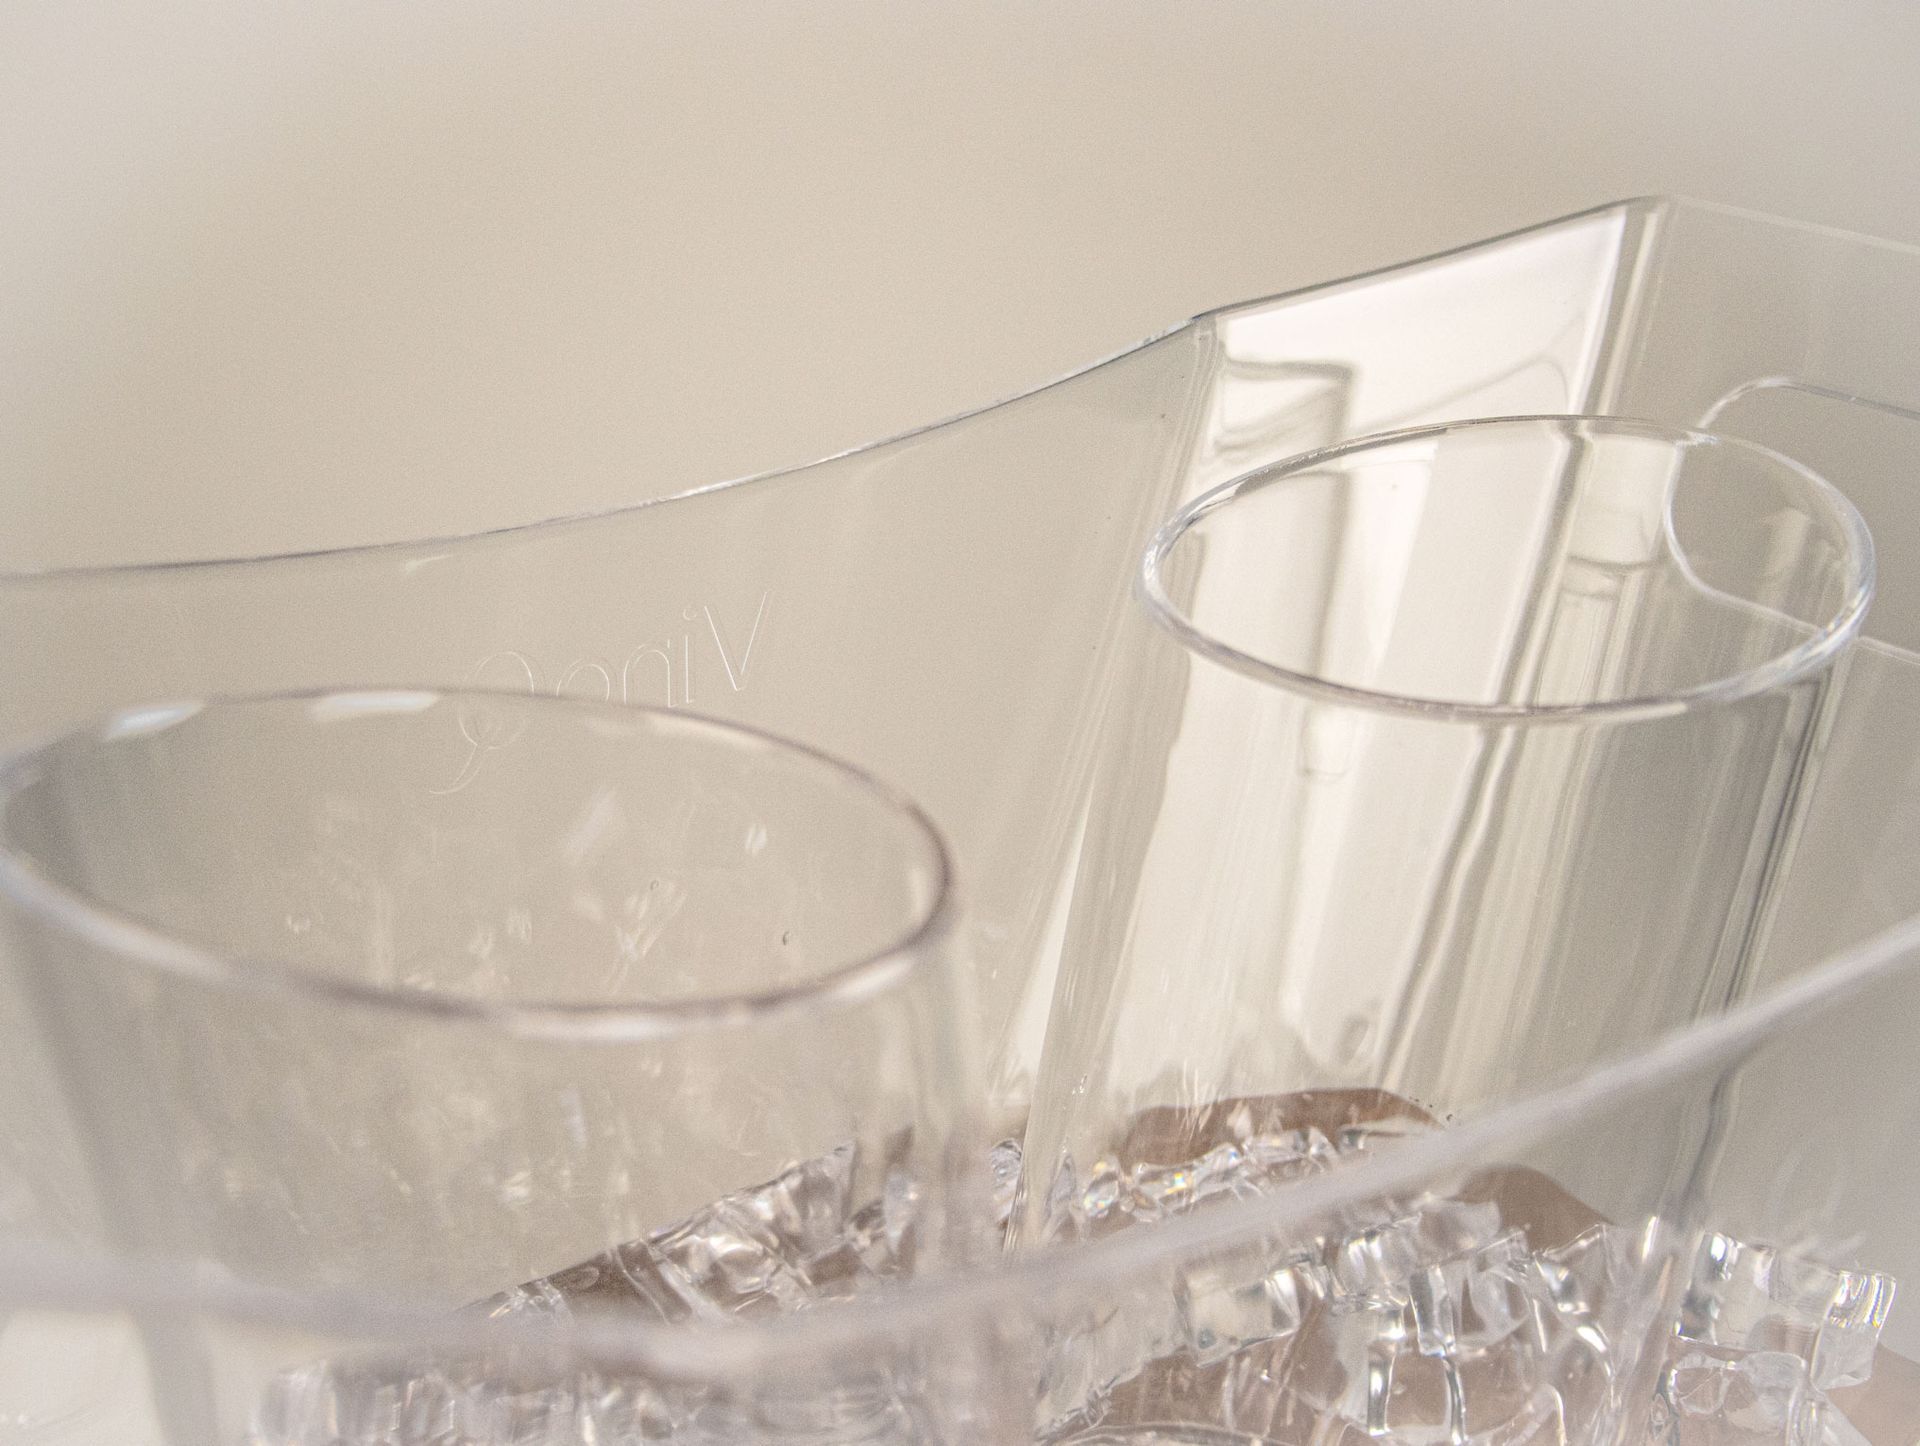
At the bottom of each cylinder, two transparent ribs function as a rest for a wine bottle. The handles are true to the original idea A.
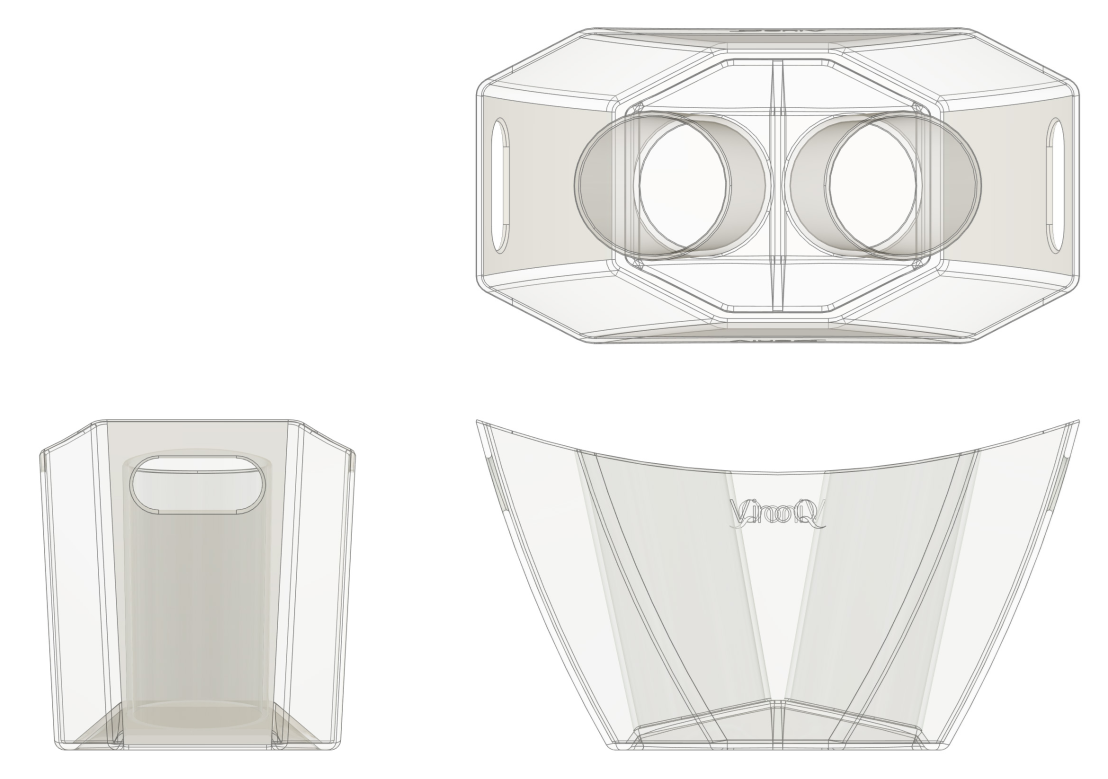
Concept A3
As an alternative version, I created a more integrated concept, which was still based on the same idea A. The coolers are sleeker and more minimalistic. The single cooler has only one handgrip. The bottoms of the cylinders are shaped so that bottles can rest directly on it.
Detail Phase
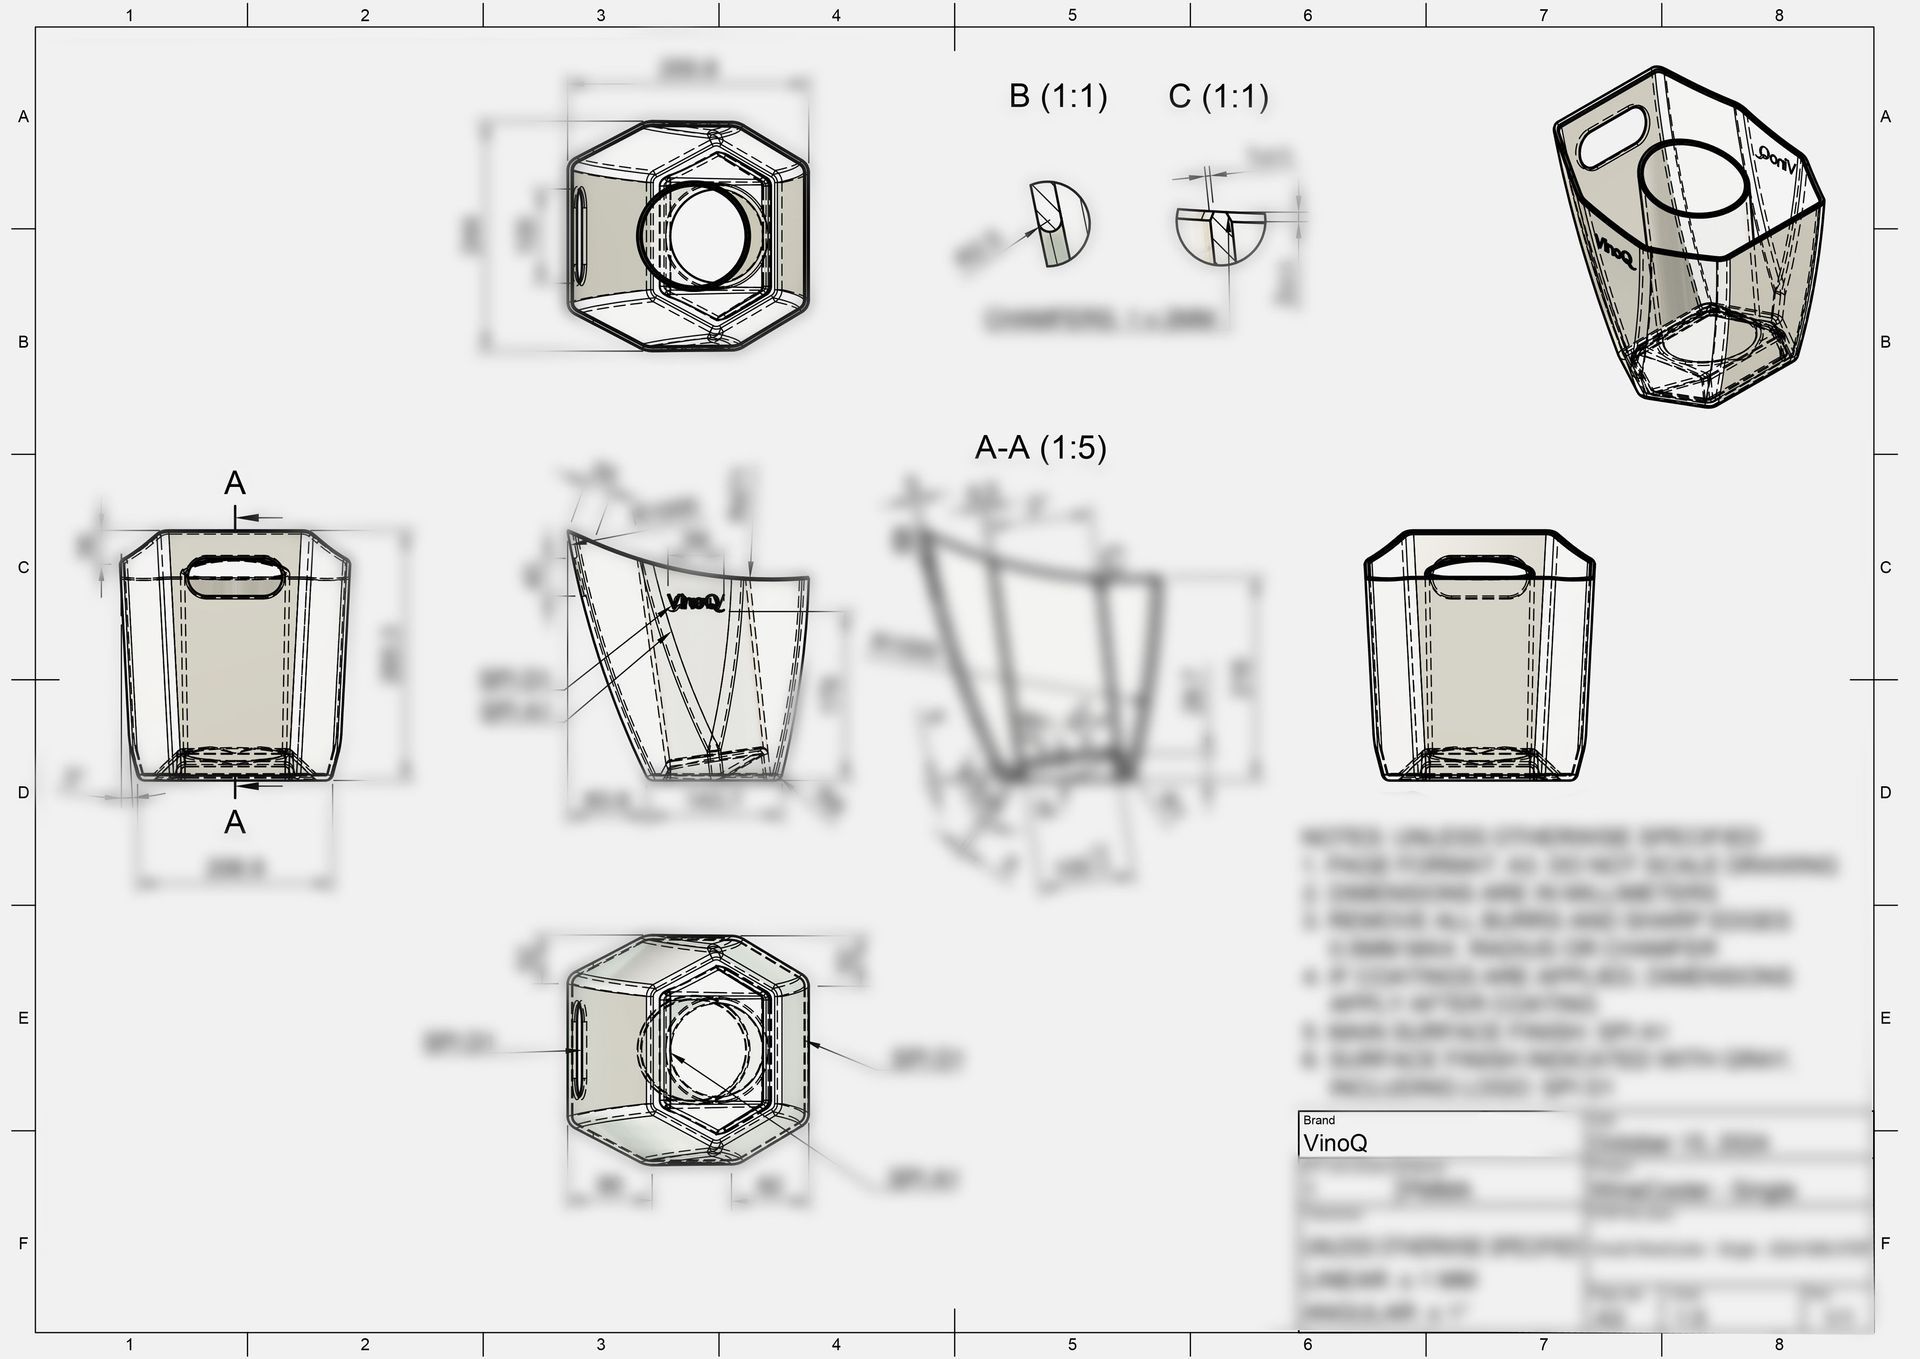
During the detail phase, I finalize Computer-Aided Design (CAD) files and often make technical drawings for prototyping and manufacturing. This is the phase in which aspects like Color, Material, and Finish (CMF) are clearly defined.
Client feedback
With a clear preference for concept A3, the client asked me to continue with the detail phase.
Sometimes clients have additional feedback at this stage, which I then take into account while going into the detail phase.
Detail Phase Output
For the detail phase, I provided the following deliverables for both wine coolers:
• CAD models (STEP format)
• Technical drawings with tolerances
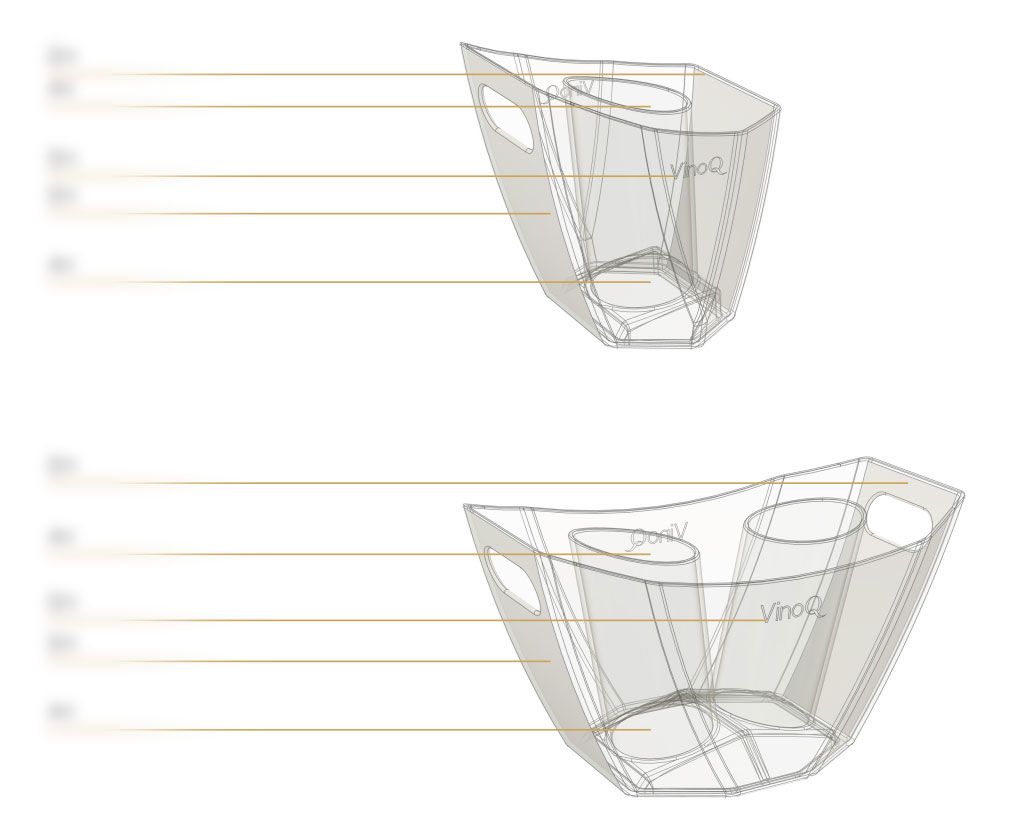
• A supporting document (PDF) in which details were explained to the manufacturer, for example:
- Criteria for the final products
- Production technique
- Material
- Cross sections
- Surface finishes
Prototyping
With the deliverables from the detail phase, my clients ask manufacturers to create prototypes. Occasionally, I help clients ordering 3D printed prototypes, but I usually recommend to create prototypes directly with manufacturing firms. During the prototyping process, the production partner then gets to know the product in detail and can provide valuable feedback about how to make adjustments if needed to make the product perfect for production with their facilities.
Ordering prototypes
The manufacturer of the wine coolers suggested a specific build up for the prototypes and asked if we agreed with it. My client and I checked and validated their approach.
It's important for manufacturers to get the right data to work with. Just a drawing or nice picture would not be enough. They need 3D CAD models and often technical drawings, that clearly define what they should build.
Testing
It's always an important part of the process to test prototypes. At this stage, investments for tooling are usually not made yet and it is easier to adjust anything at that point in time compared to later on. My client thoroughly tested the prototypes. Occasionally I also test prototypes. It depends on the preferences of my client. Usually, I advise to test the mechanical properties of a product extensively and also to test all functions, if possible with end users of the product.
Feedback for the manufacturer
The prototypes turned out really well, they already looked like finished products. There were only a few minor changes that we requested, for example a small correction of a mistake in the logo.
Sometimes, manufacturers requests modifications before creating prototypes. It often depends on which machines and facilities the manufacturers have available.
From time to time, one prototype is enough in the development process. However, more than one prototype might be needed to get to the desired end result.

Manufacturing
After approval of a prototype, it is time to start preparing for manufacturing. If molds are needed for production, they are commonly ordered just before manufacturing. Initial samples from the mold then show what the final product will be like. These samples need to be checked in detail and if necessary, minor changes can be made. After that, the manufacturing process can start.
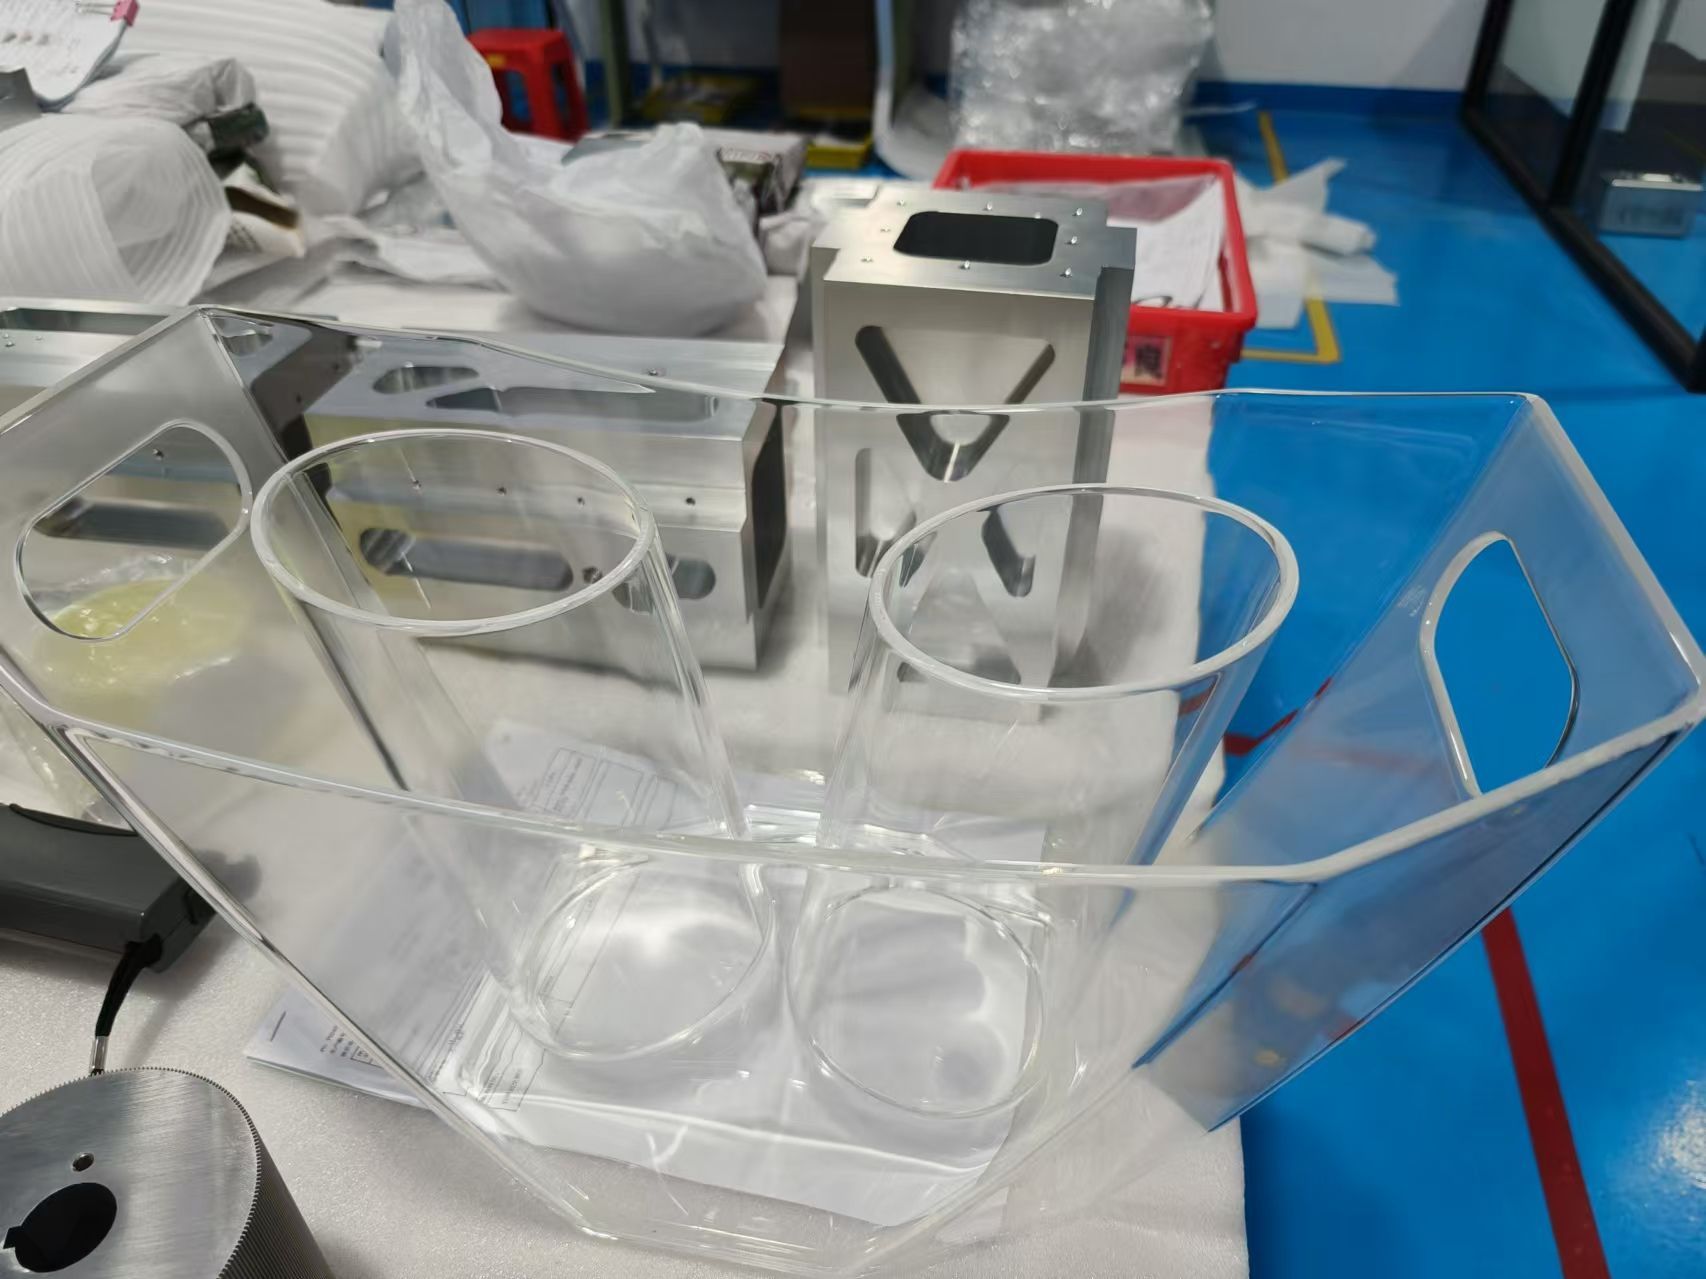
Initial production samples
Before starting up production, initial samples were created in the molds. The first trial of the single wine cooler was quite good. The product came out of the mold almost as envisioned with all features included, like the handle and specified differences in surface roughness. I inspected photos and videos from the manufacturer and pointed out a few details that needed to be corrected to get the products exactly how the founder of VinoQ and I envisioned them.
For the double wine cooler, there were some complications, which made the initial production sample imperfect. It was a shame, but it's common to encounter some roadblocks like this in the development of innovative products. With the manufacturer, we talked about possibilities and sent 3D models back and forth to come to a solution to enable correct production of that product as well.
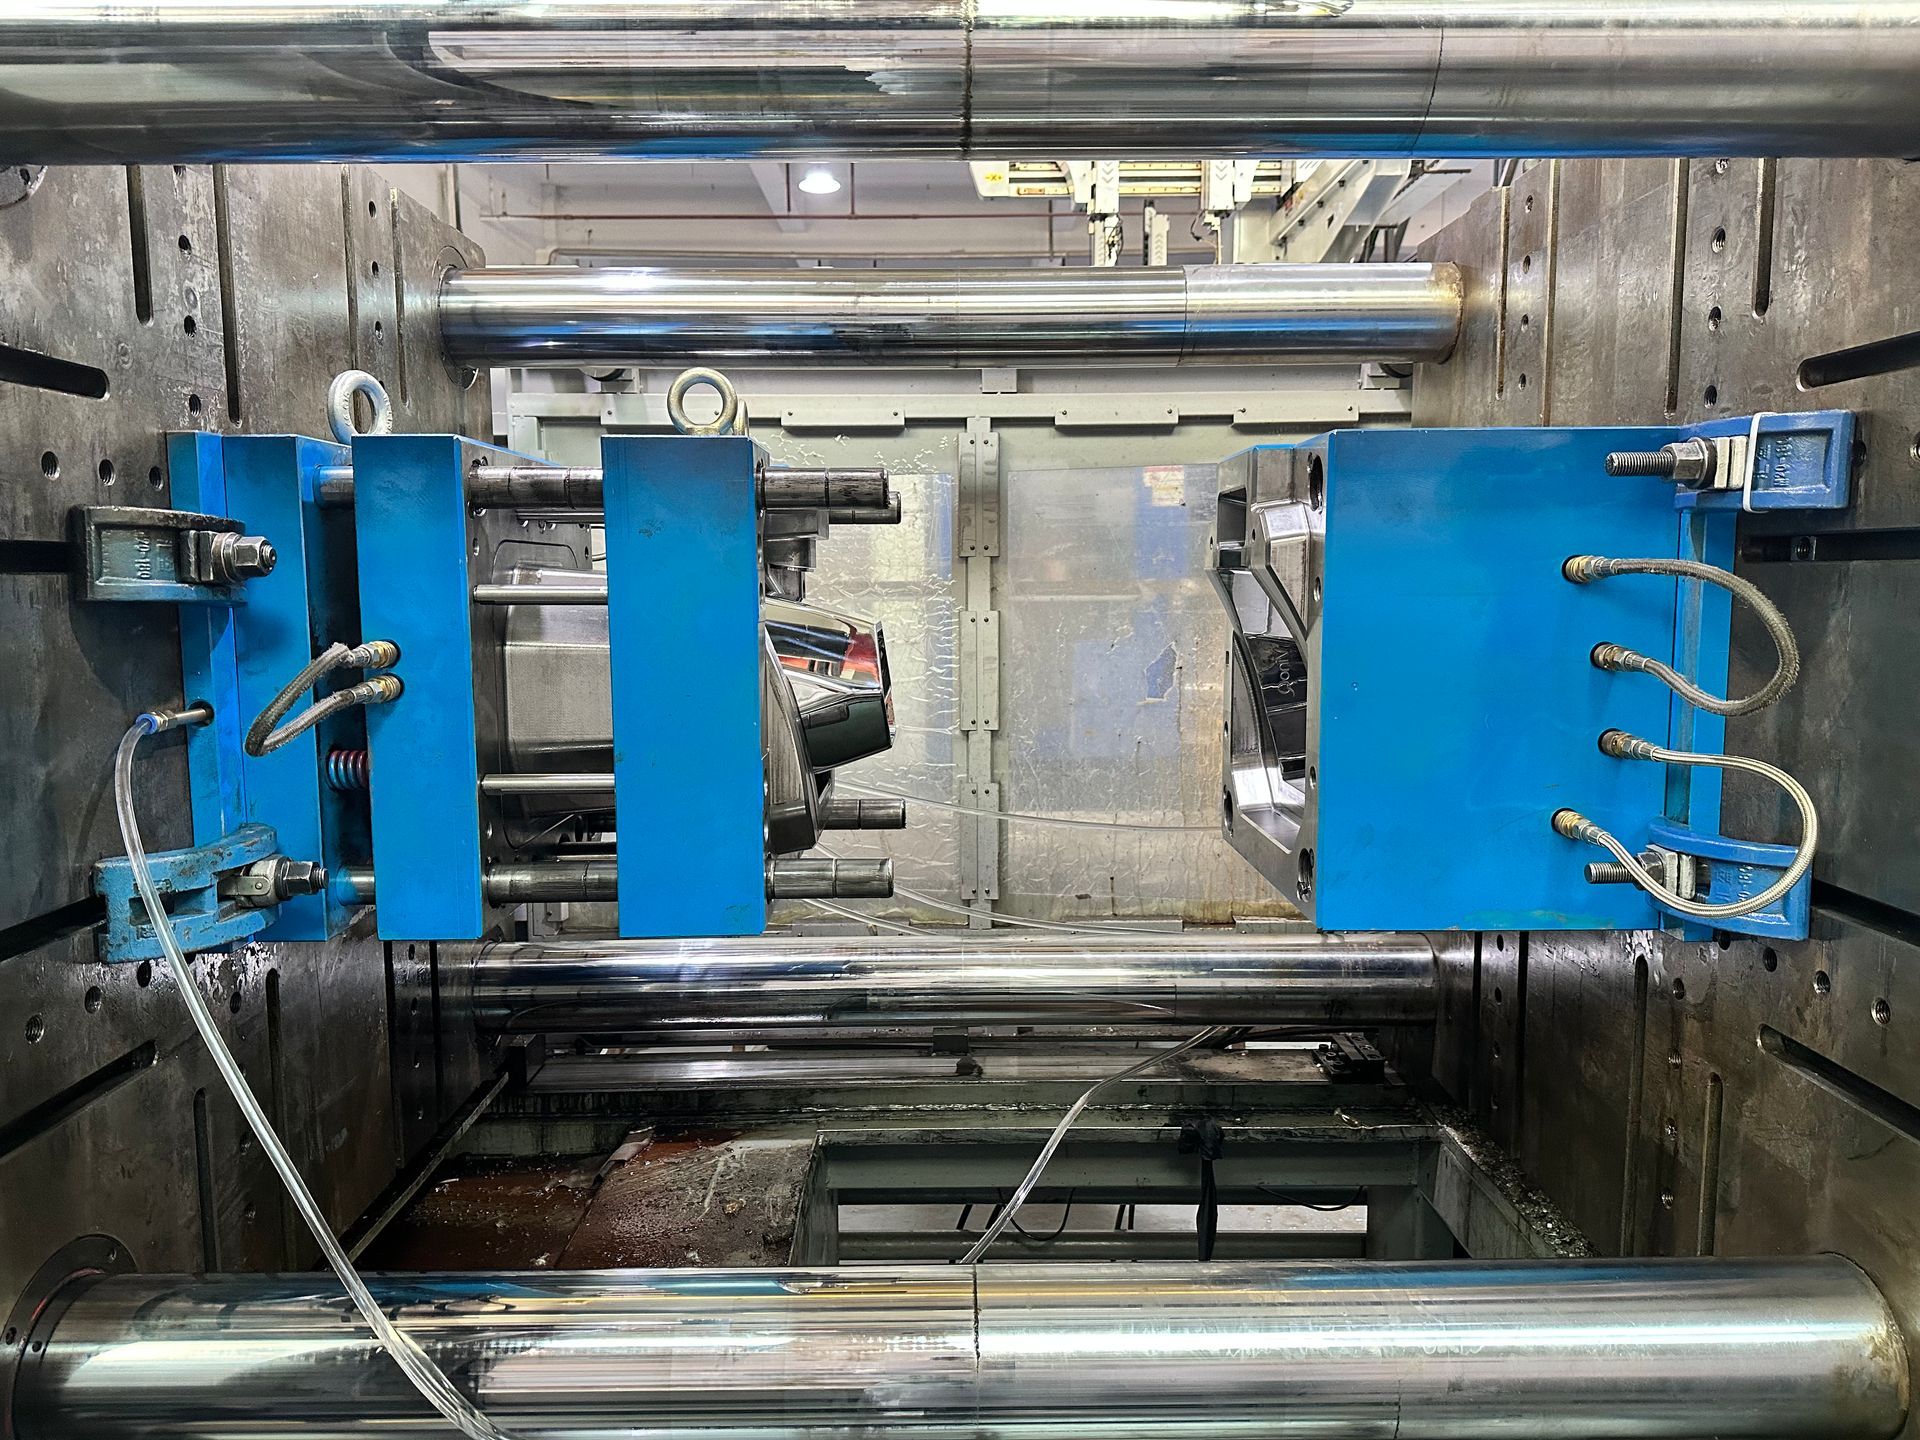
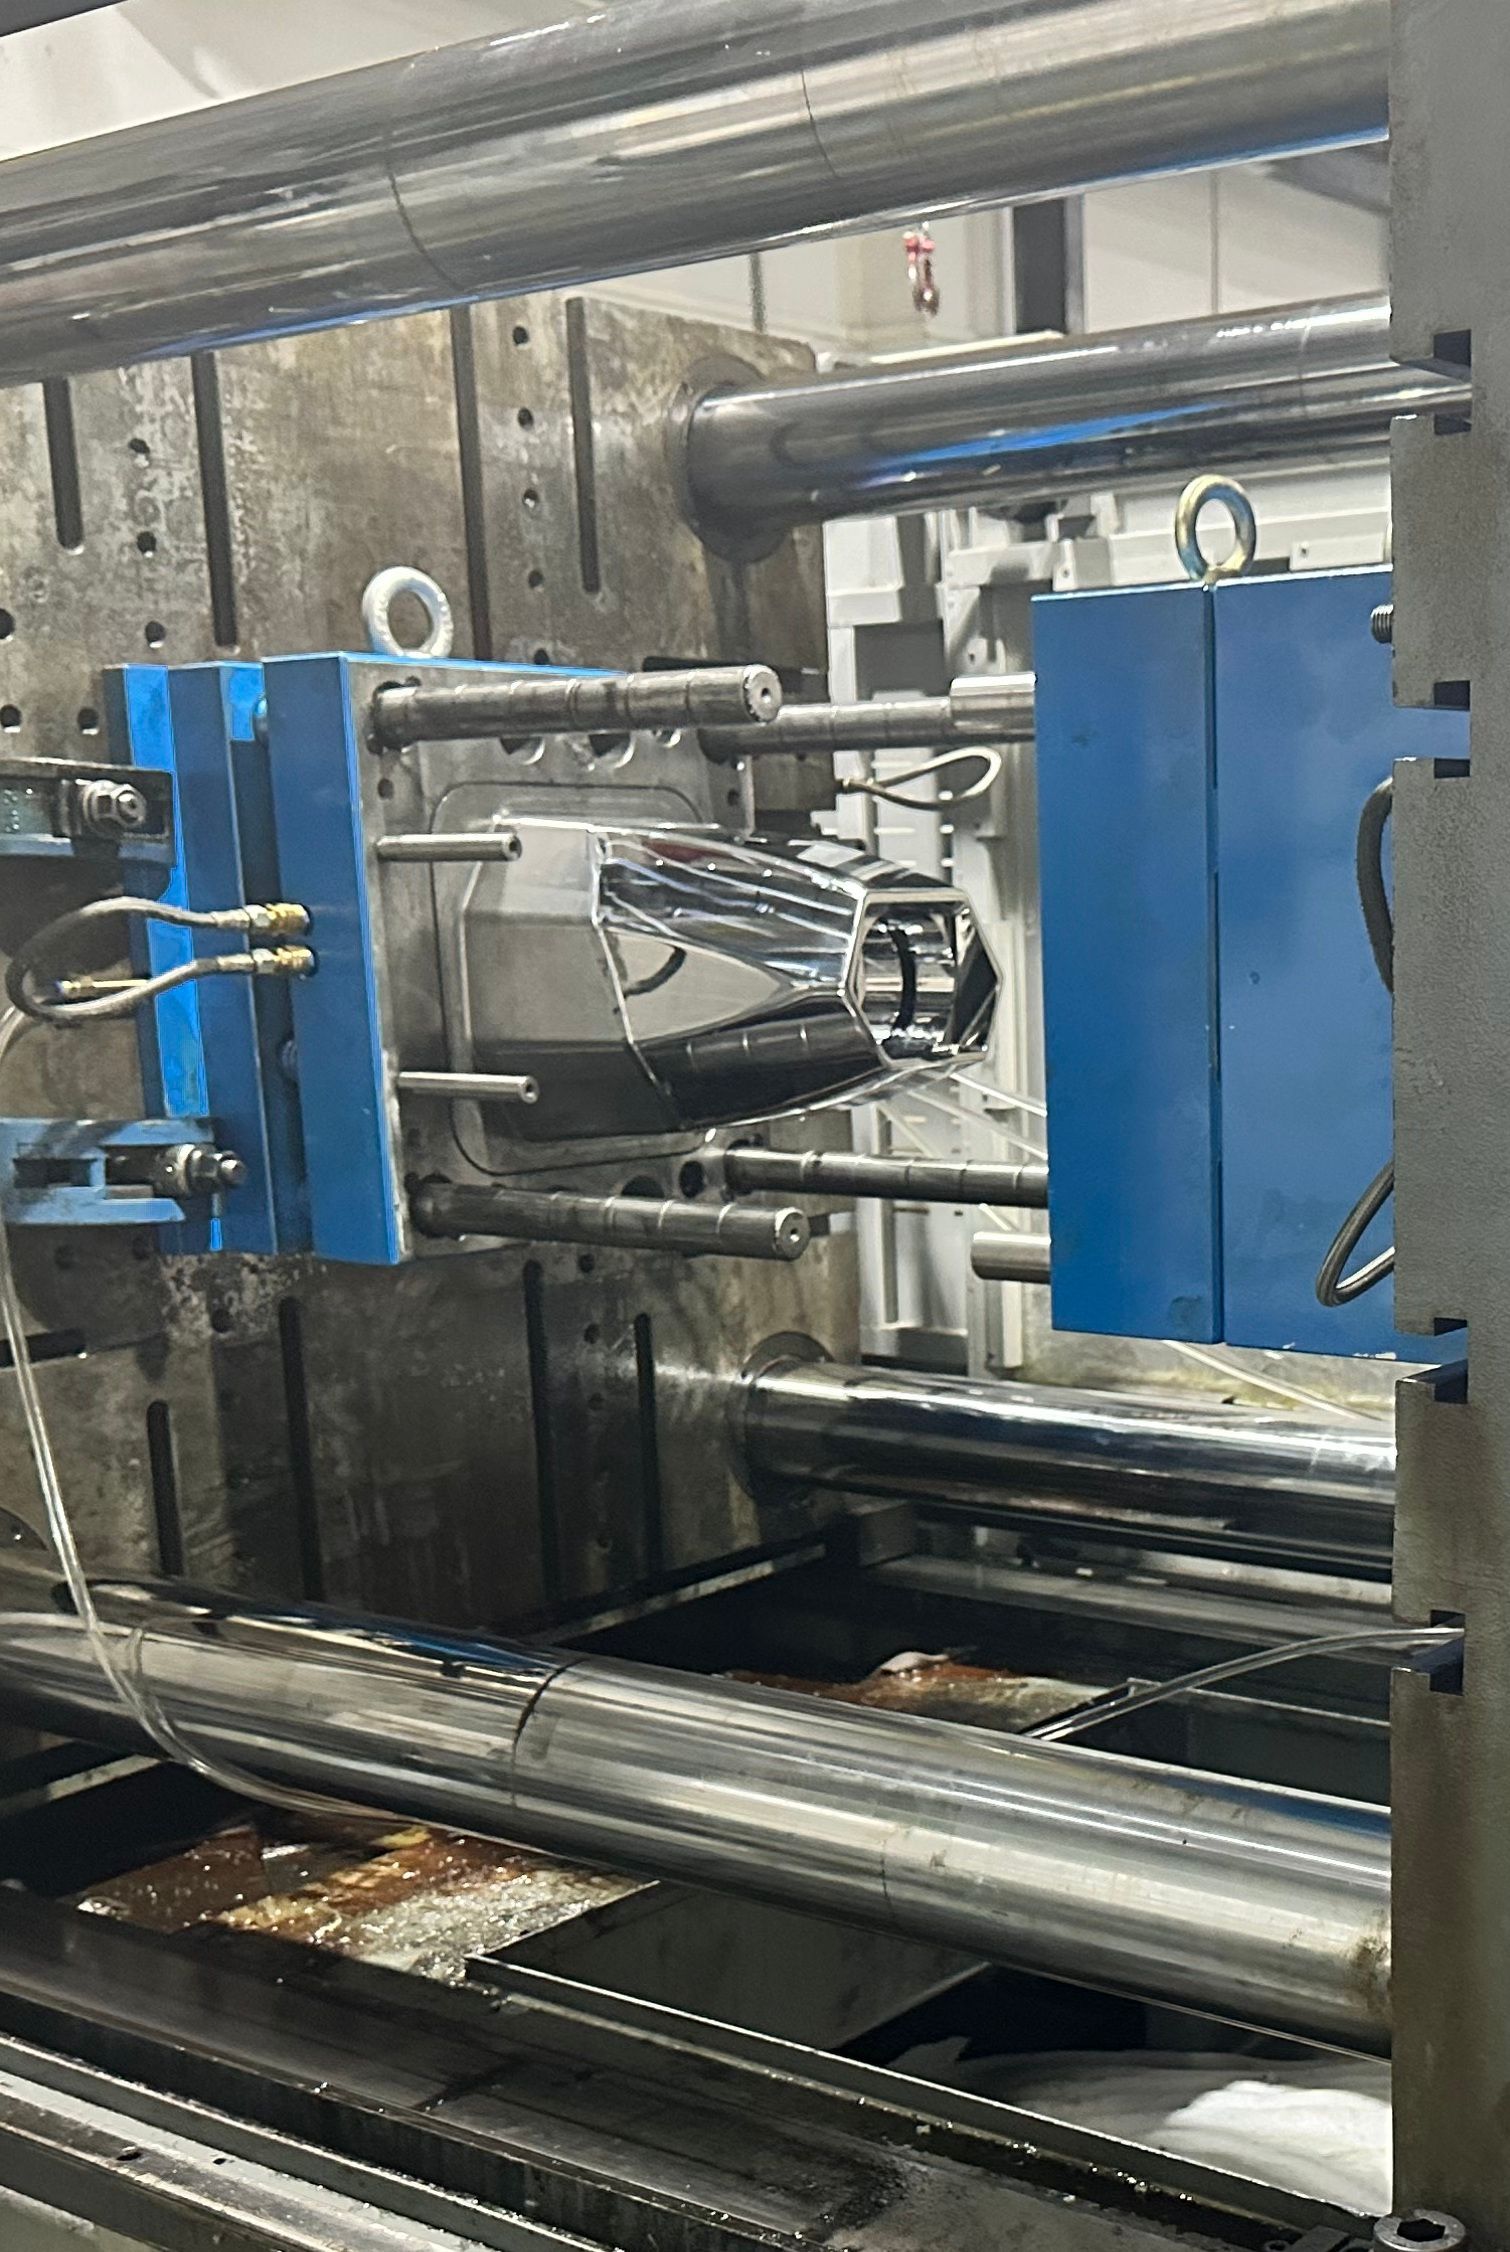
Mass production
Below are some videos that show production steps for the single wine cooler. It looks quite simple, but it's only simple after putting in all the work to ensure the product can be manufactured and then it's up to the manufacturer to create the required tools and produce the products.
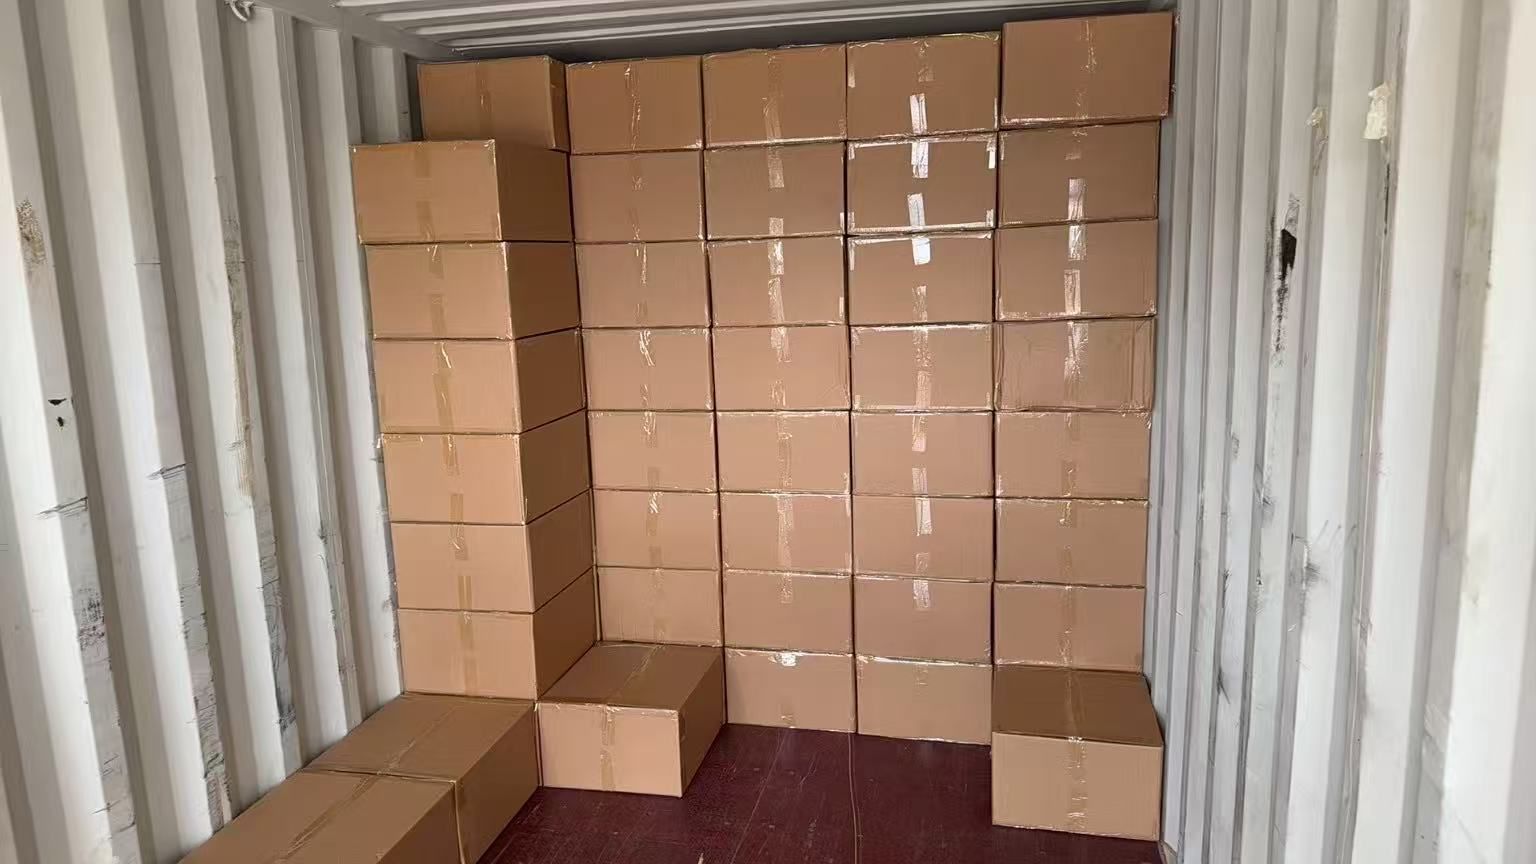
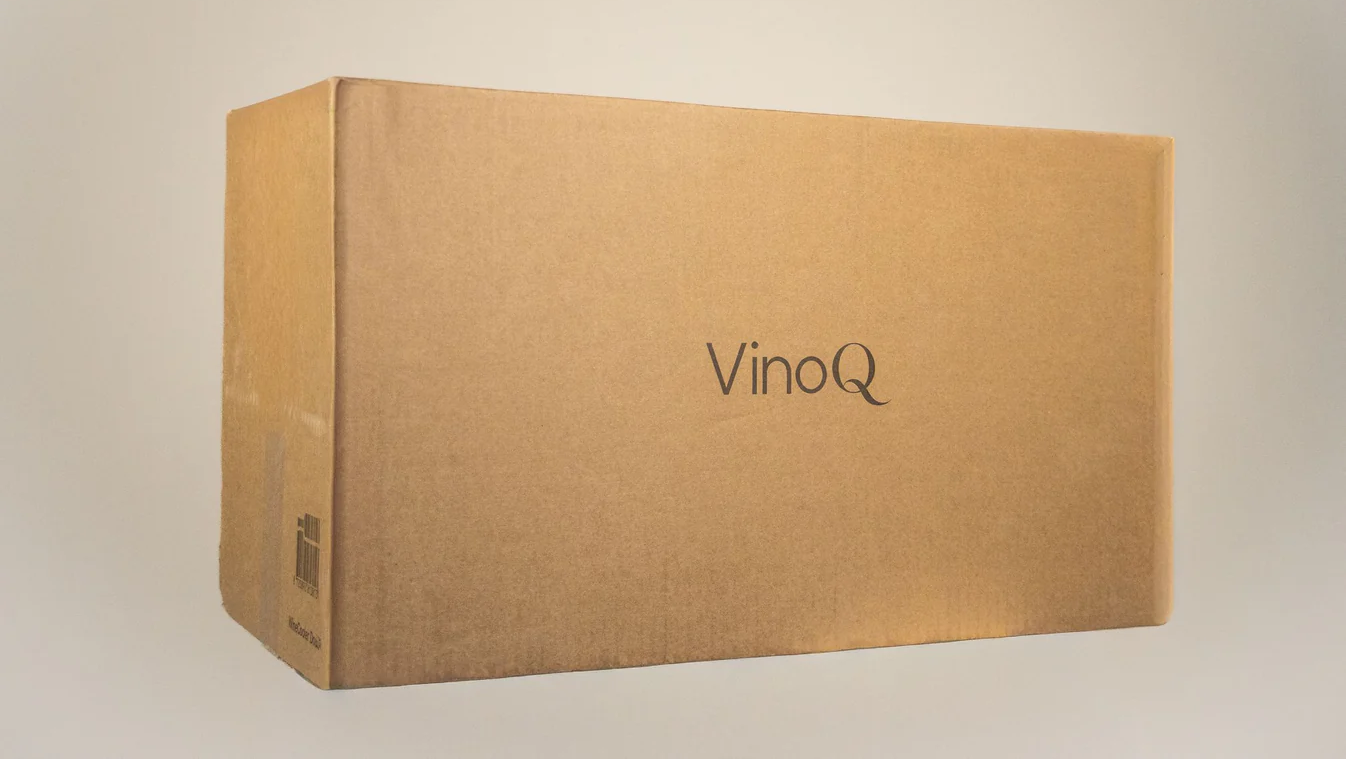
The image below was taken during loading of finished products in a container for shipping.
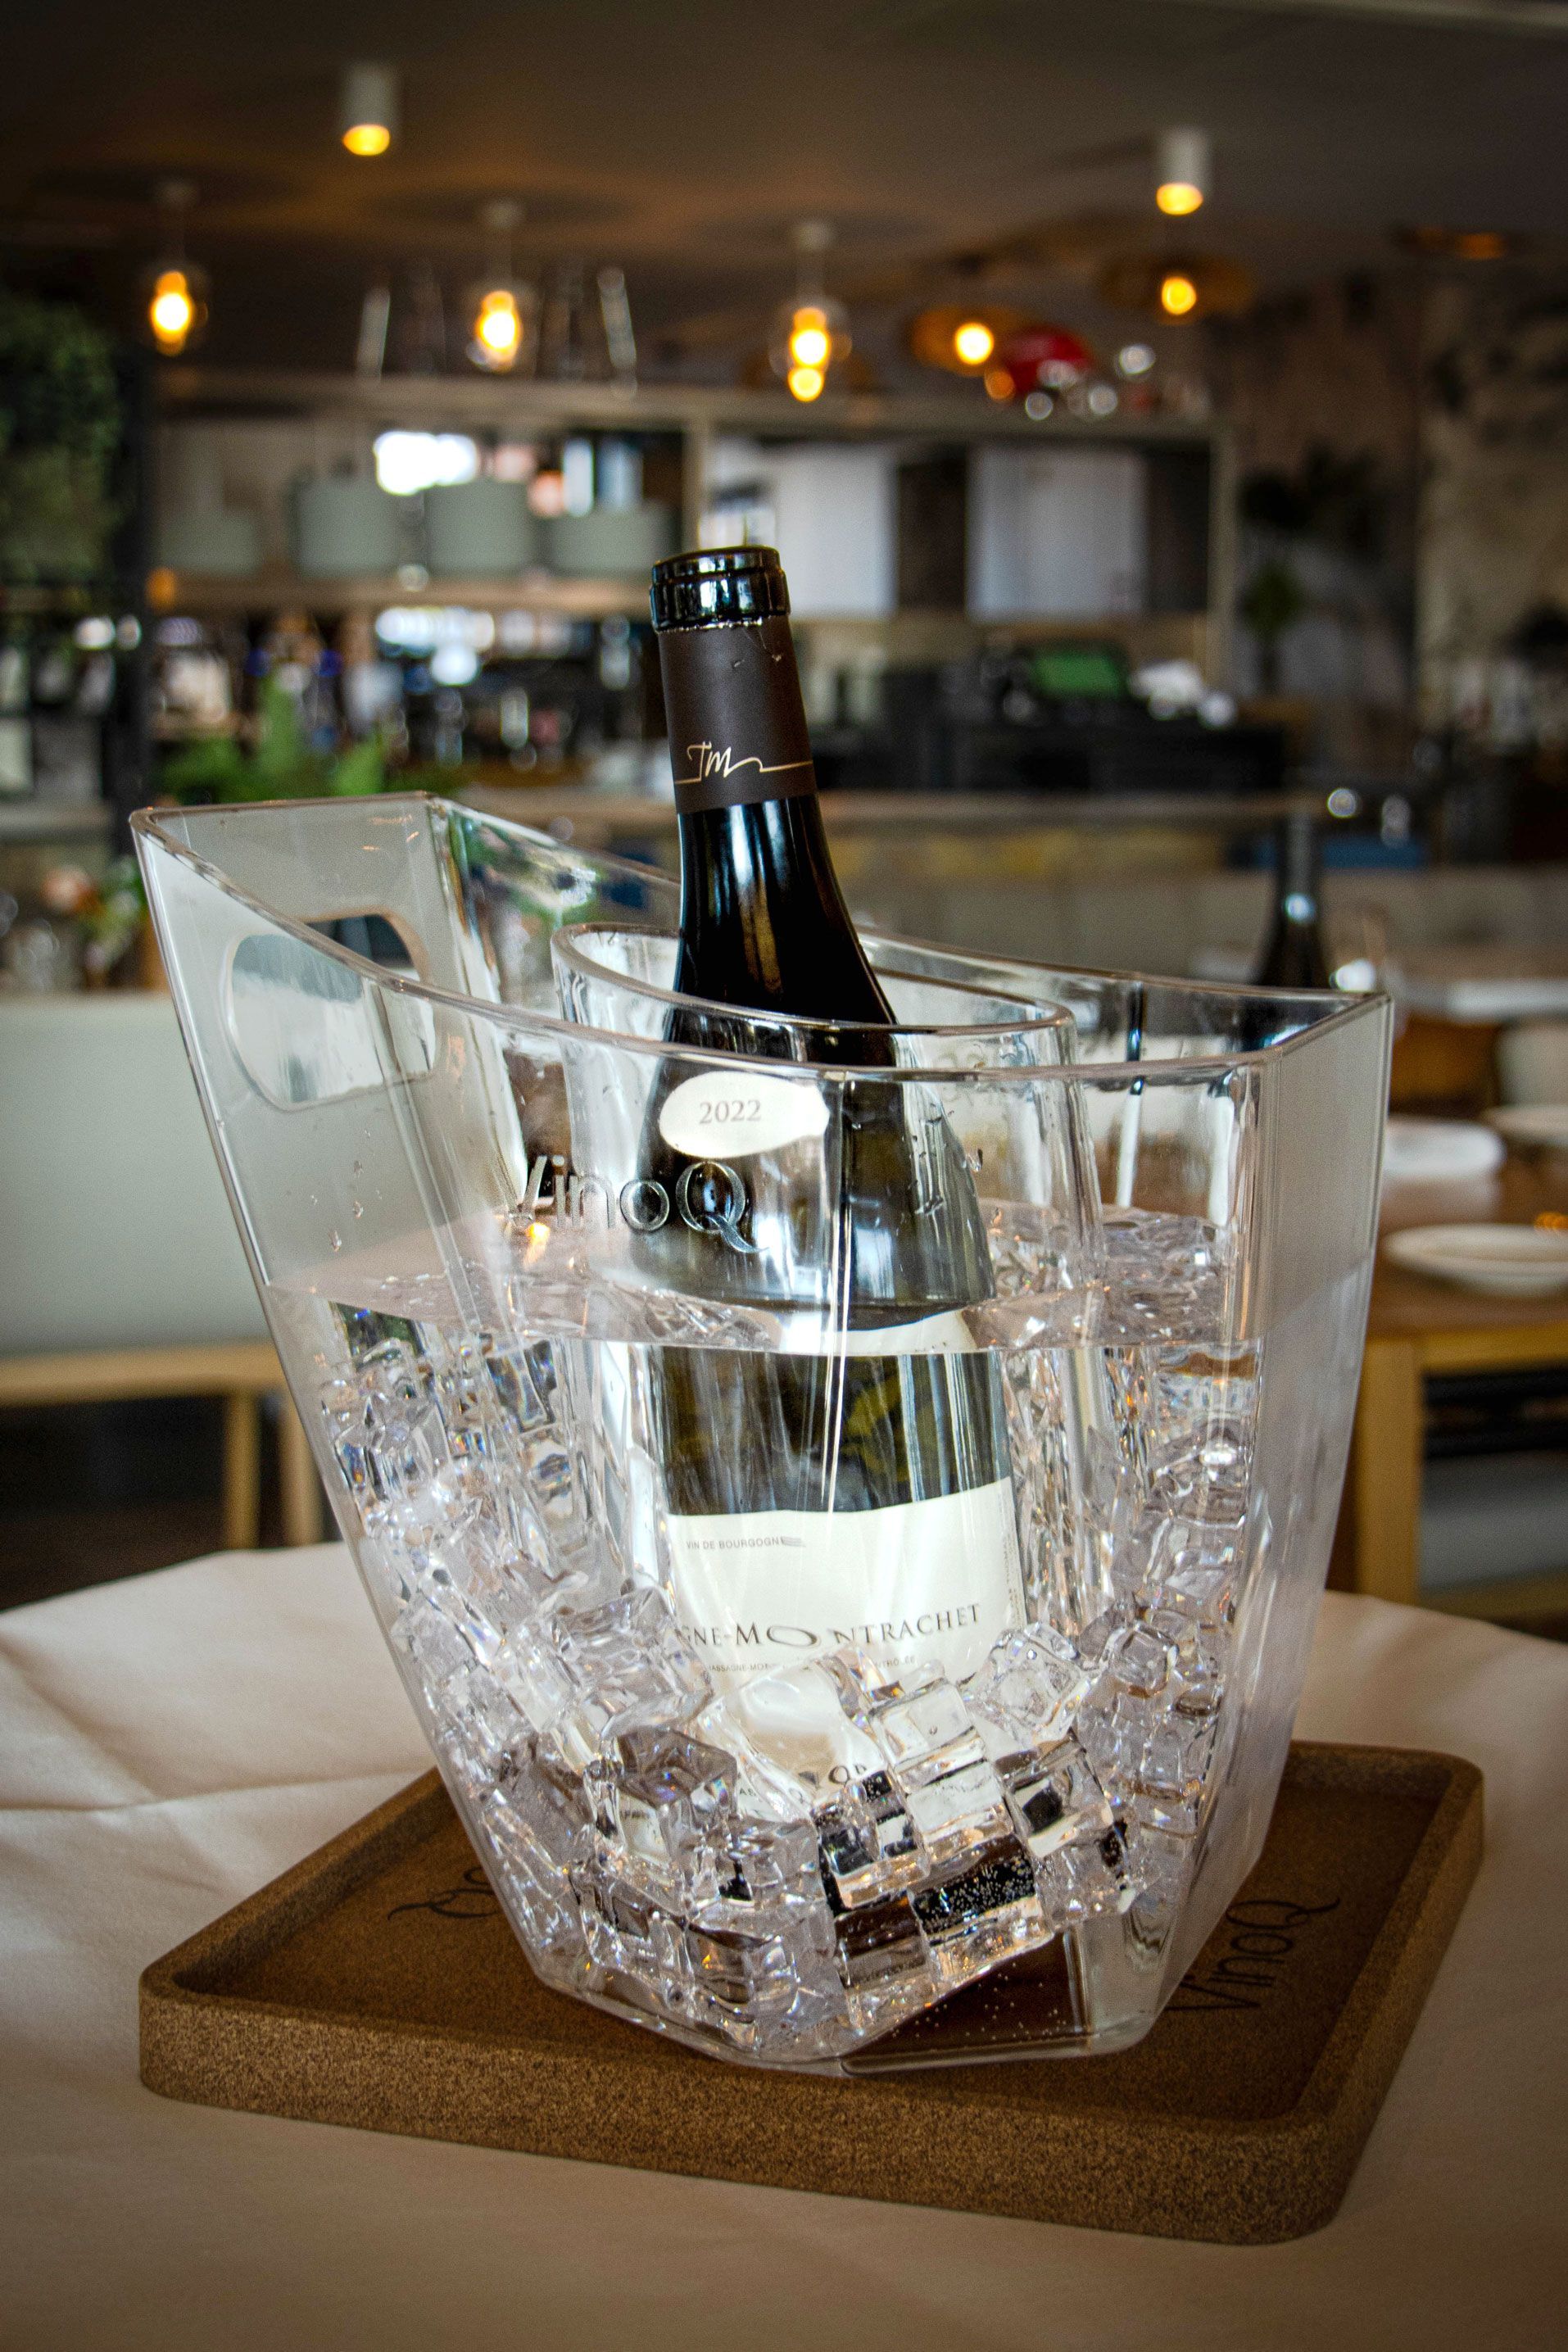
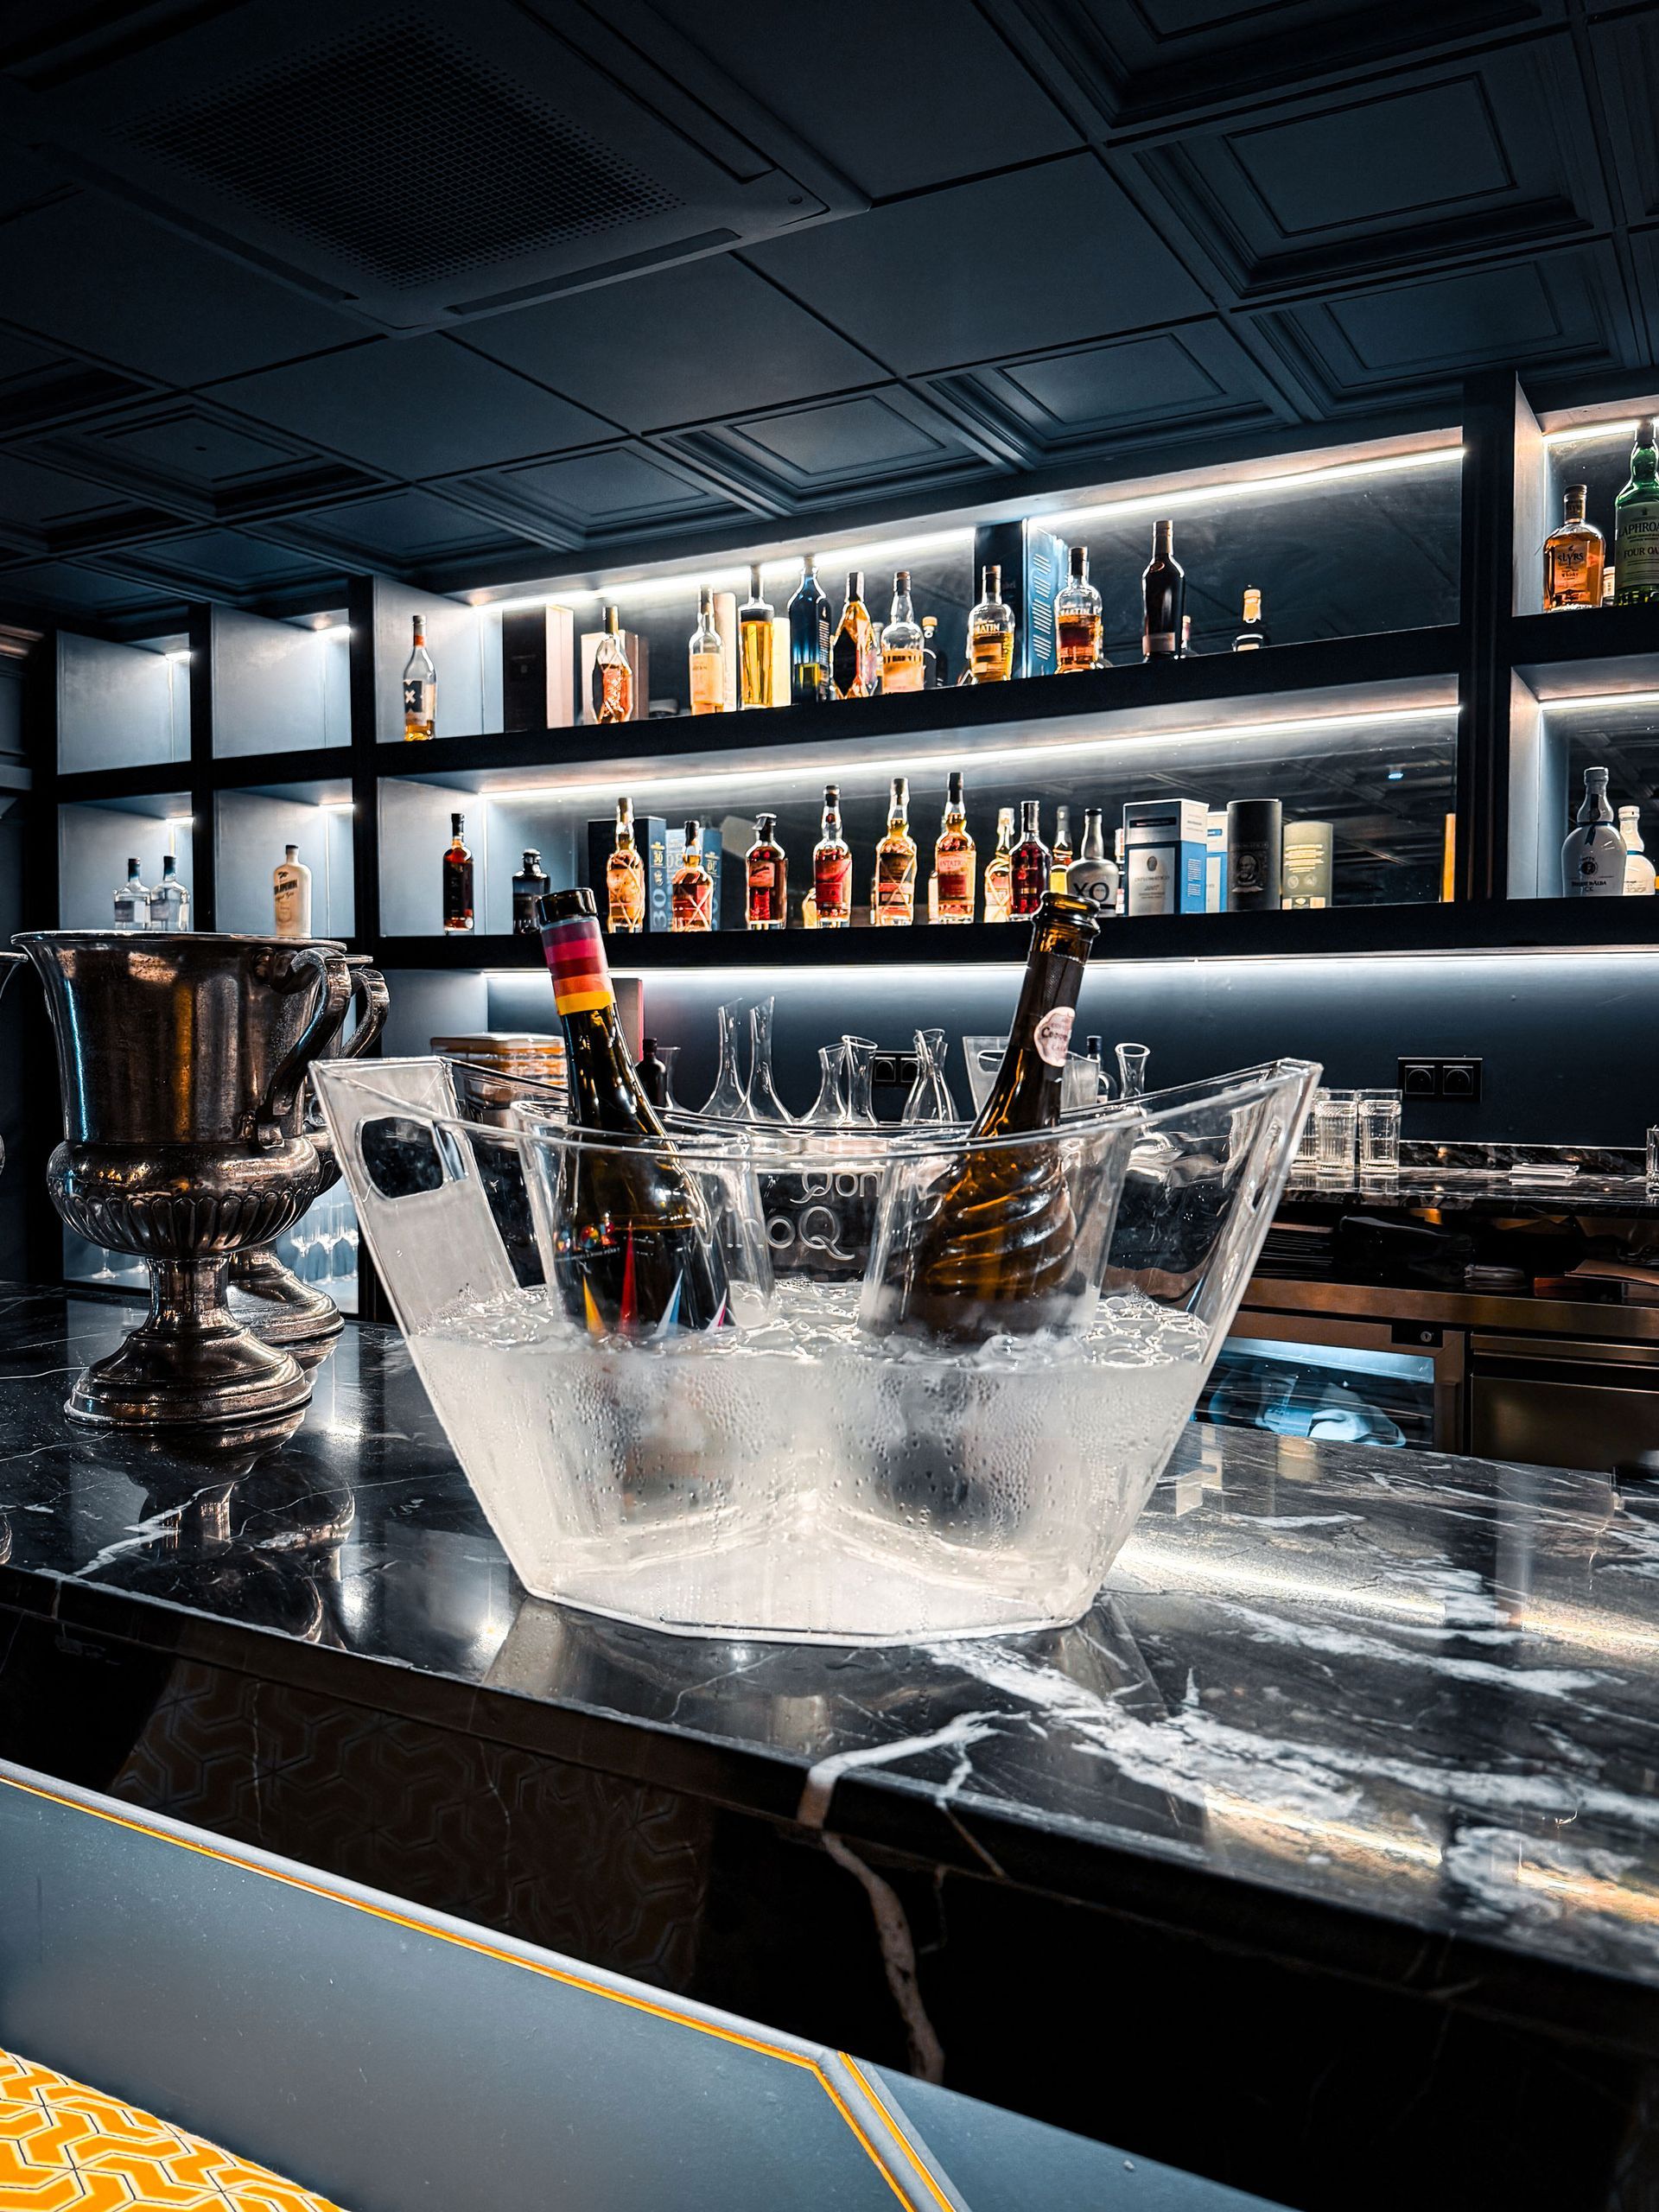
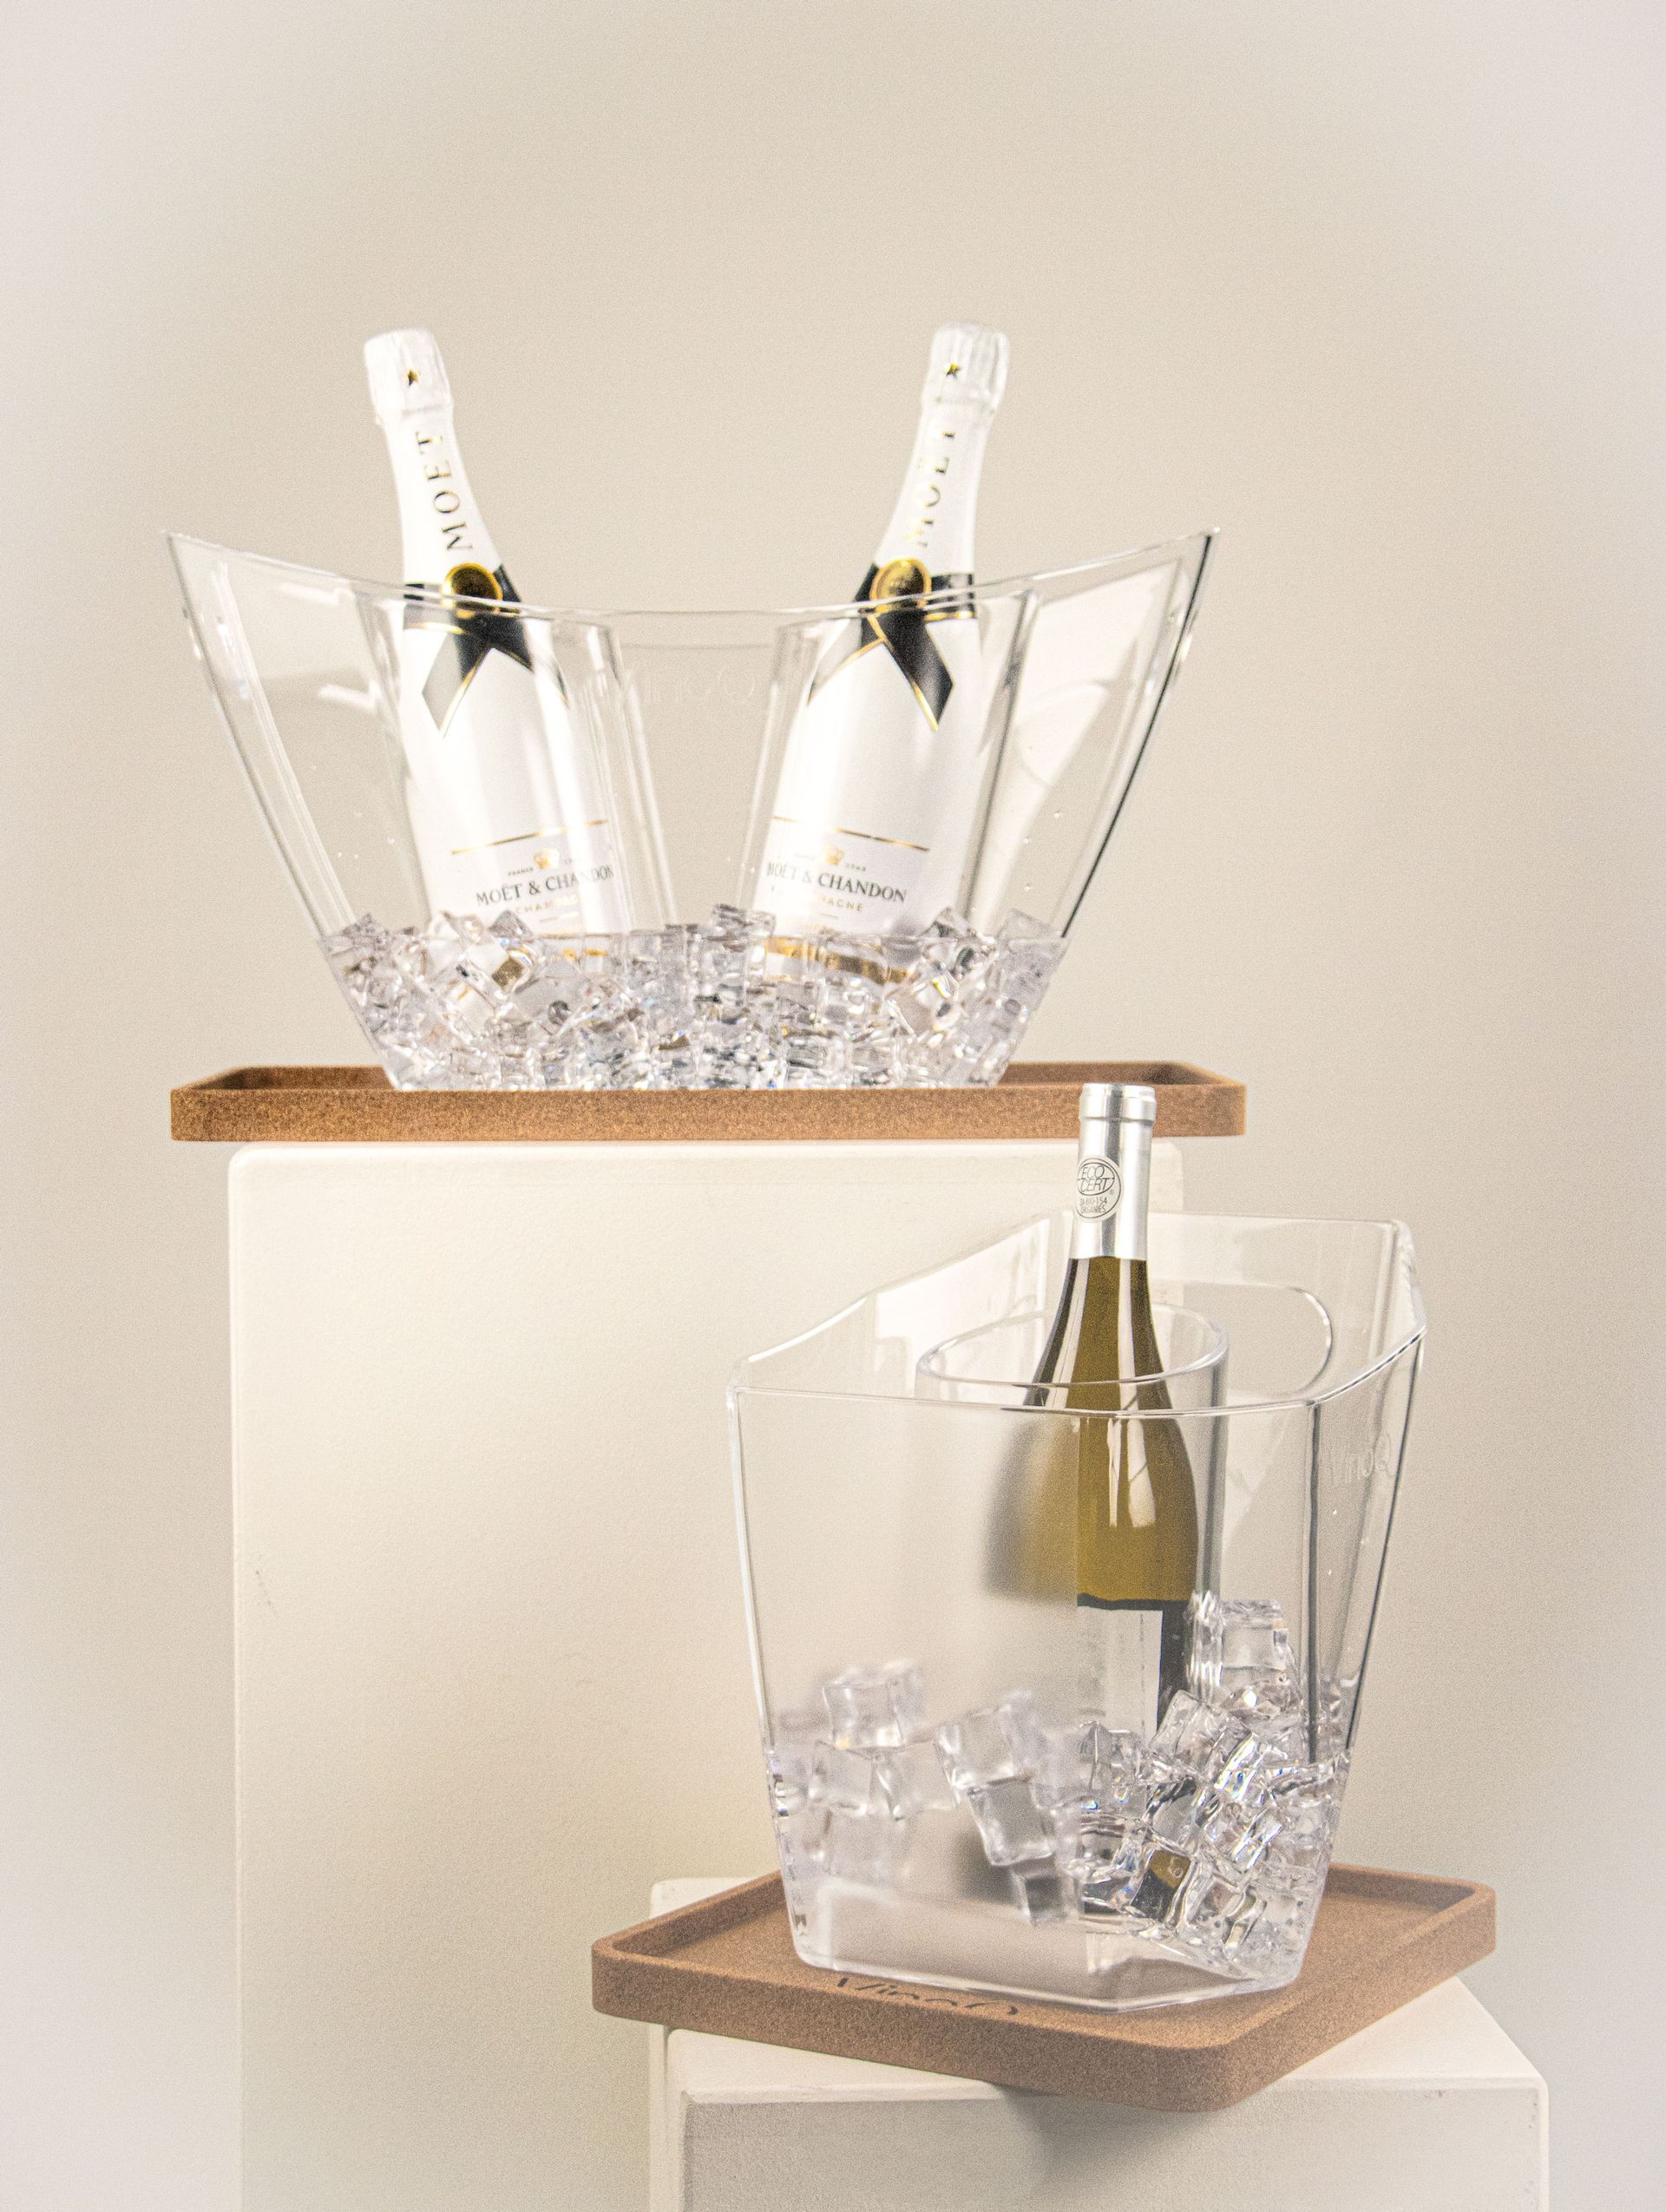
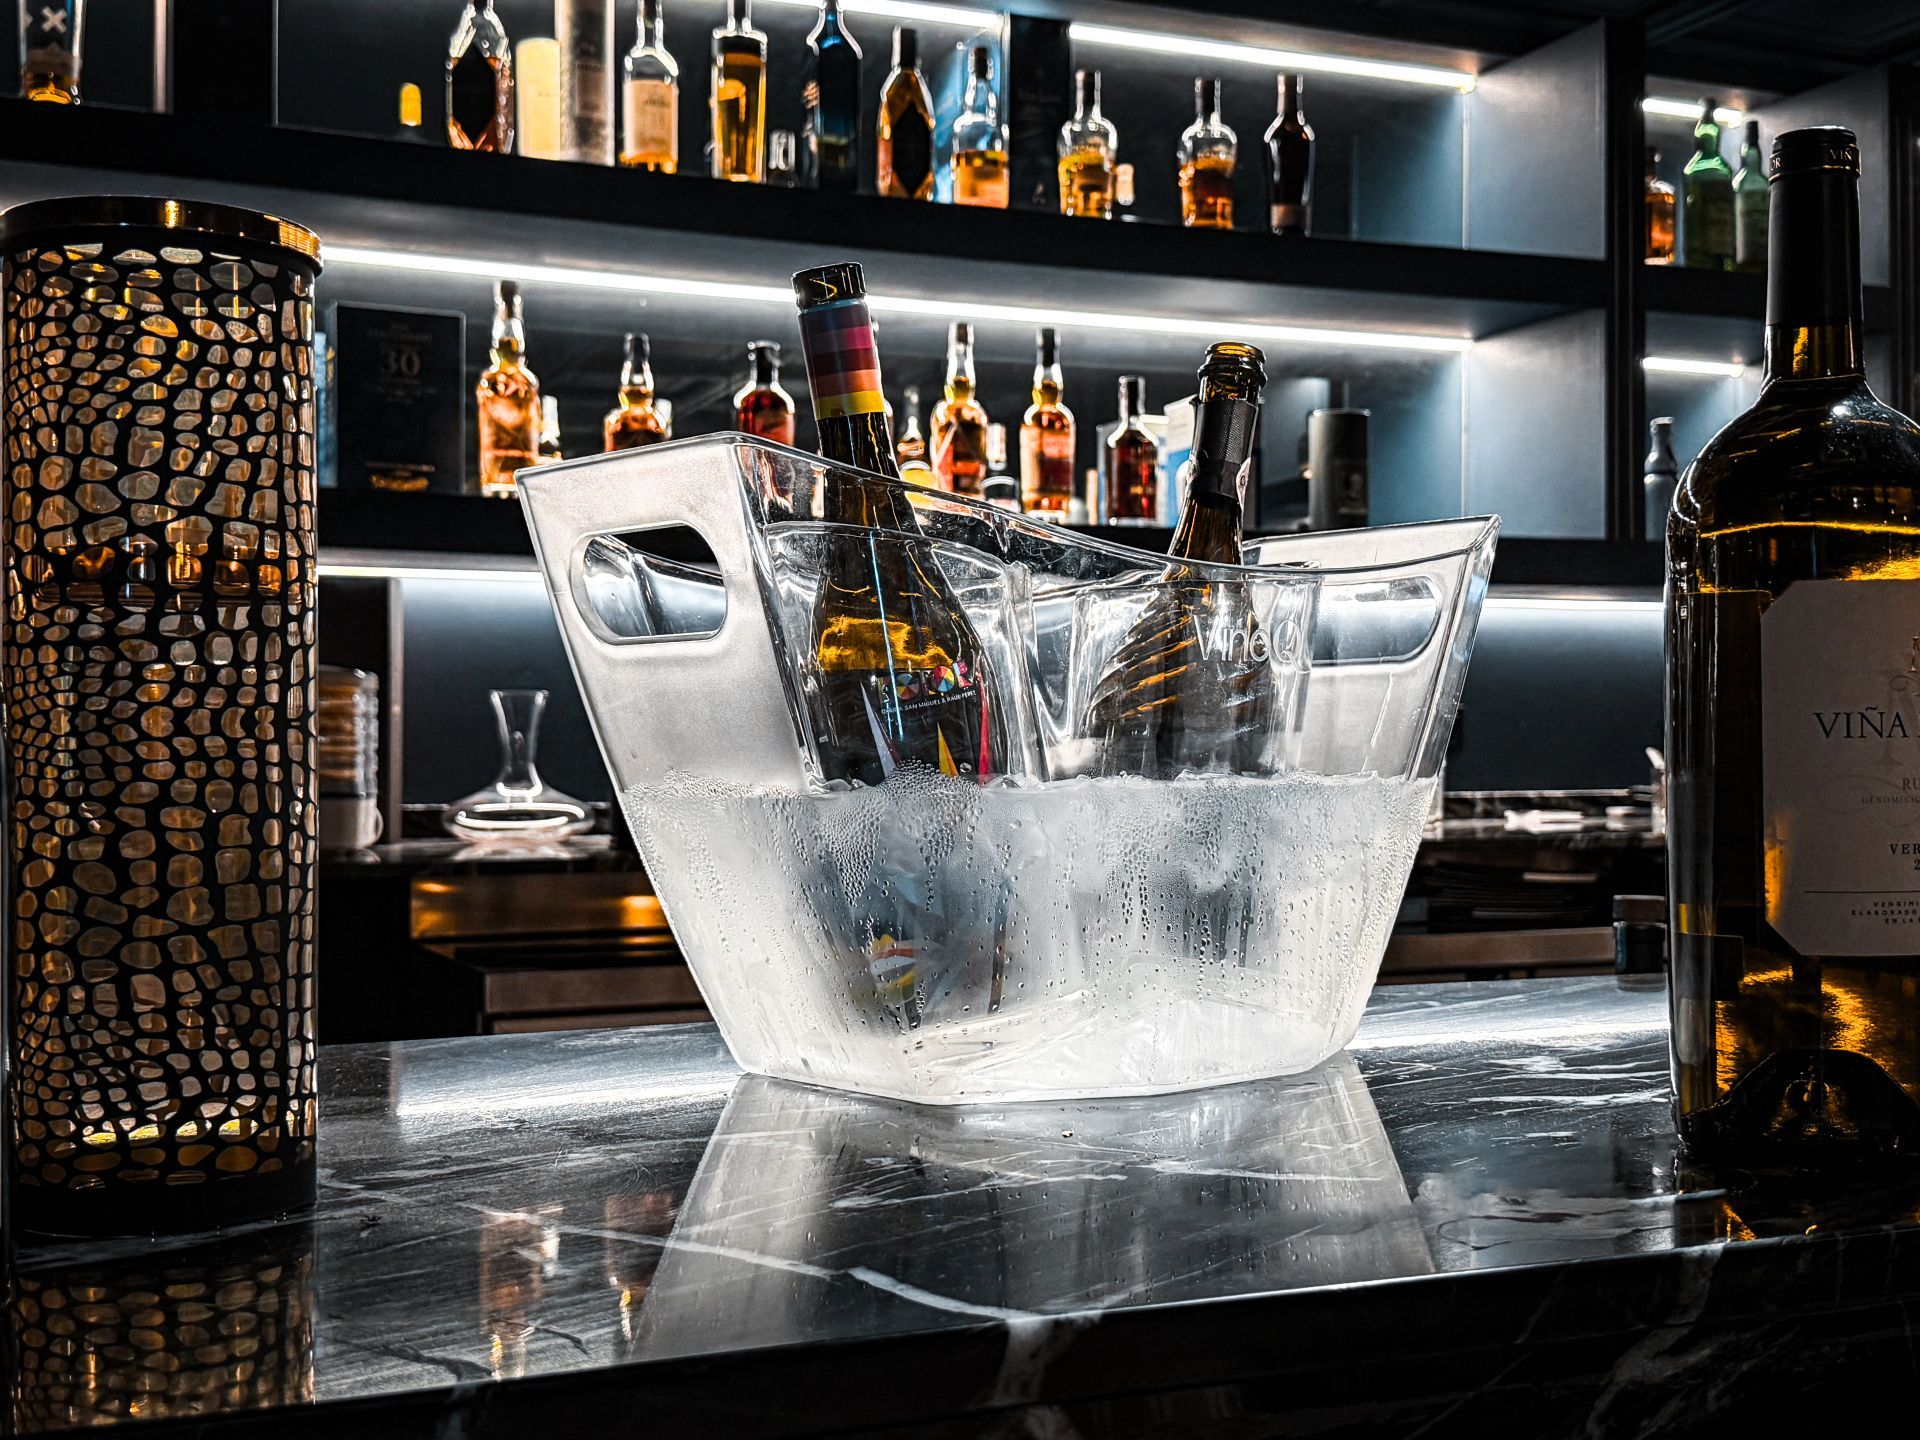
Final Product
The wine coolers are now available on the official VinoQ website.
You can check out a video and photos of the wine coolers below.
?Do you have a product idea
Case Study:
Wine Cooler Packaging
Design
for VinoQ

This packaging case study shows the steps in the development of two packagings for the VinoQ brand.
The following development process phases are described below:
Packaging
Idea Phase
The packaging design process starts the same as my regular product design process: by exploring possibilities and coming up with several ideas for my client to choose from.
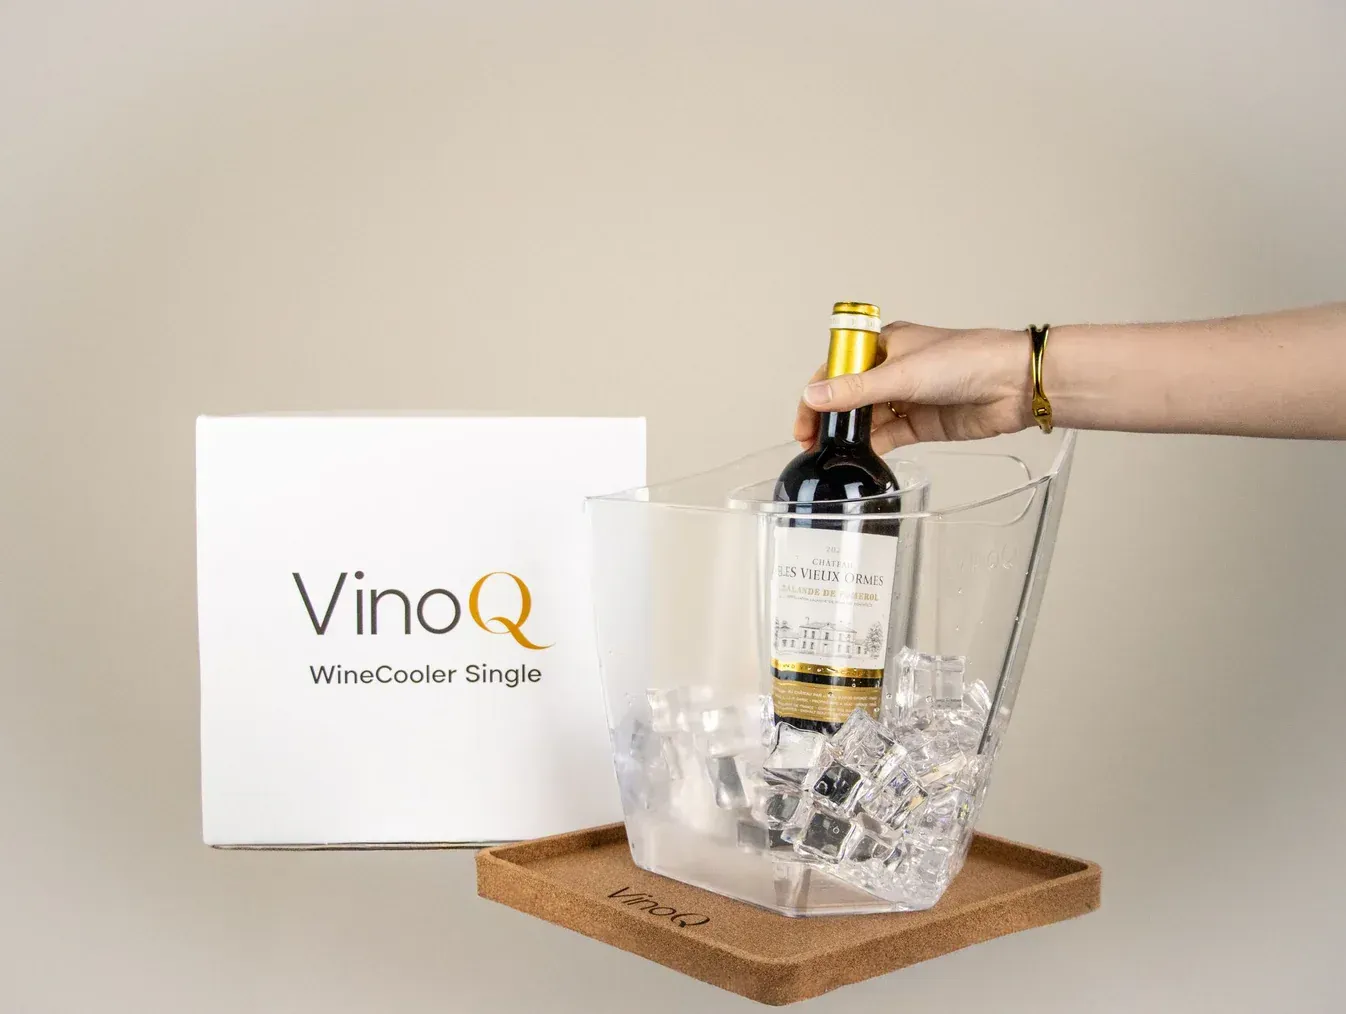
The CEO of VinoQ was looking for packagings for the two types of wine coolers: one for a single bottle and one for two bottles.

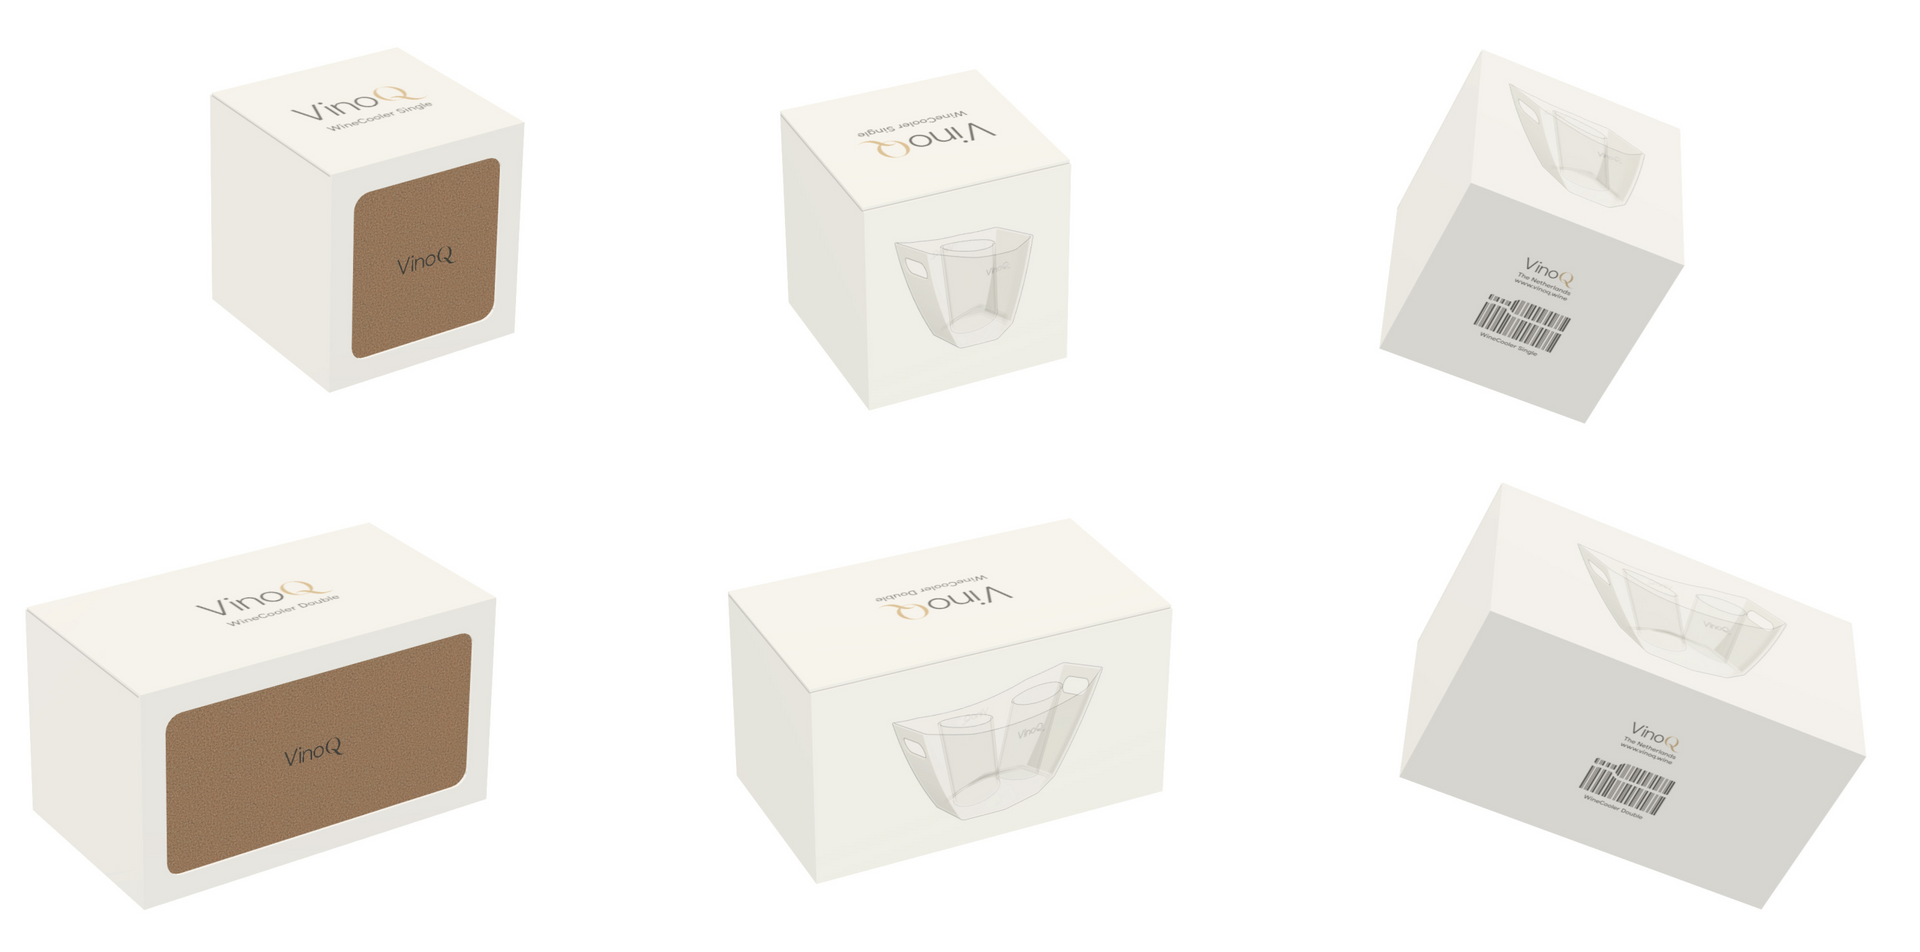
Idea Phase Output
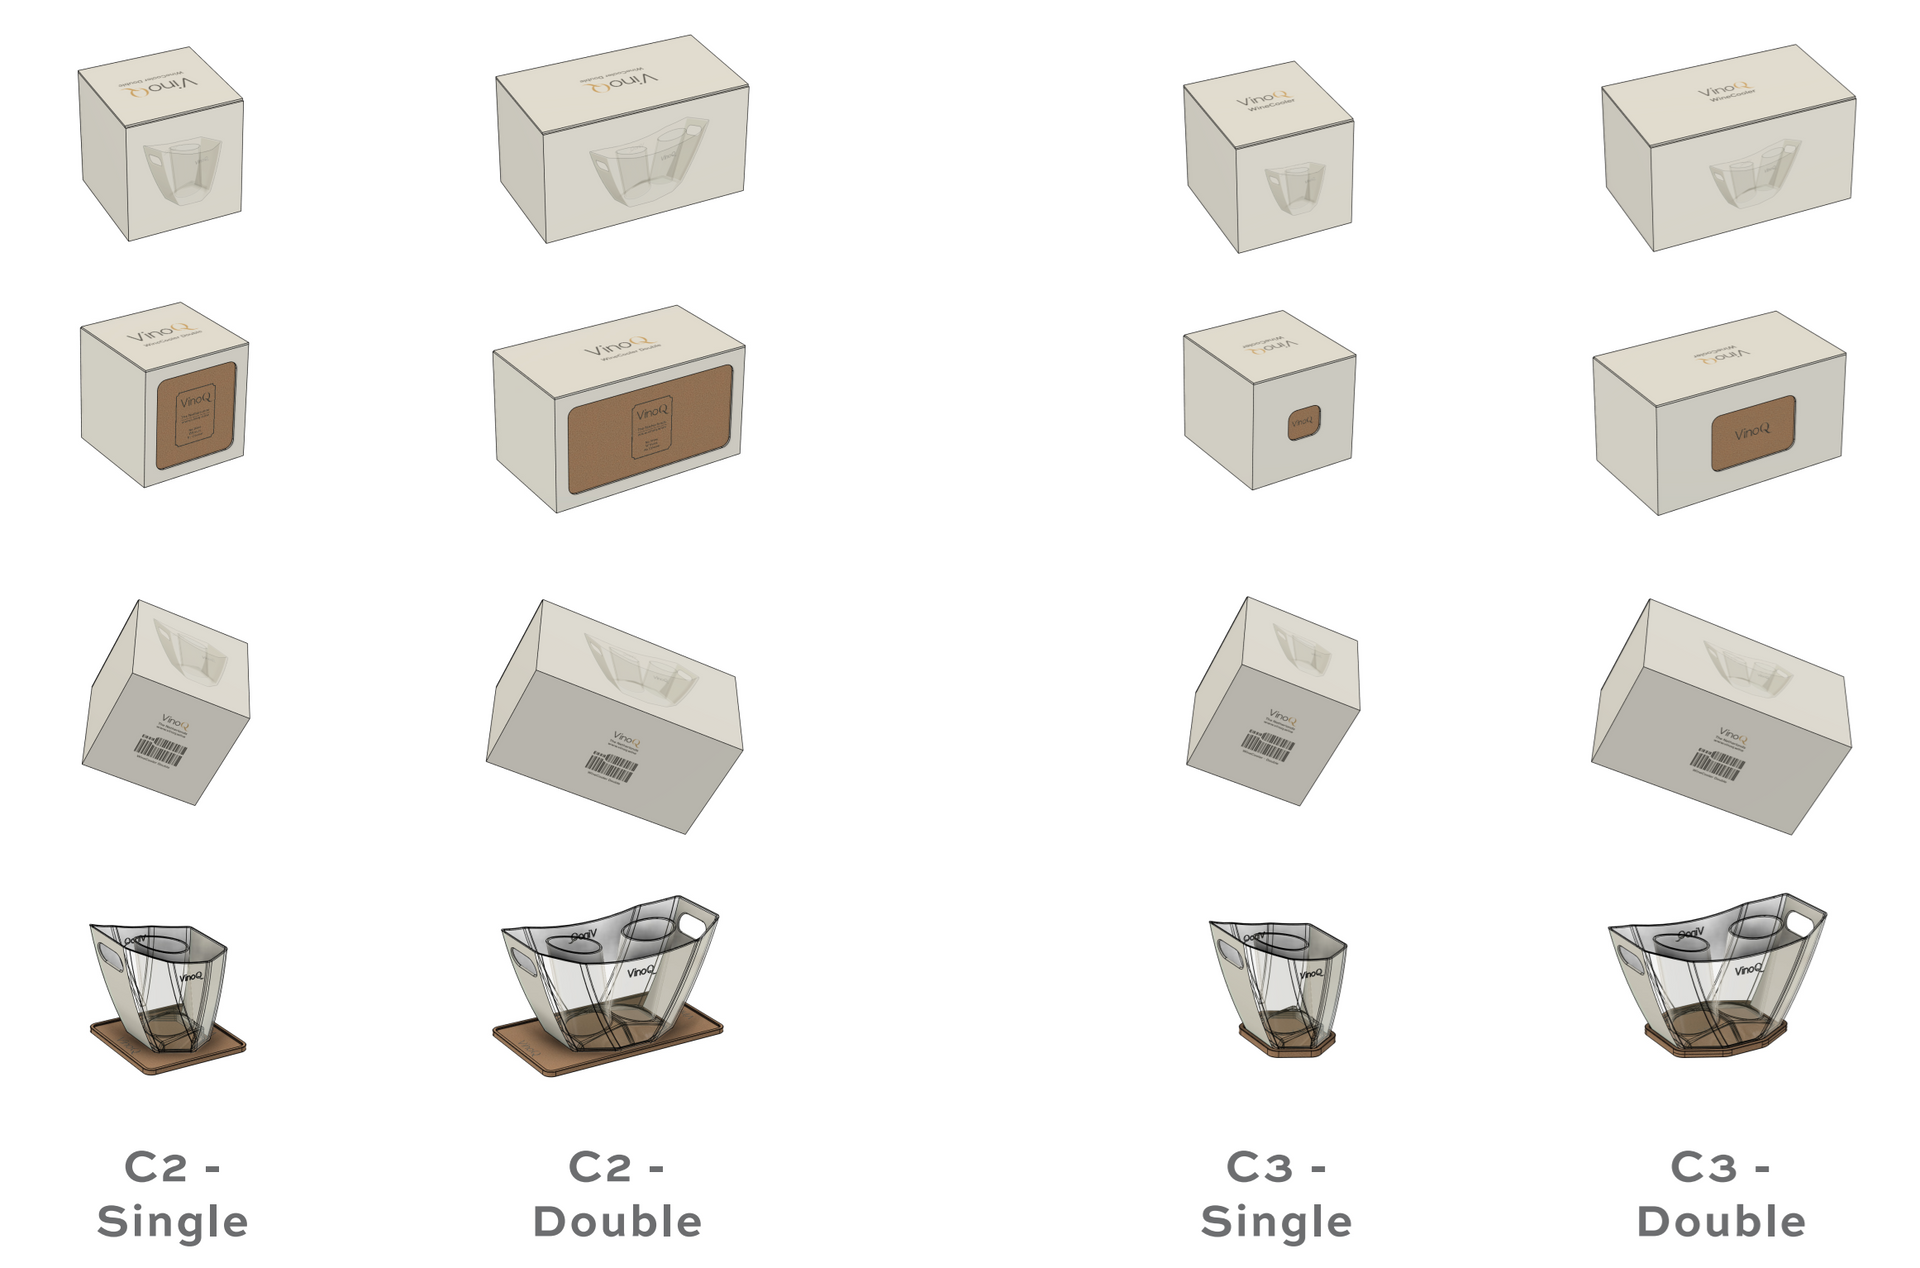
For the packagings, I explored many different directions and eventually compressed the best parts into 4 different ideas. Above, you can see a couple of the images I made for the single wine cooler packaging ideas. I created similar ones for the double wine cooler.
Idea A
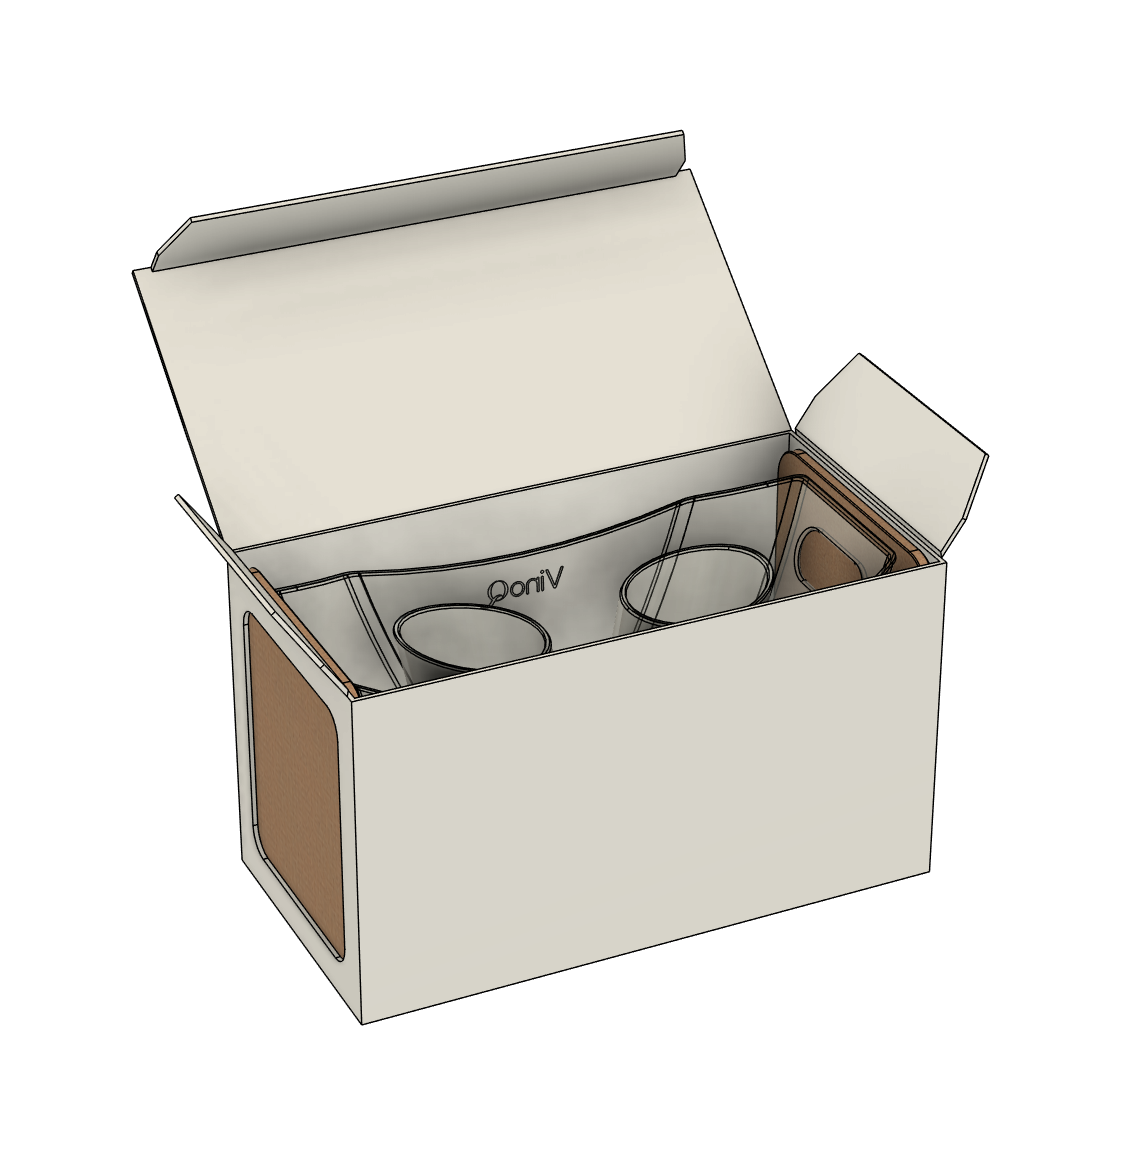
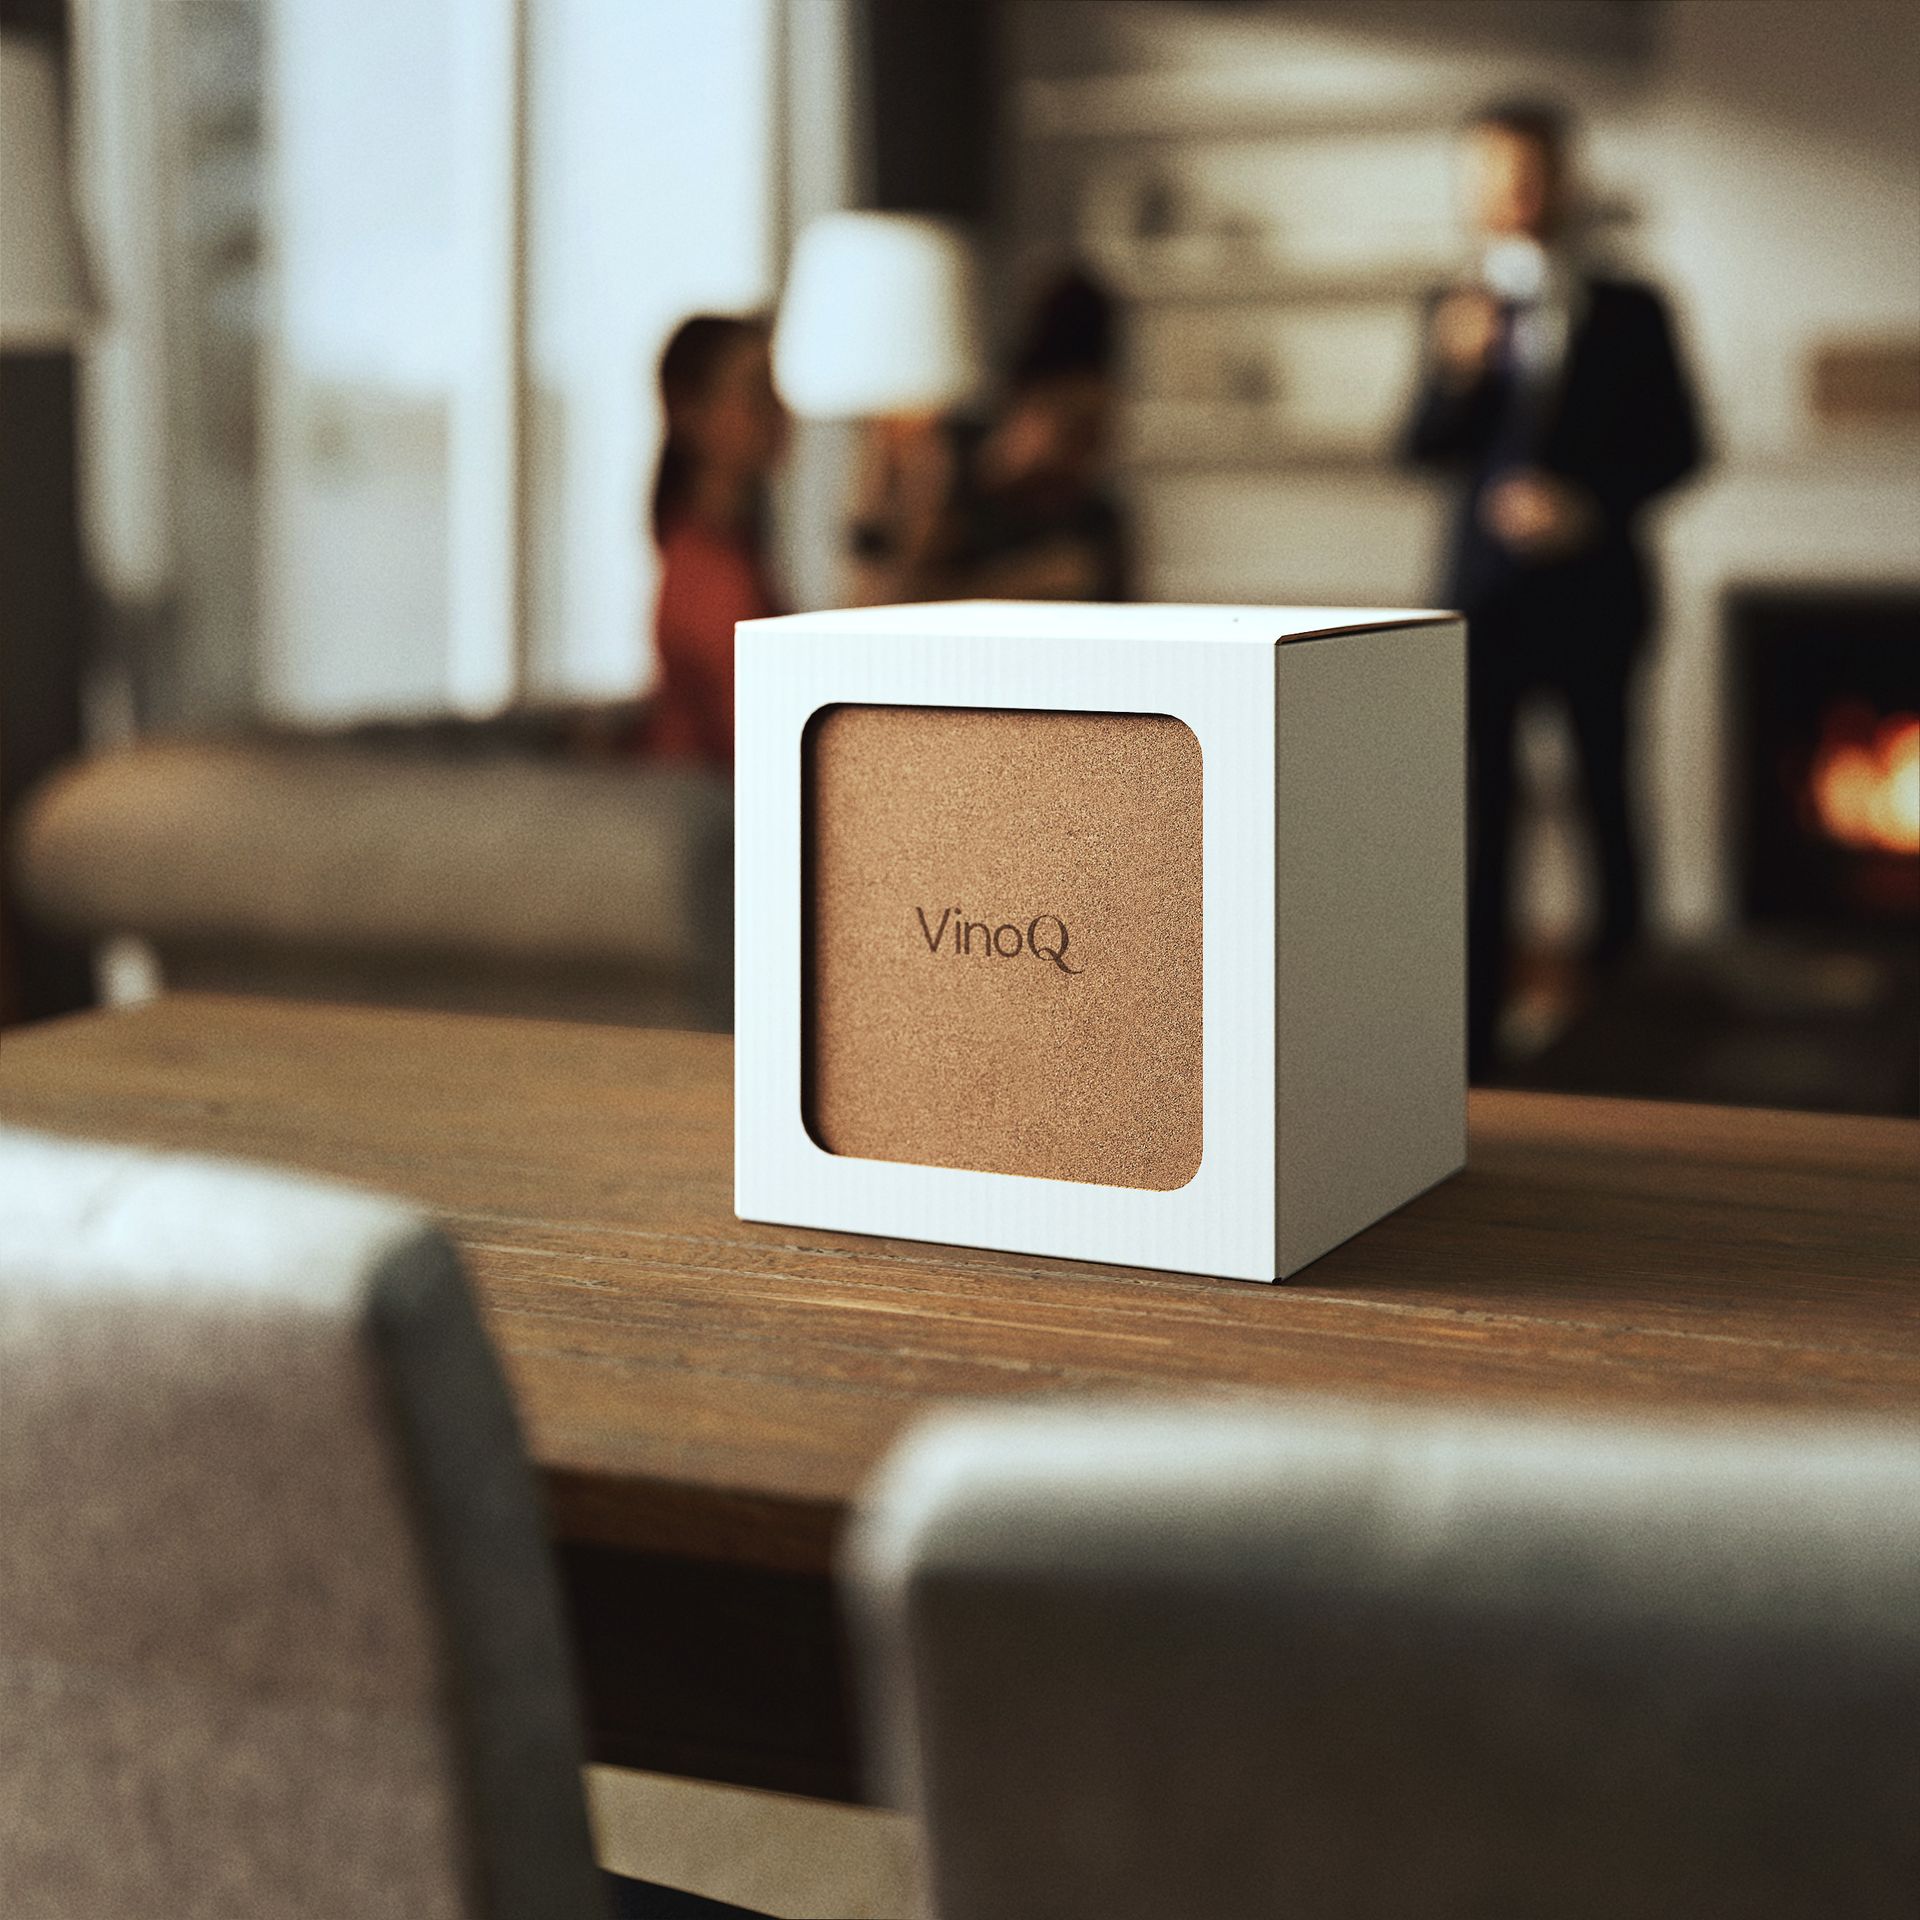
This idea has a cork box inside a smooth cardboard box. The cork box could be made in such a way that it can be used for other purposes after unboxing the wine cooler.
Idea B
This cork box uses a cardboard sleeve that could have all required product information on it. The cork box roughly follows the wine cooler shape, and therefore creates a recognizable outline.
Idea C
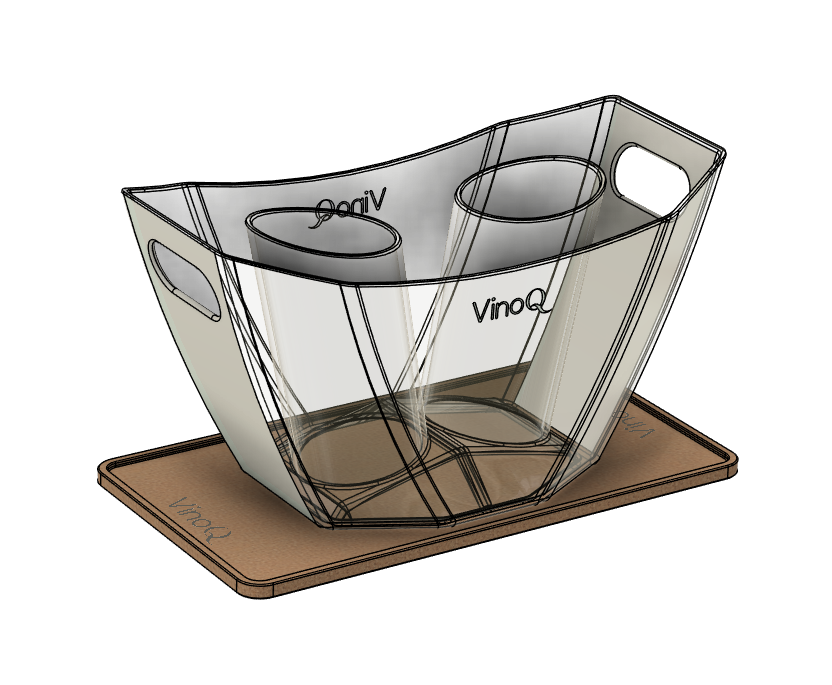
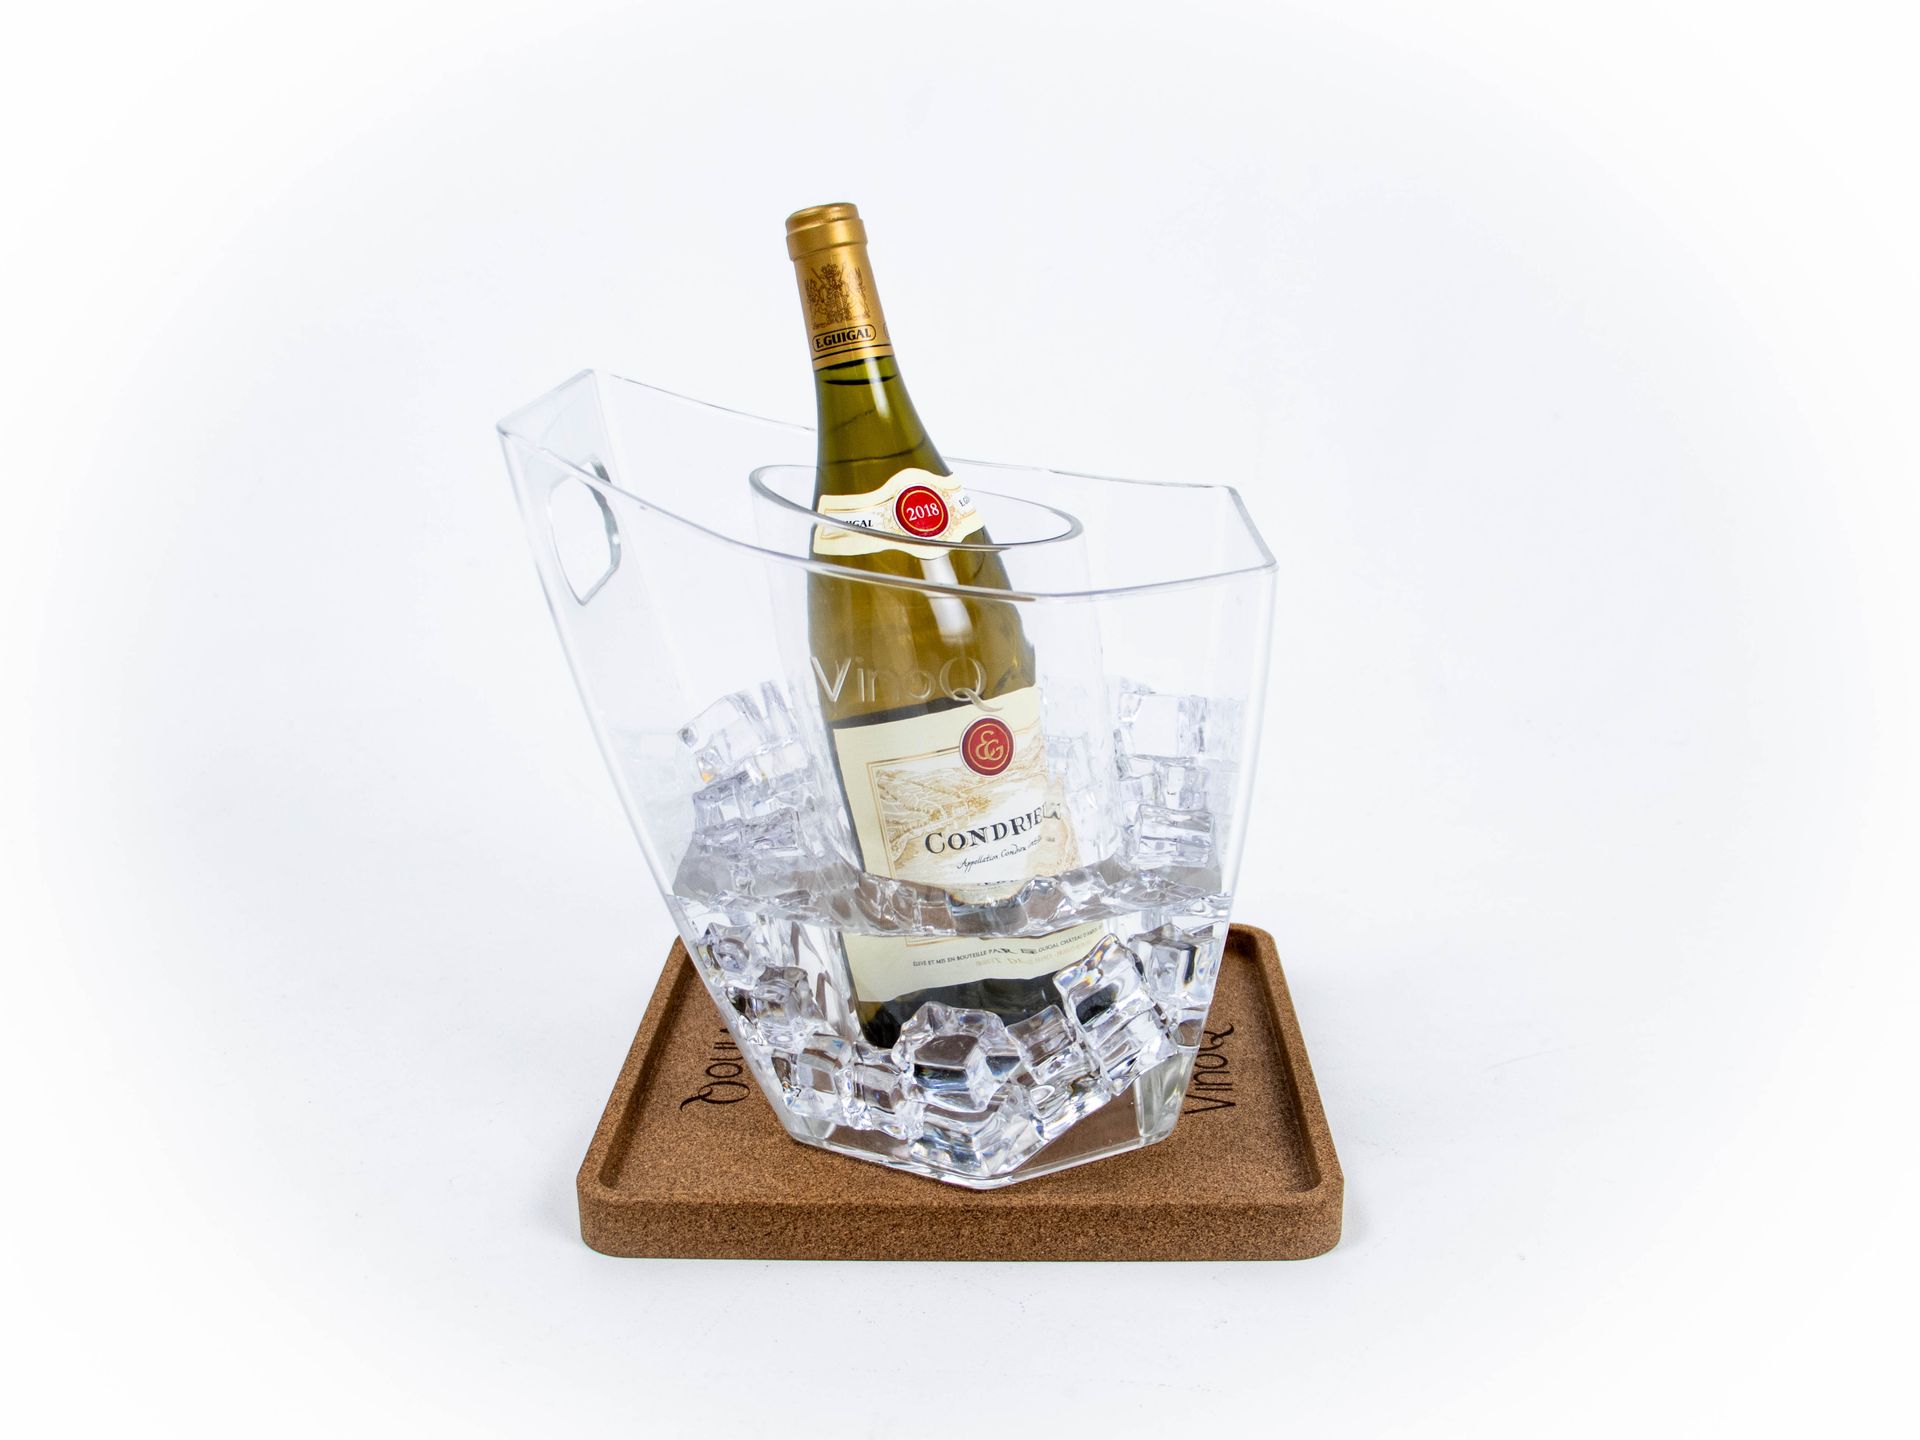
Cork is included in this idea as well. It is after all a material that is deeply associated with wine culture. In this idea, the cork elements protect the wine cooler during transport and can be used as coasters afterwards.
Idea D
A type of luxury cardbpard packaging that can fold out to two sides after removing the sticker on top. Inside the box, the wine cooler is stored in a dust bag.
Packaging
Concept Phase
During the concept phase, I improve, adjust, and elaborate the favorite idea of my client.
Client feedback
The VinoQ founder preferred idea C and asked to make the coasters pair well with the wine coolers (the sizes should work well to make them suitable for the wine cooler coasters). He also requested a rim on the coasters, to make the coasters catch any water that potentially drips from the wine coolers.
It could be that clients have additional feedback after the idea phase. In any case, I take the feedback seriously and take it into account while moving from the idea phase into the concept phase.
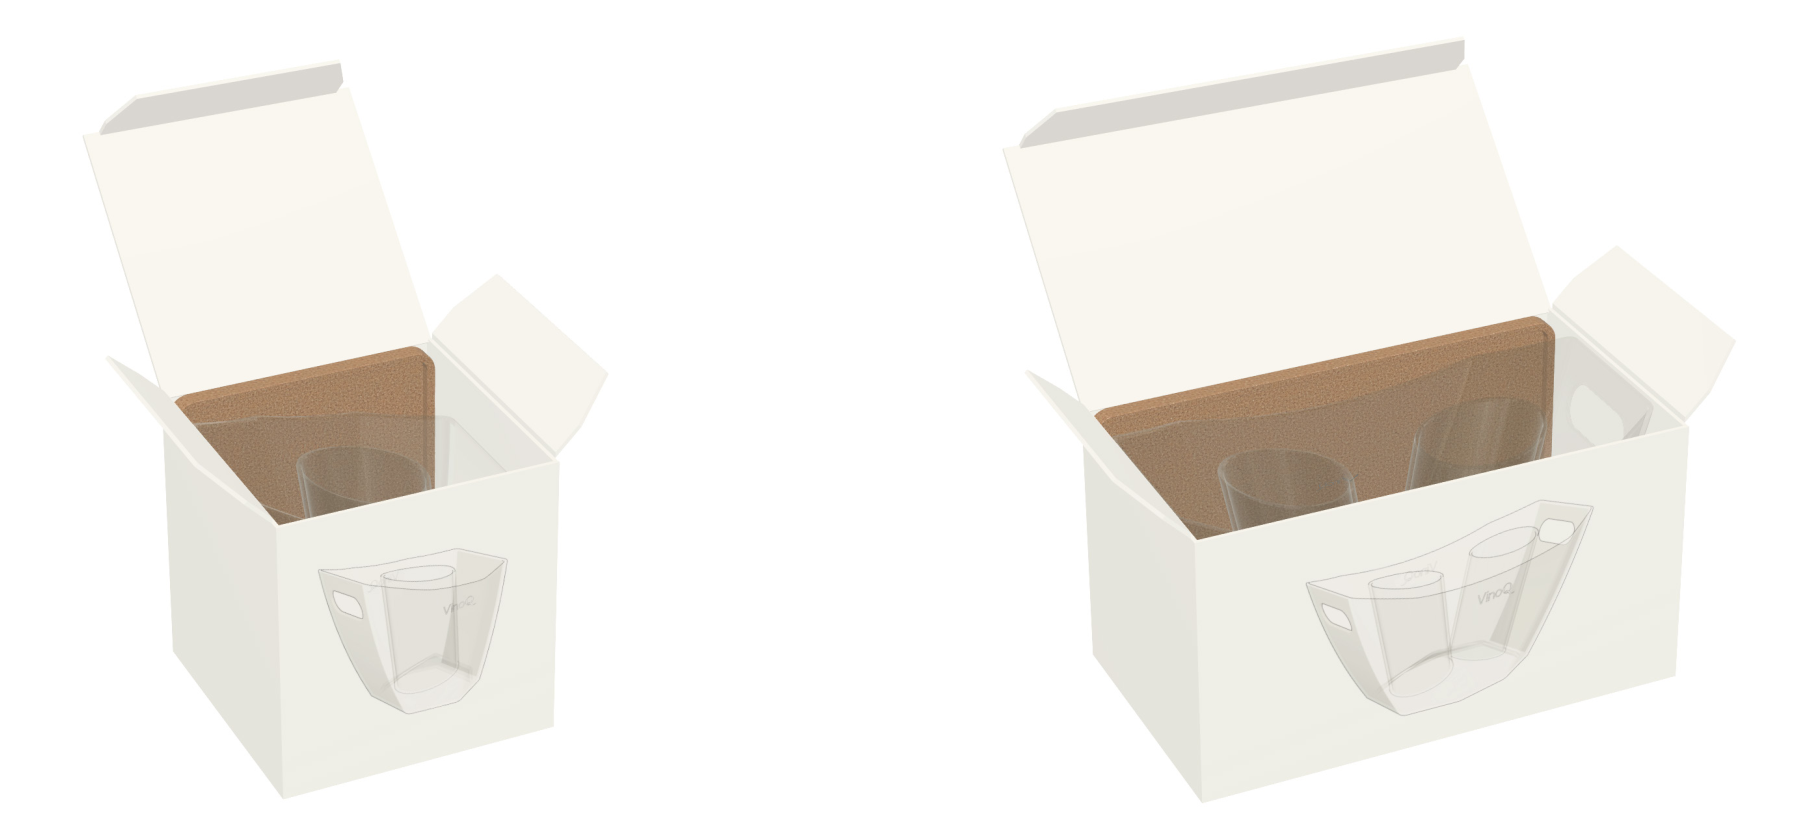
Concept Phase Output
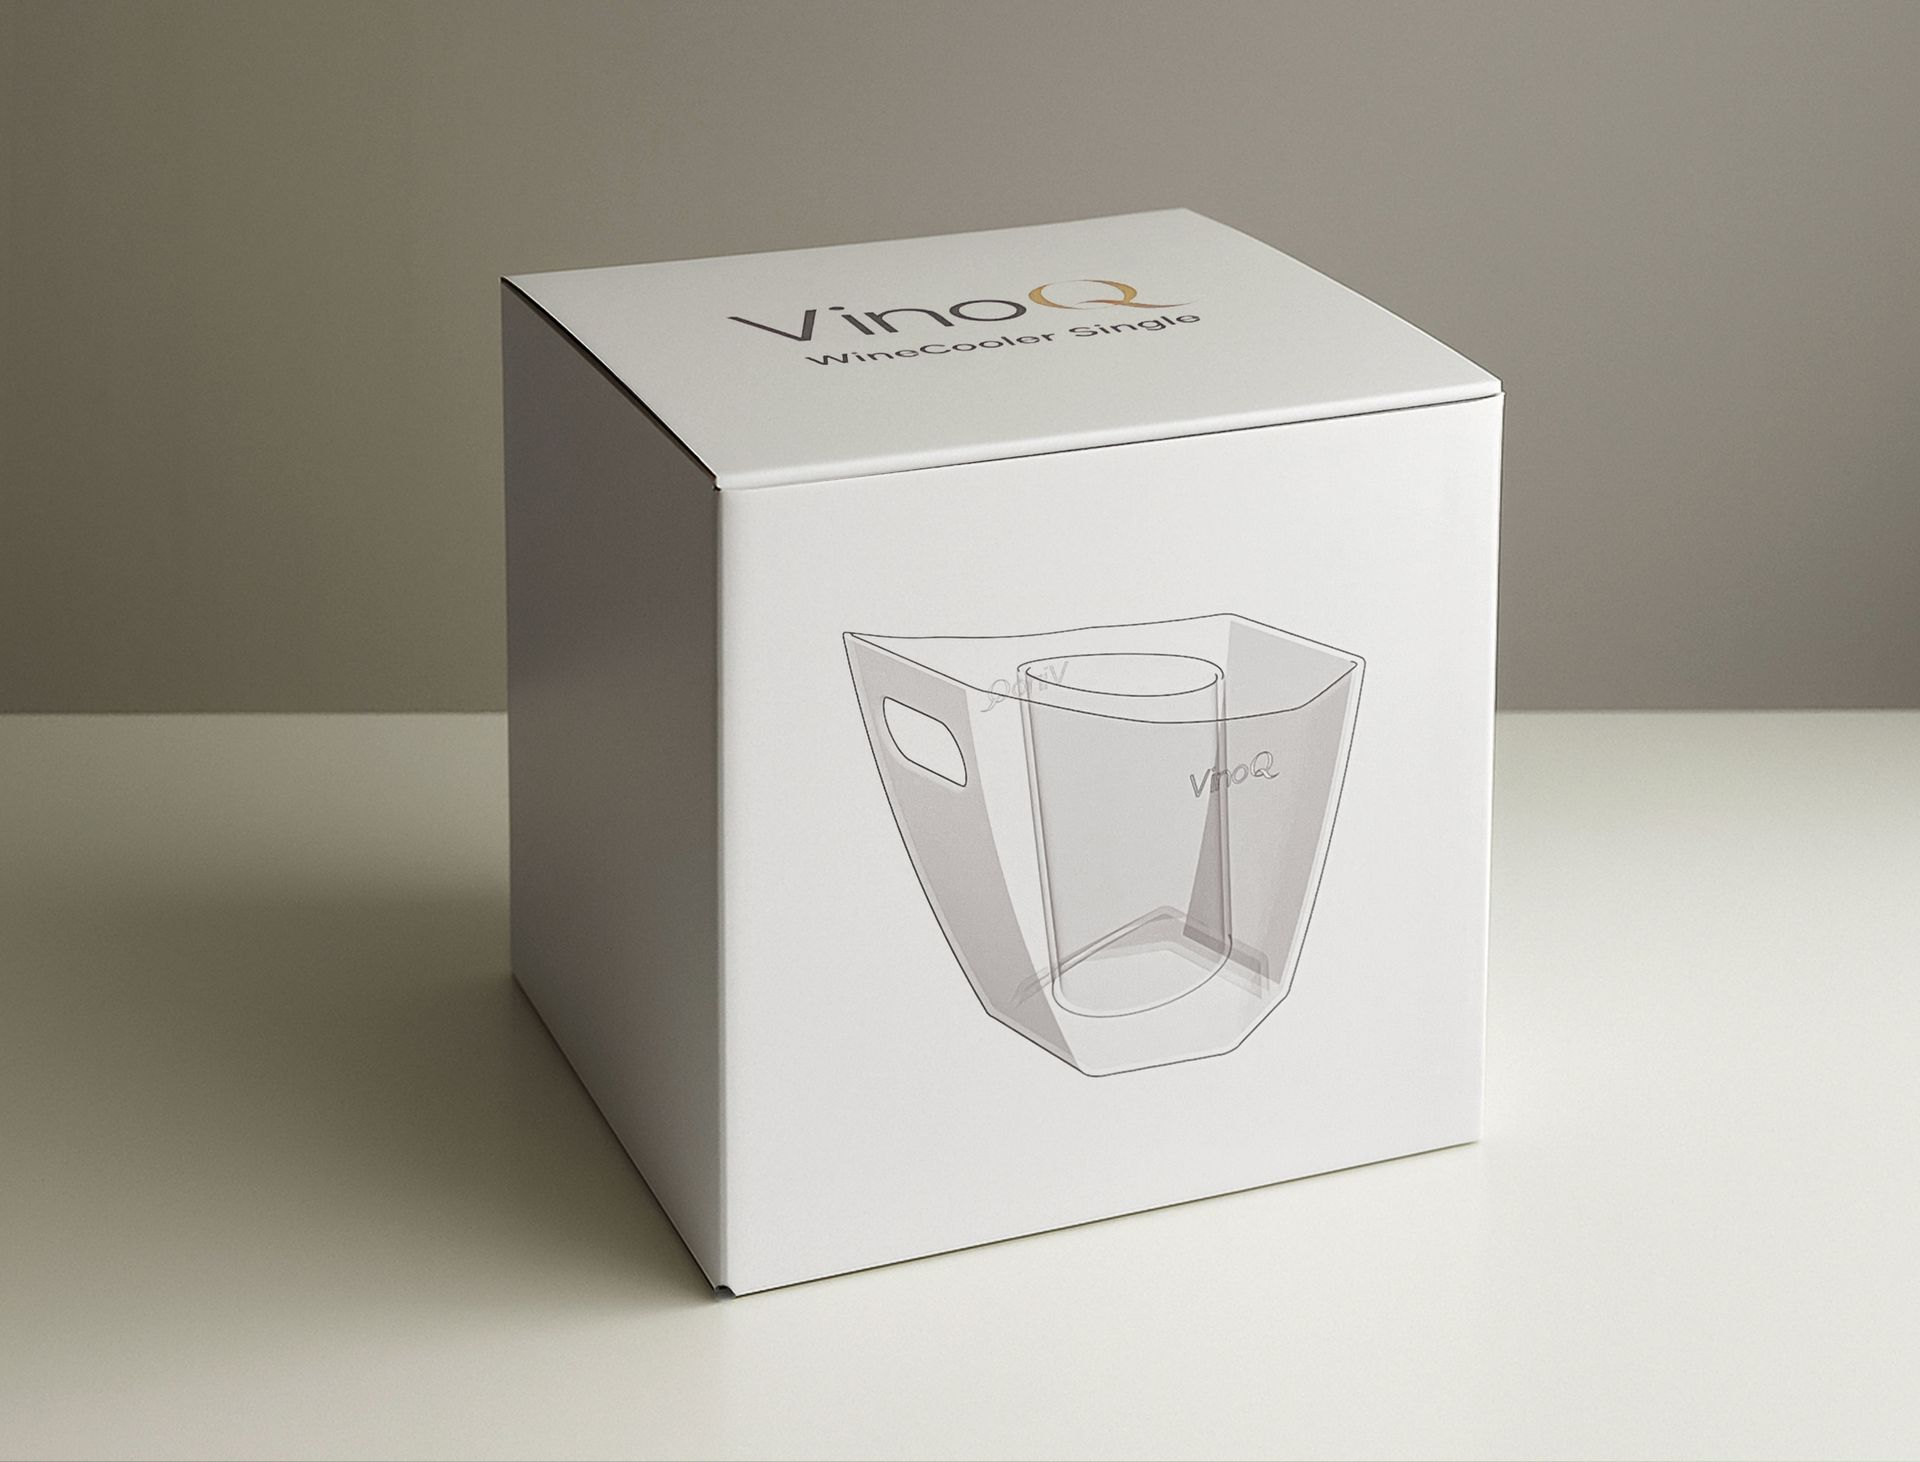
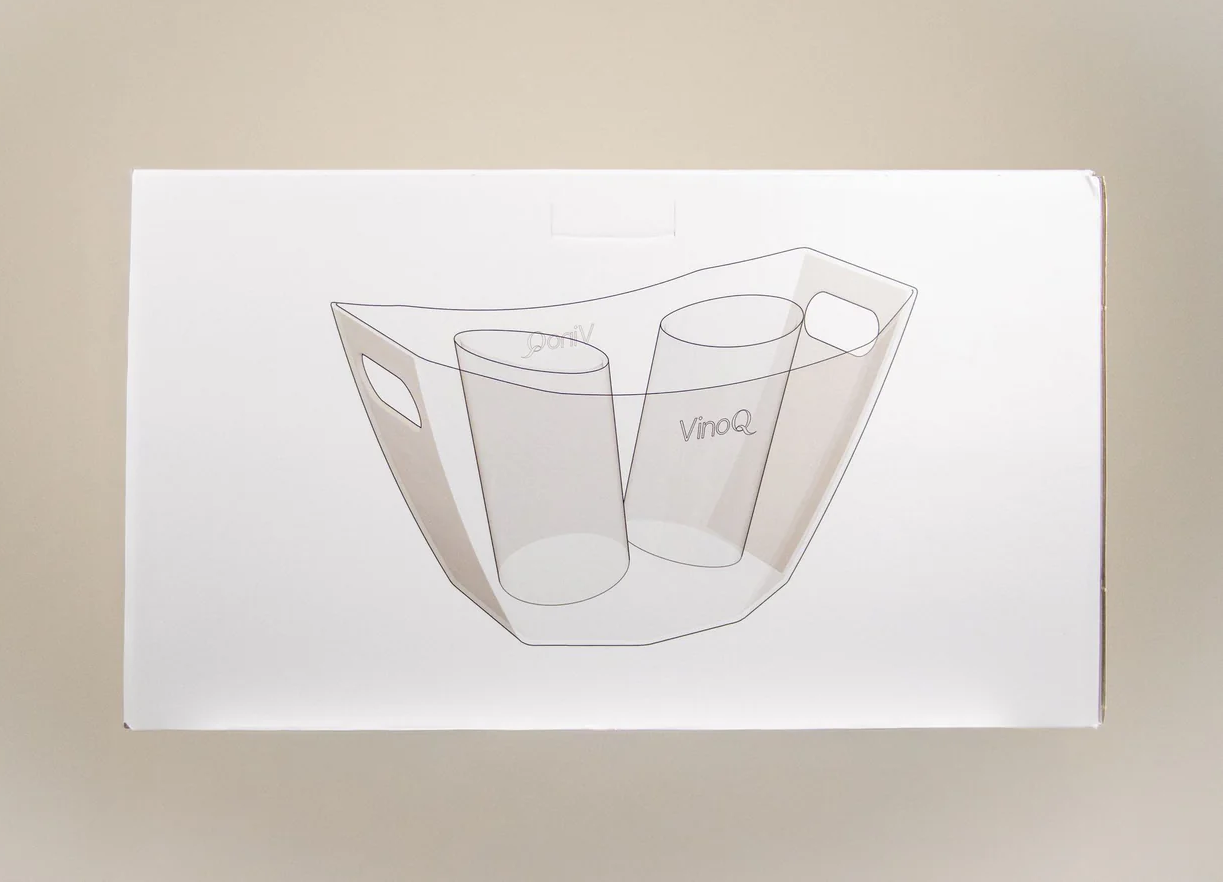
In this phase, I made several designs based on the client's choice and feedback. I elaborated the best two versions and presented them to my client. I created drawings of the wine coolers specifically for use on the packagings.
Concept C2
As requested by the client, the cork coasters in this version match the sizes of the wine coolers well. Since they are specifically tailored to the wine coolers, I included one coaster in each packaging.
Concept C3
For this version, I designed coasters that harmonize with the wine coolers in a different way: by following their shapes. Other differences with C2 are more subtle variations in sizes of graphics and openings.
Packaging
Detail Phase
In the detail phase, I prepare 3D CAD files and graphic print files for the packaging.
Client feedback
My client made the choice to continue with concept C2, and to make the visible logos on the coasters (visible when the box is closed) like on C3.
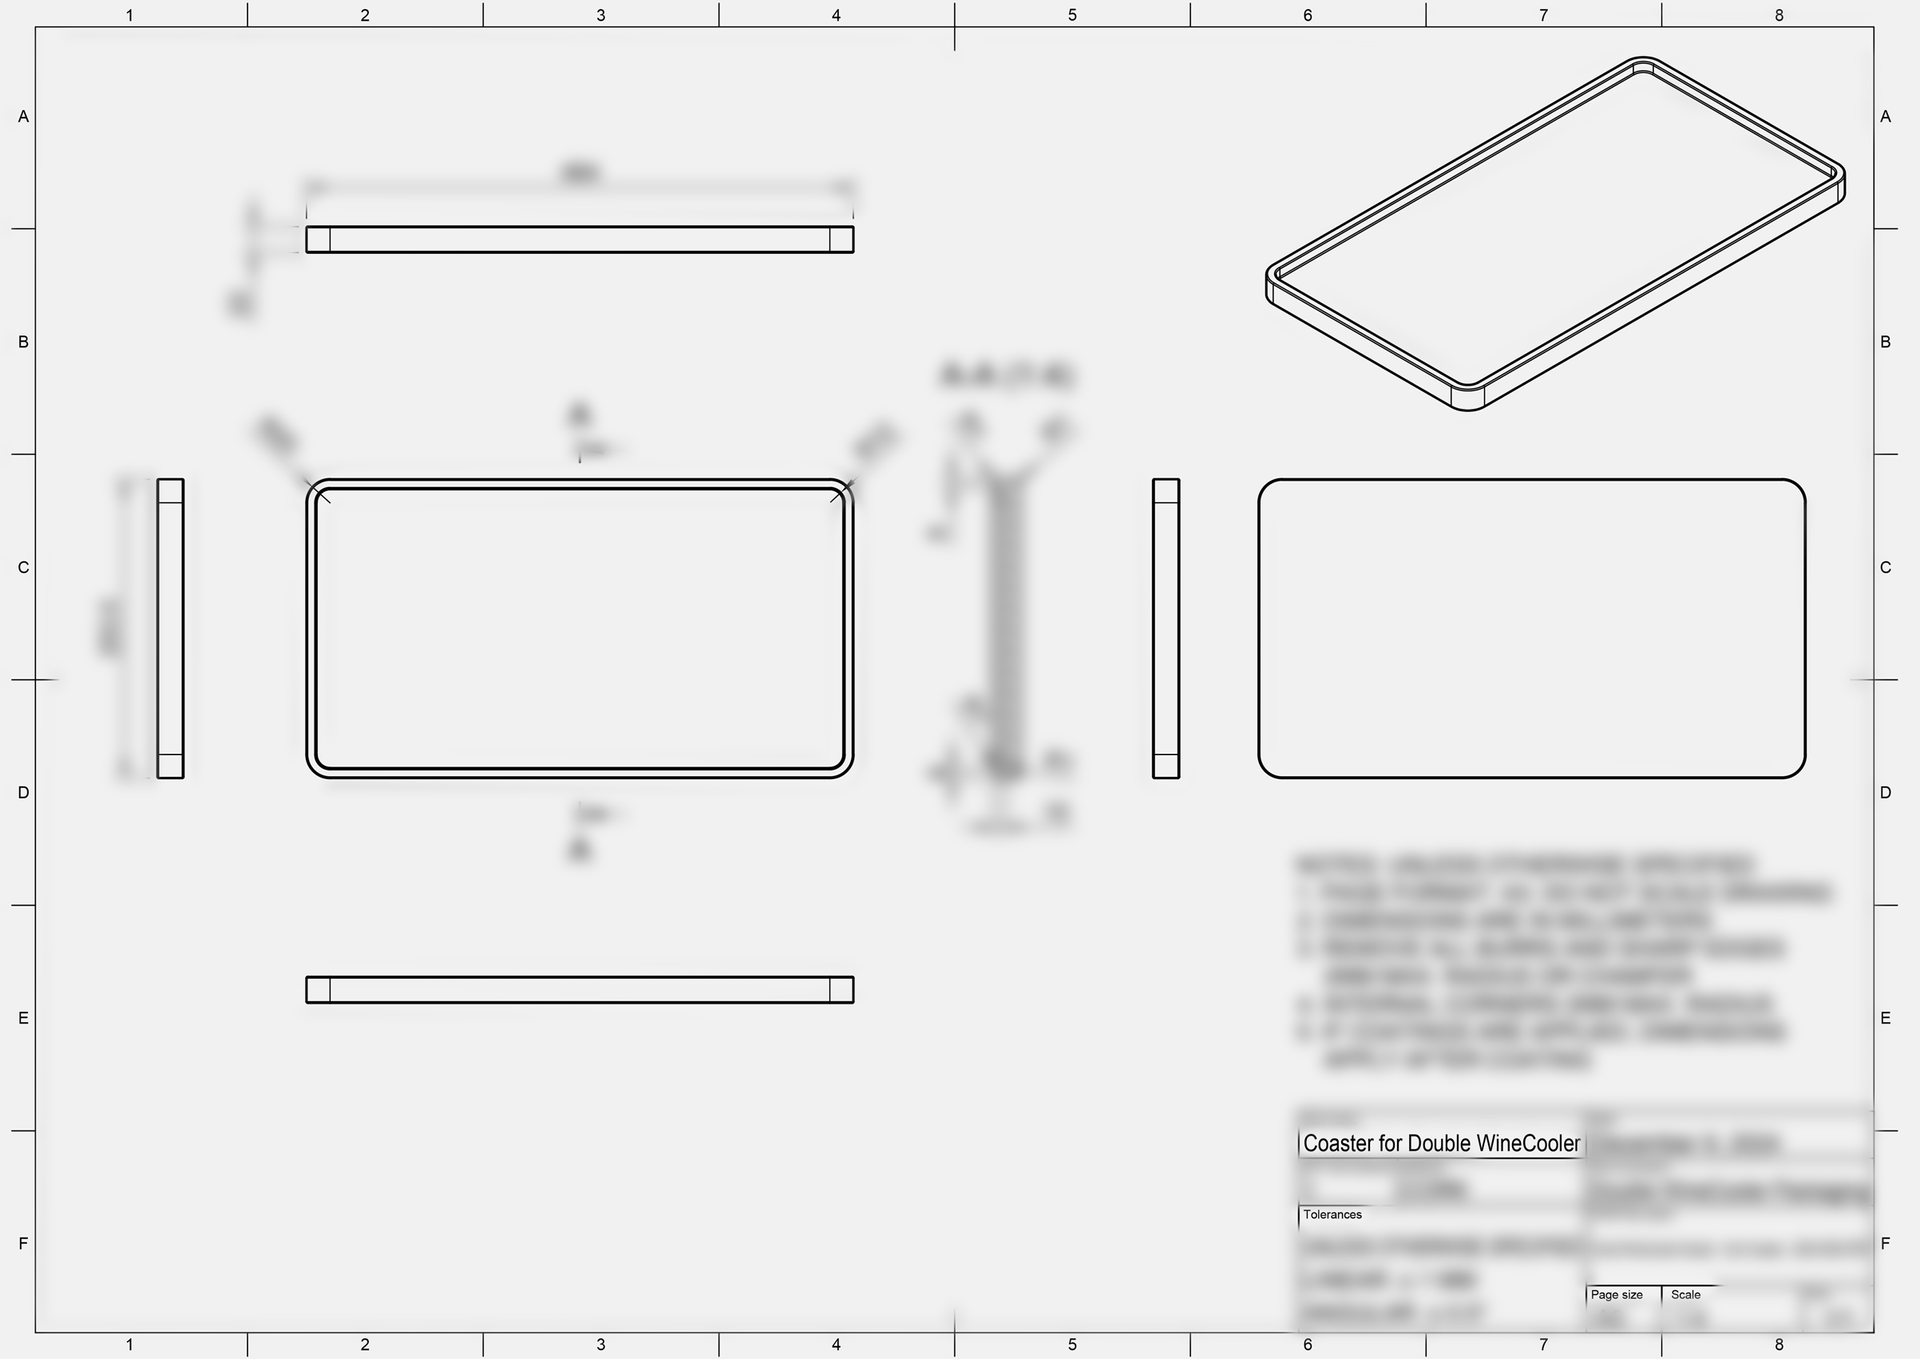
Detail Phase Output
I provided the following deliverables for both wine coolers:
• CAD models of the coasters (STEP format)
• Technical drawings of the coasters
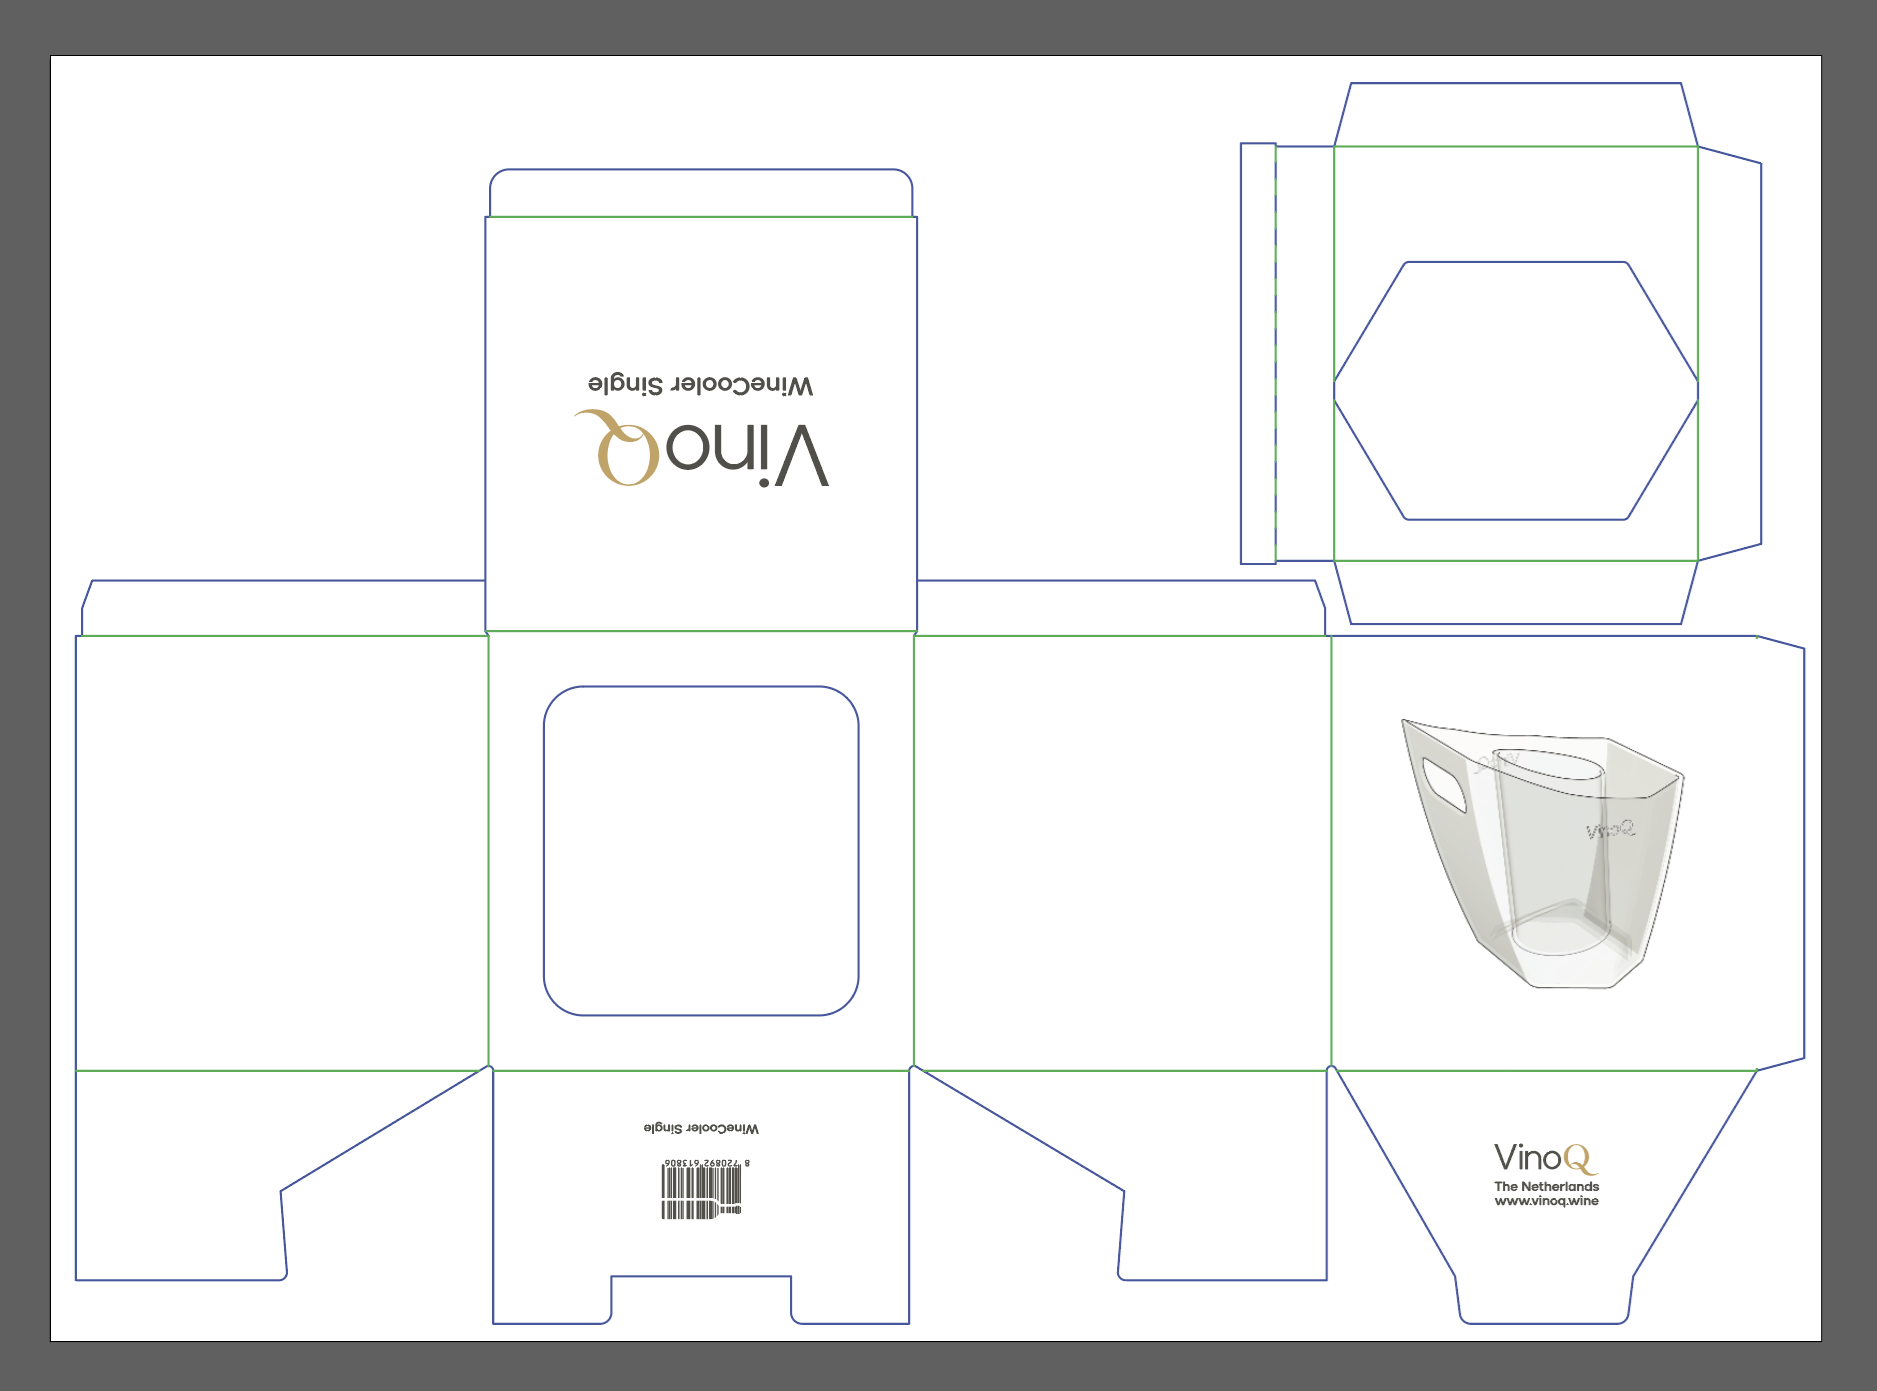
• Print files for:
- Boxes
- Coasters
• Drawings of the coolers
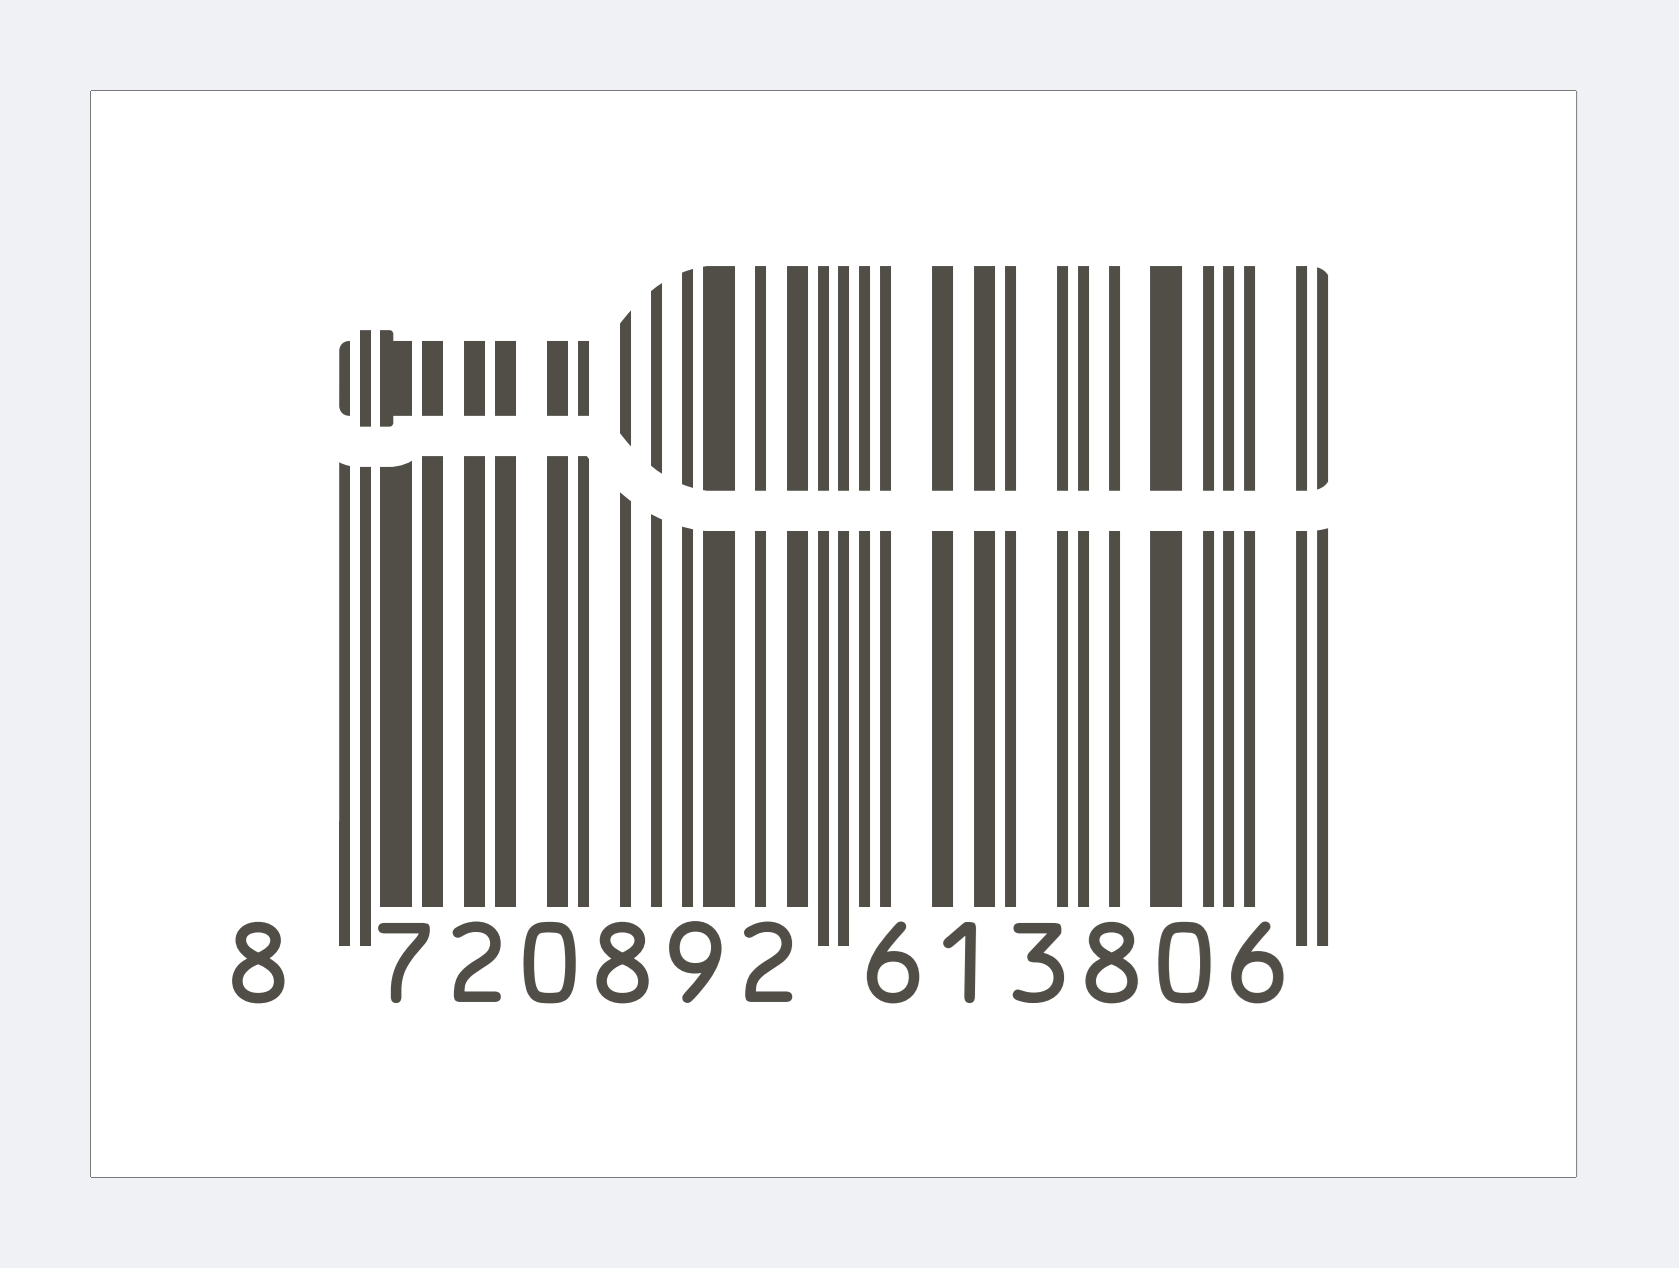
• Bar code files
Packaging
Prototyping & Manufacturing
With the files from the detail phase, my clients order packaging prototypes/samples.
The founder of VinoQ sourced a manufacturer for the box and another one for the cork coasters. After some minor adjustments, they could continue with manufacturing.
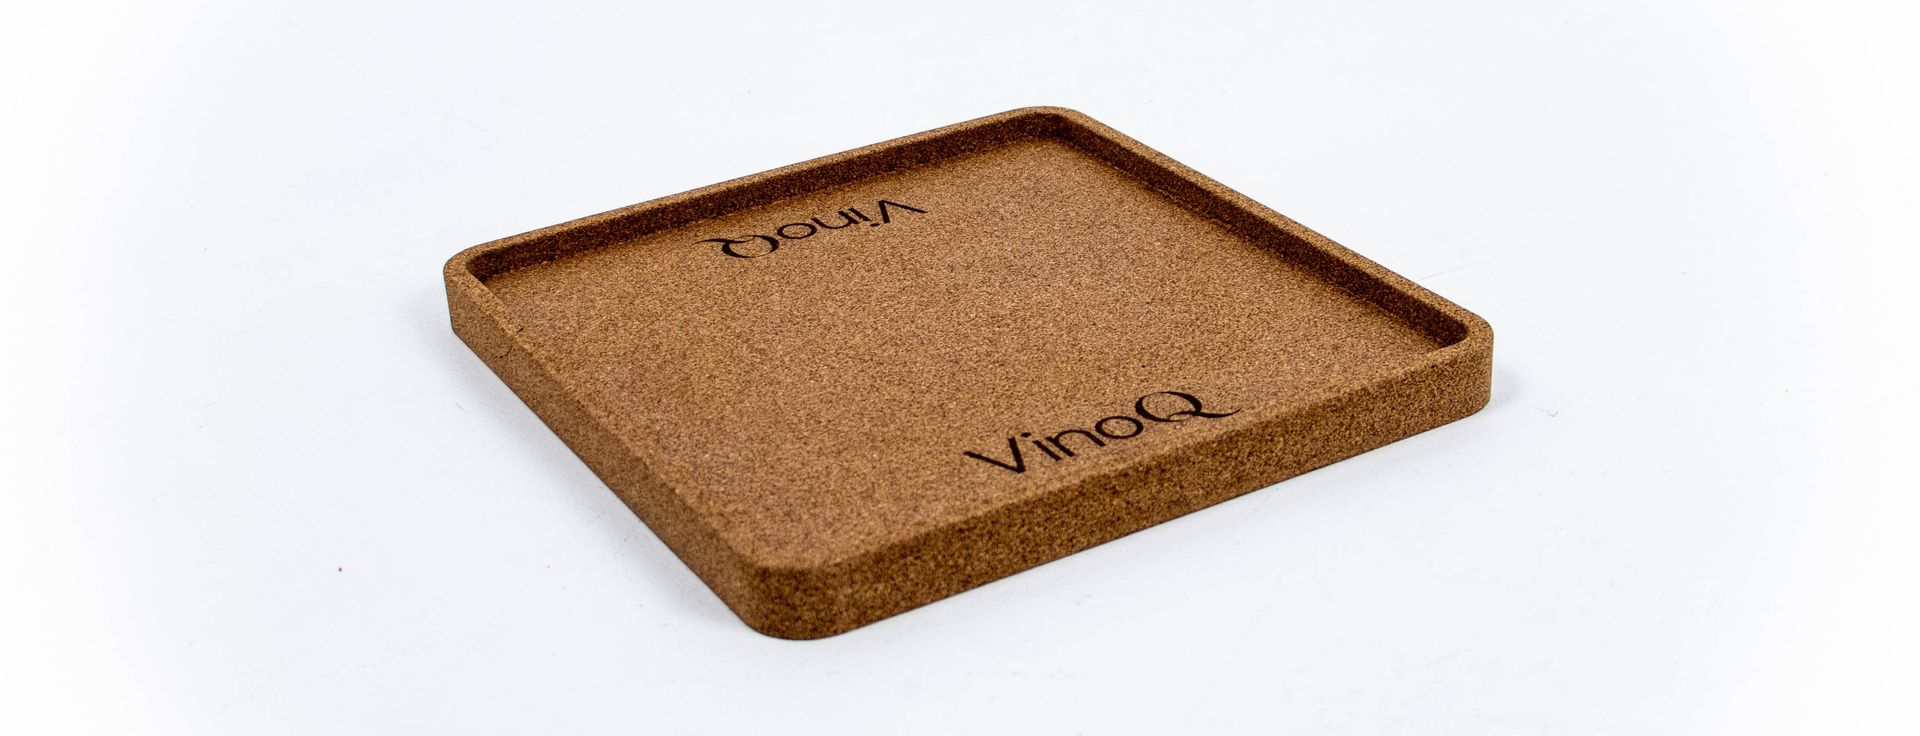
Cork coaster prototyping and manufacturing
The cork manufacturer had the idea to make the coasters thicker than what we had at that moment, because with a little extra thickness, they would have the right strength to function as a service tray too. We liked this idea, and I adjusted the files accordingly. The manufacturer also shared several options with us for the logo and we chose a lasered logo option that shows the logo very nicely.
Box sampling and manufacturing
The box manufacturer first made test boxes for both versions to check dimensions in order to minimize the chance for potential damage during transport. People from the manufacturer shared print files that worked well for them and asked to place the graphics on their outlines. I aligned the graphics on their lay-out so they could easily work with it and go ahead with production.
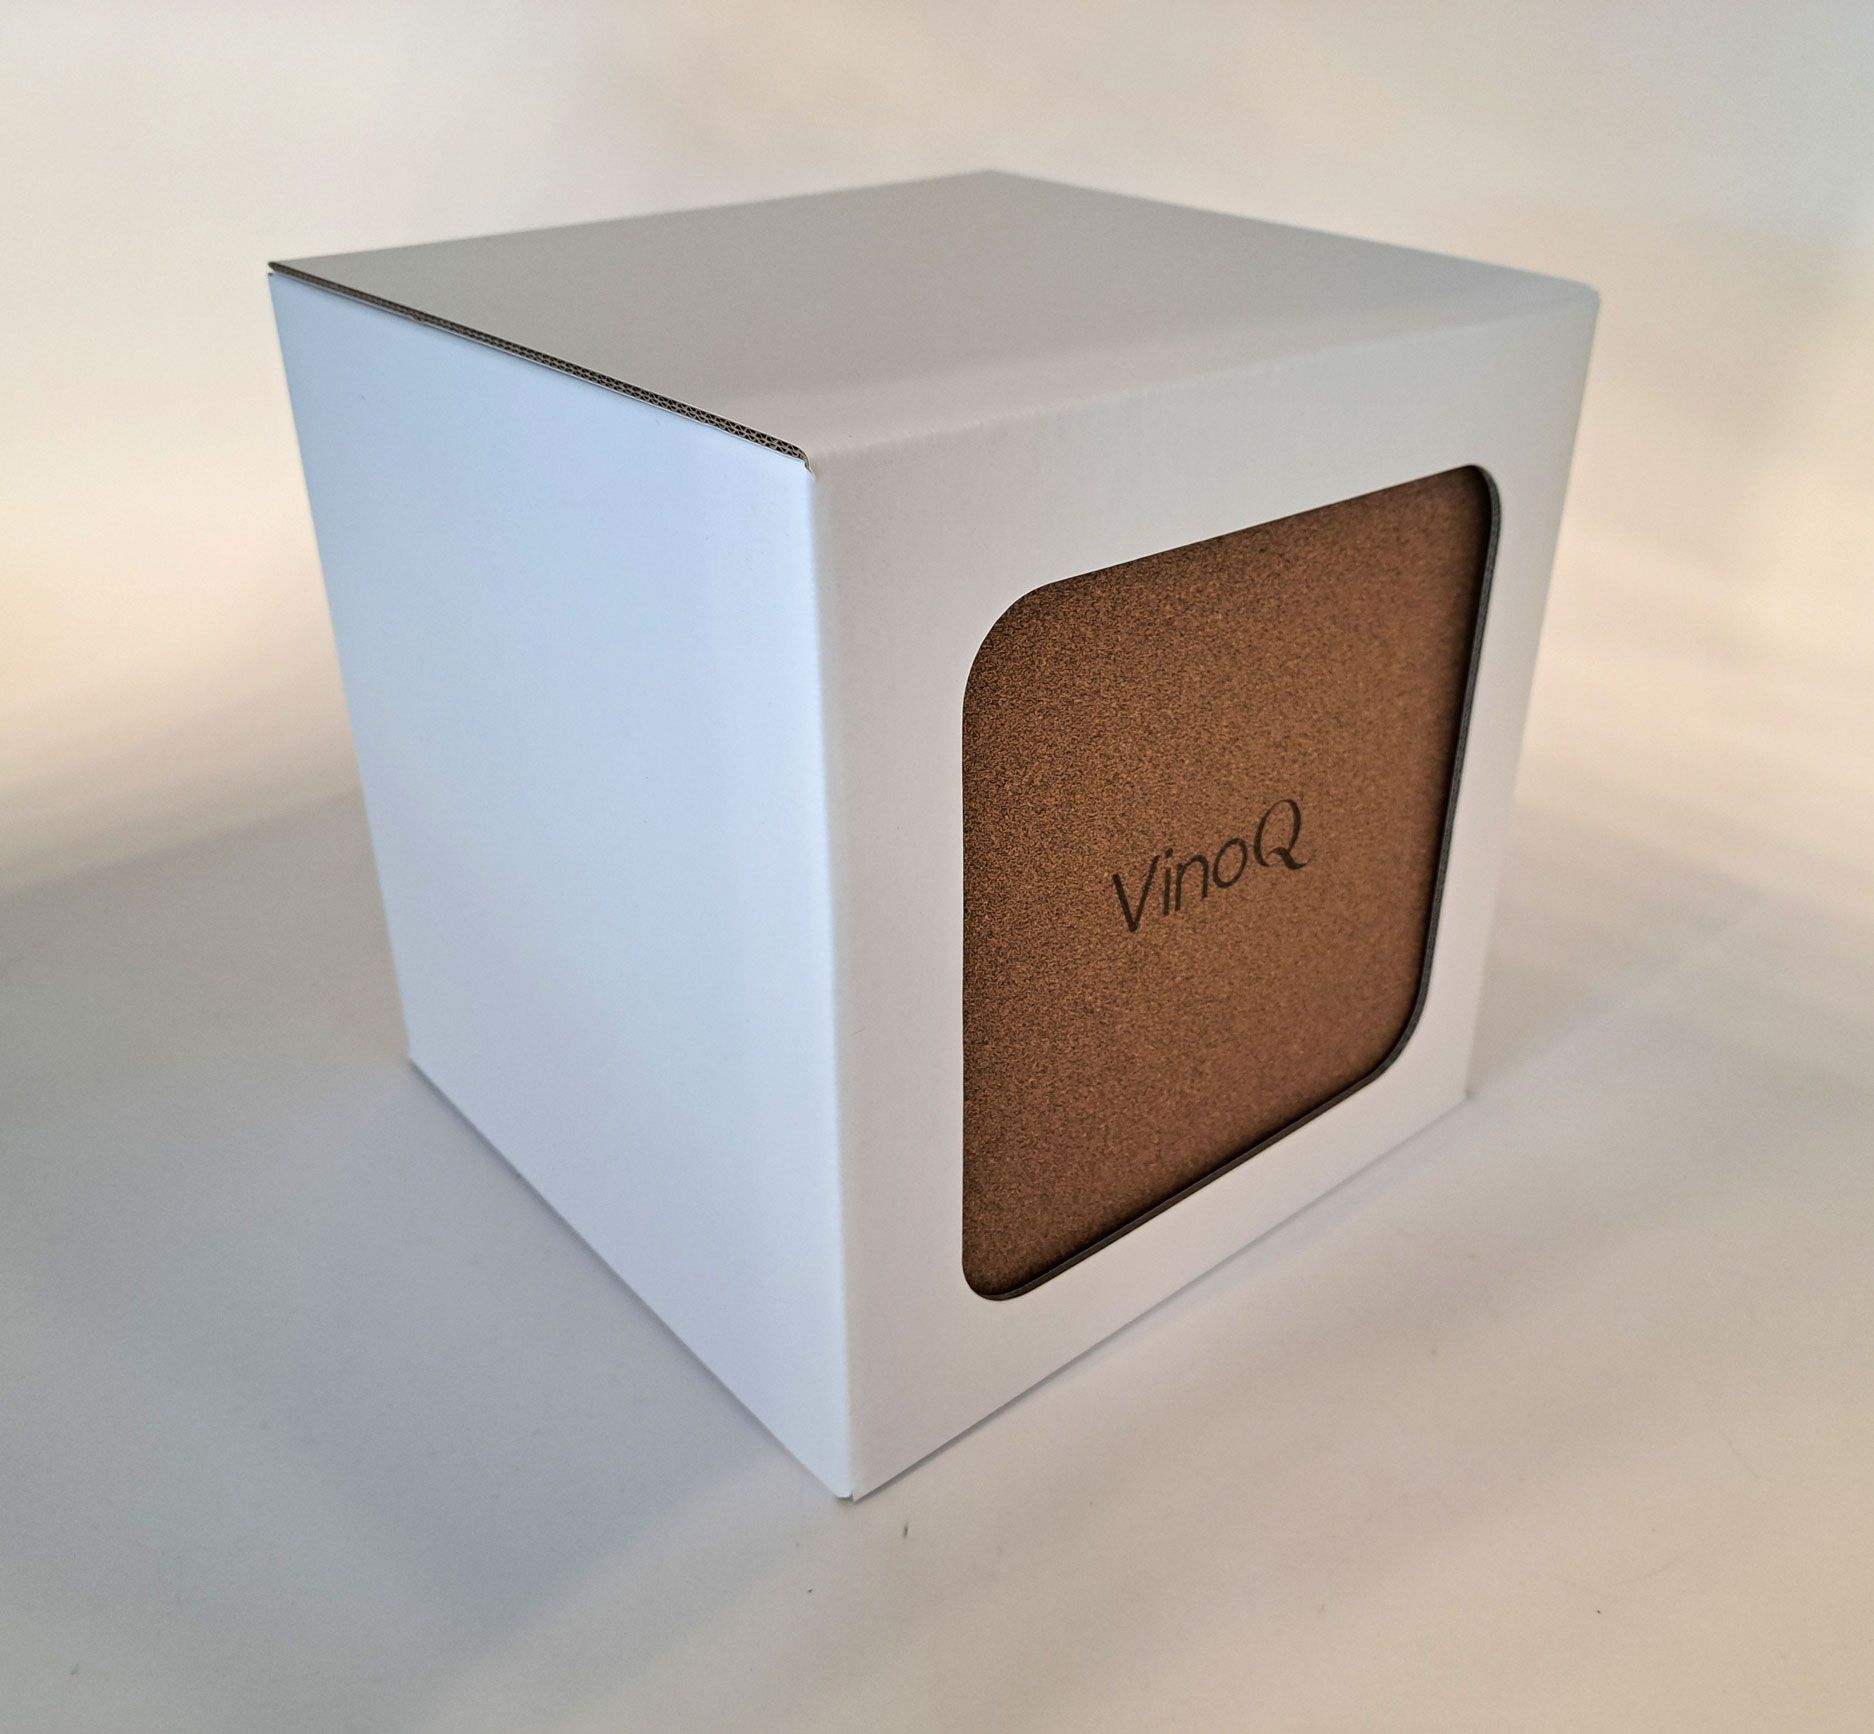
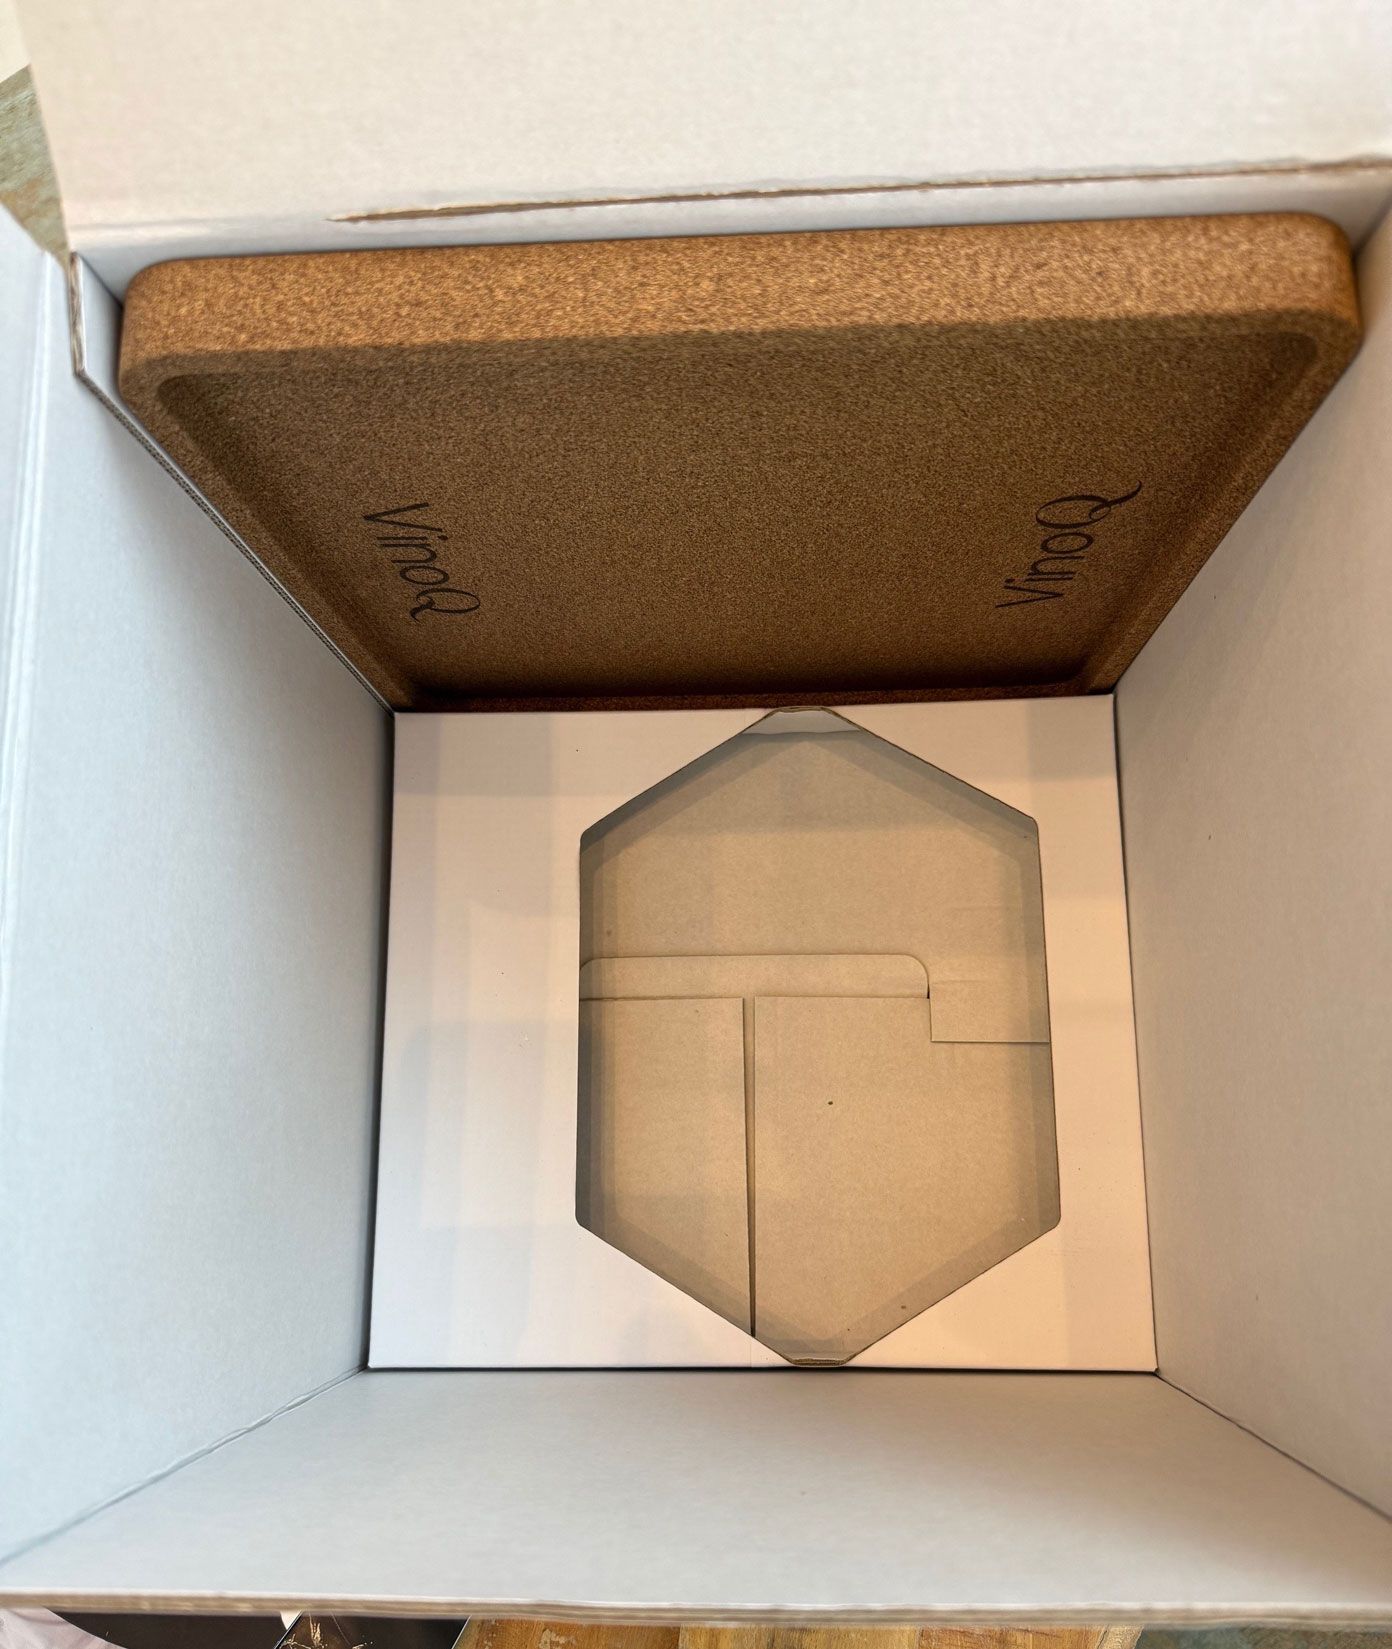
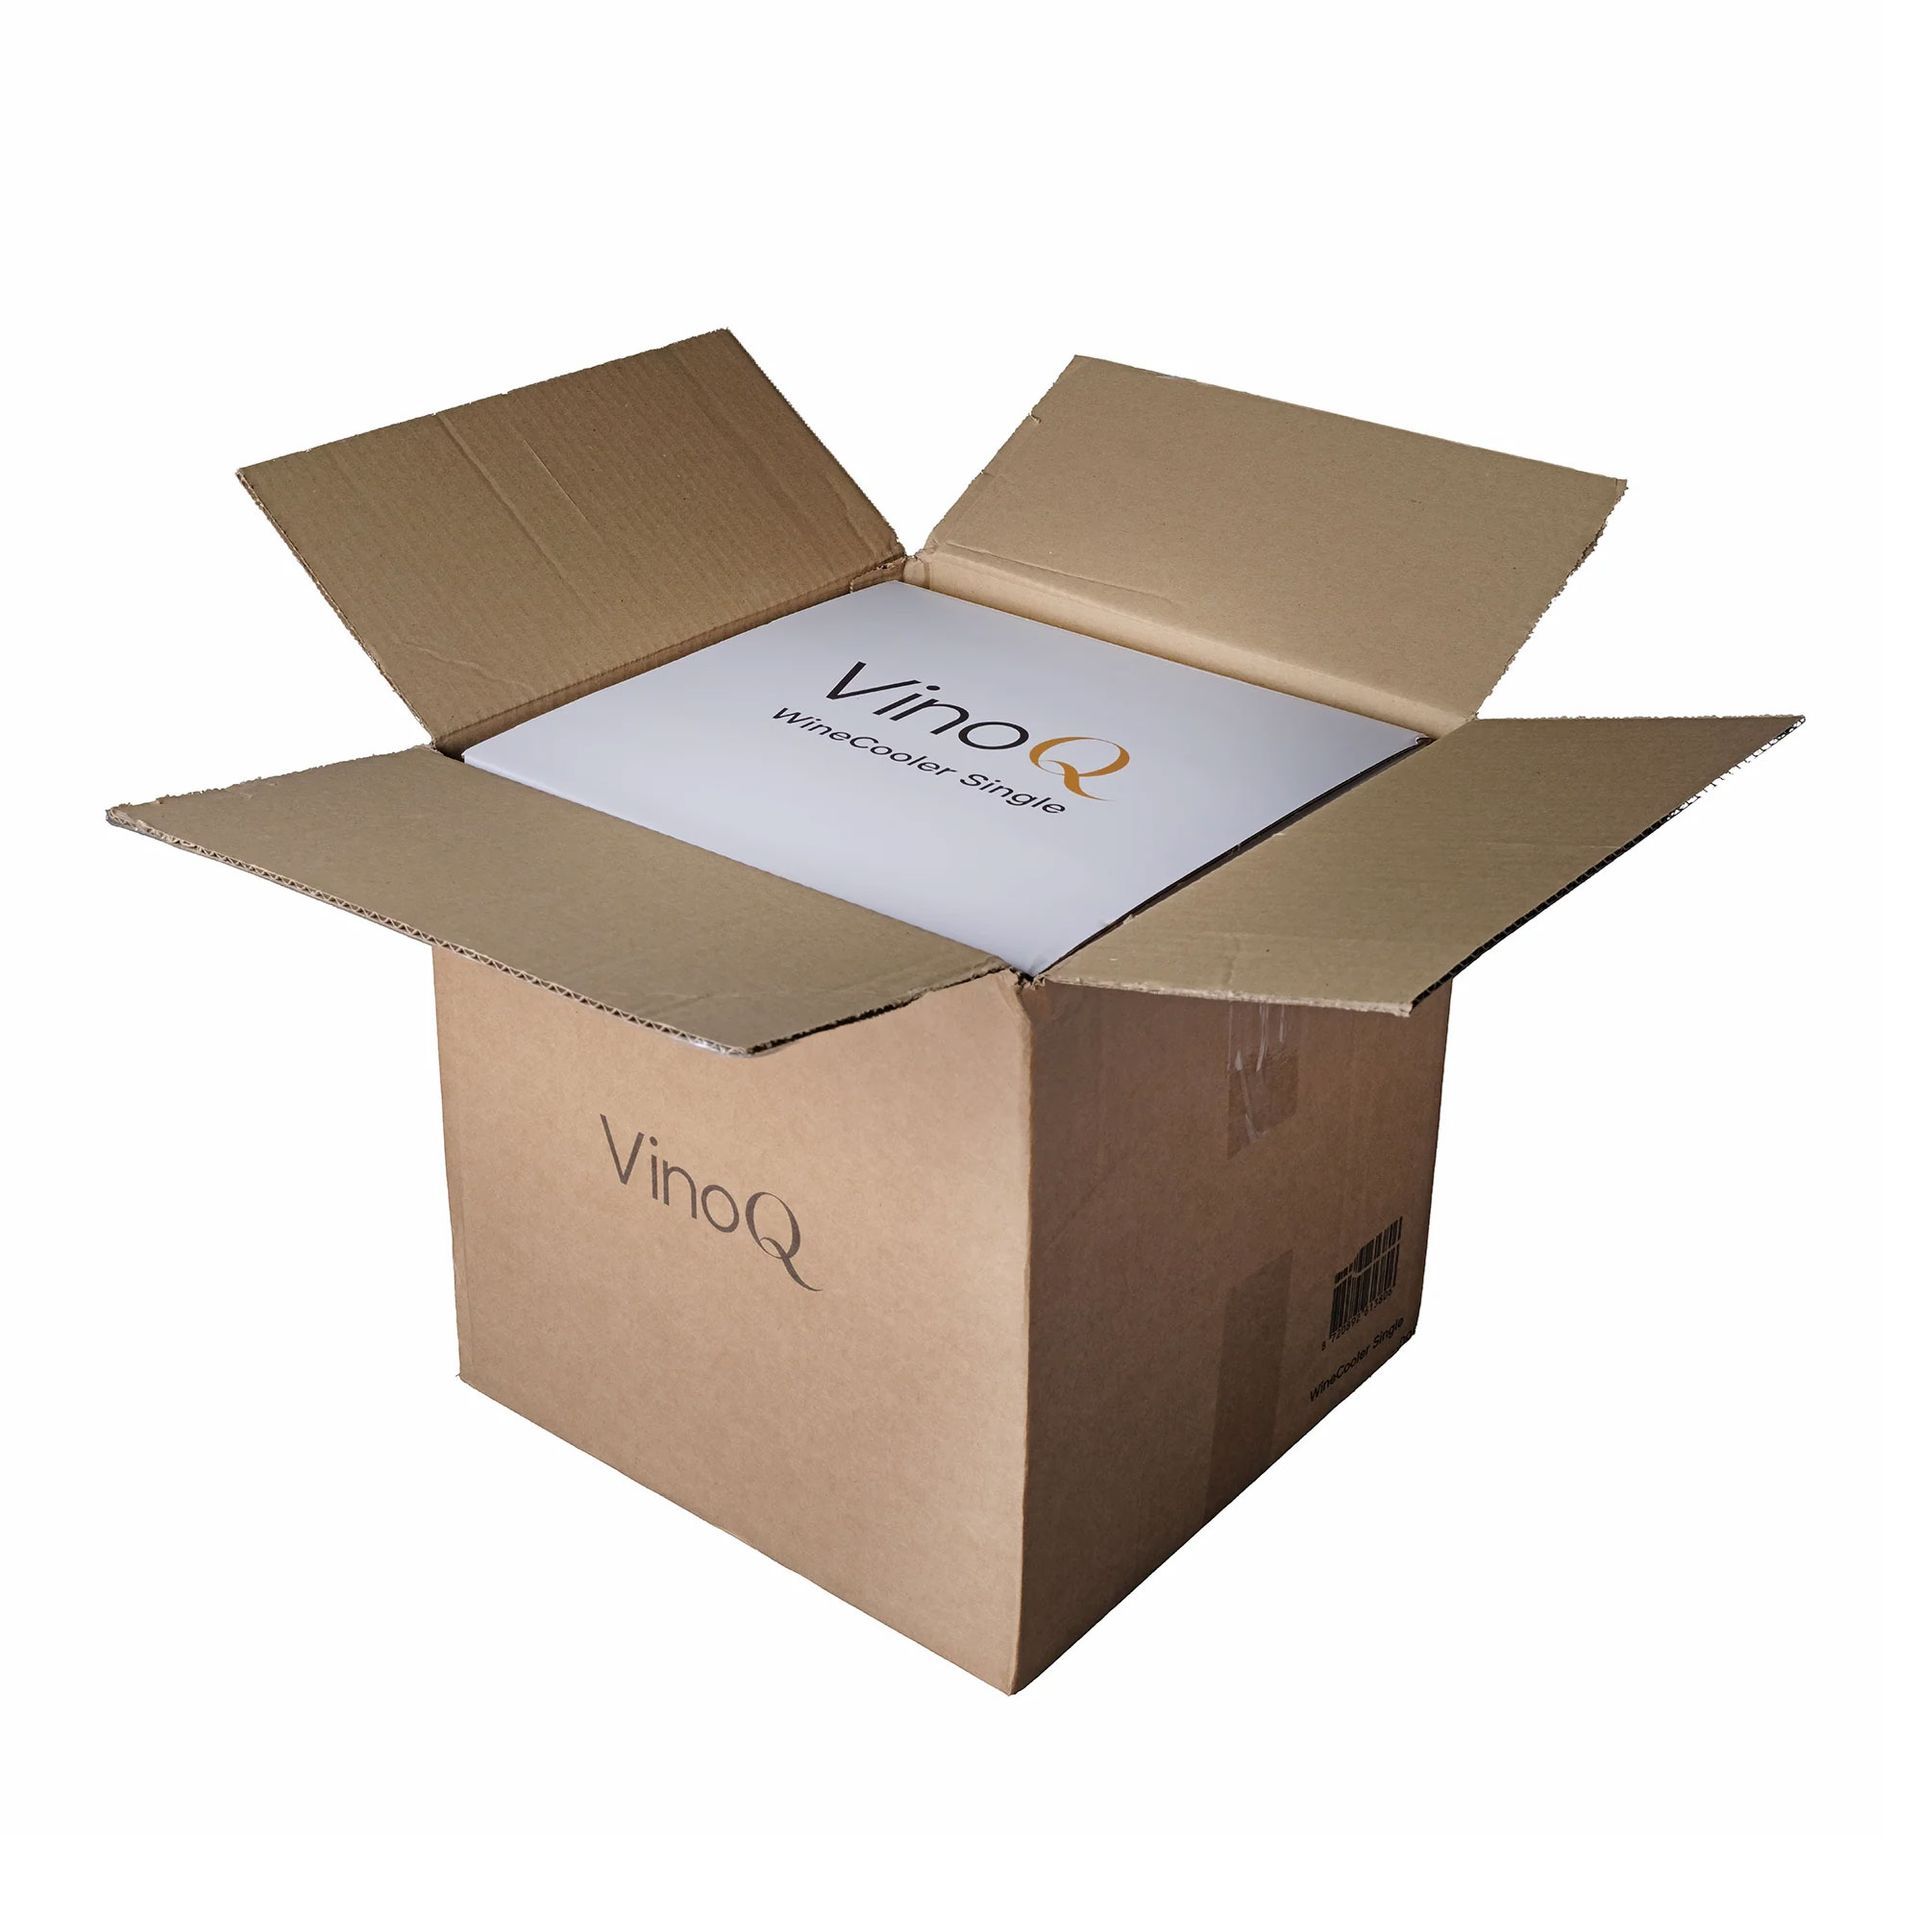
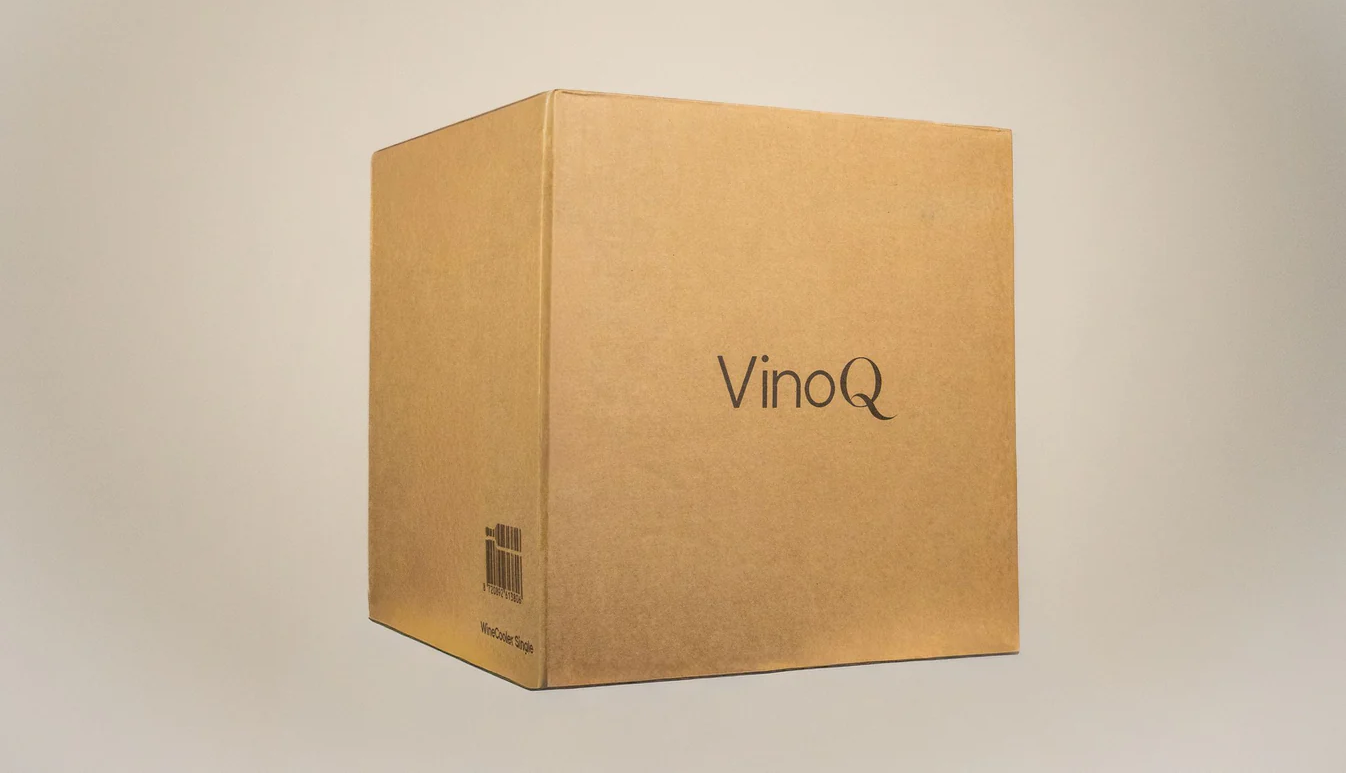
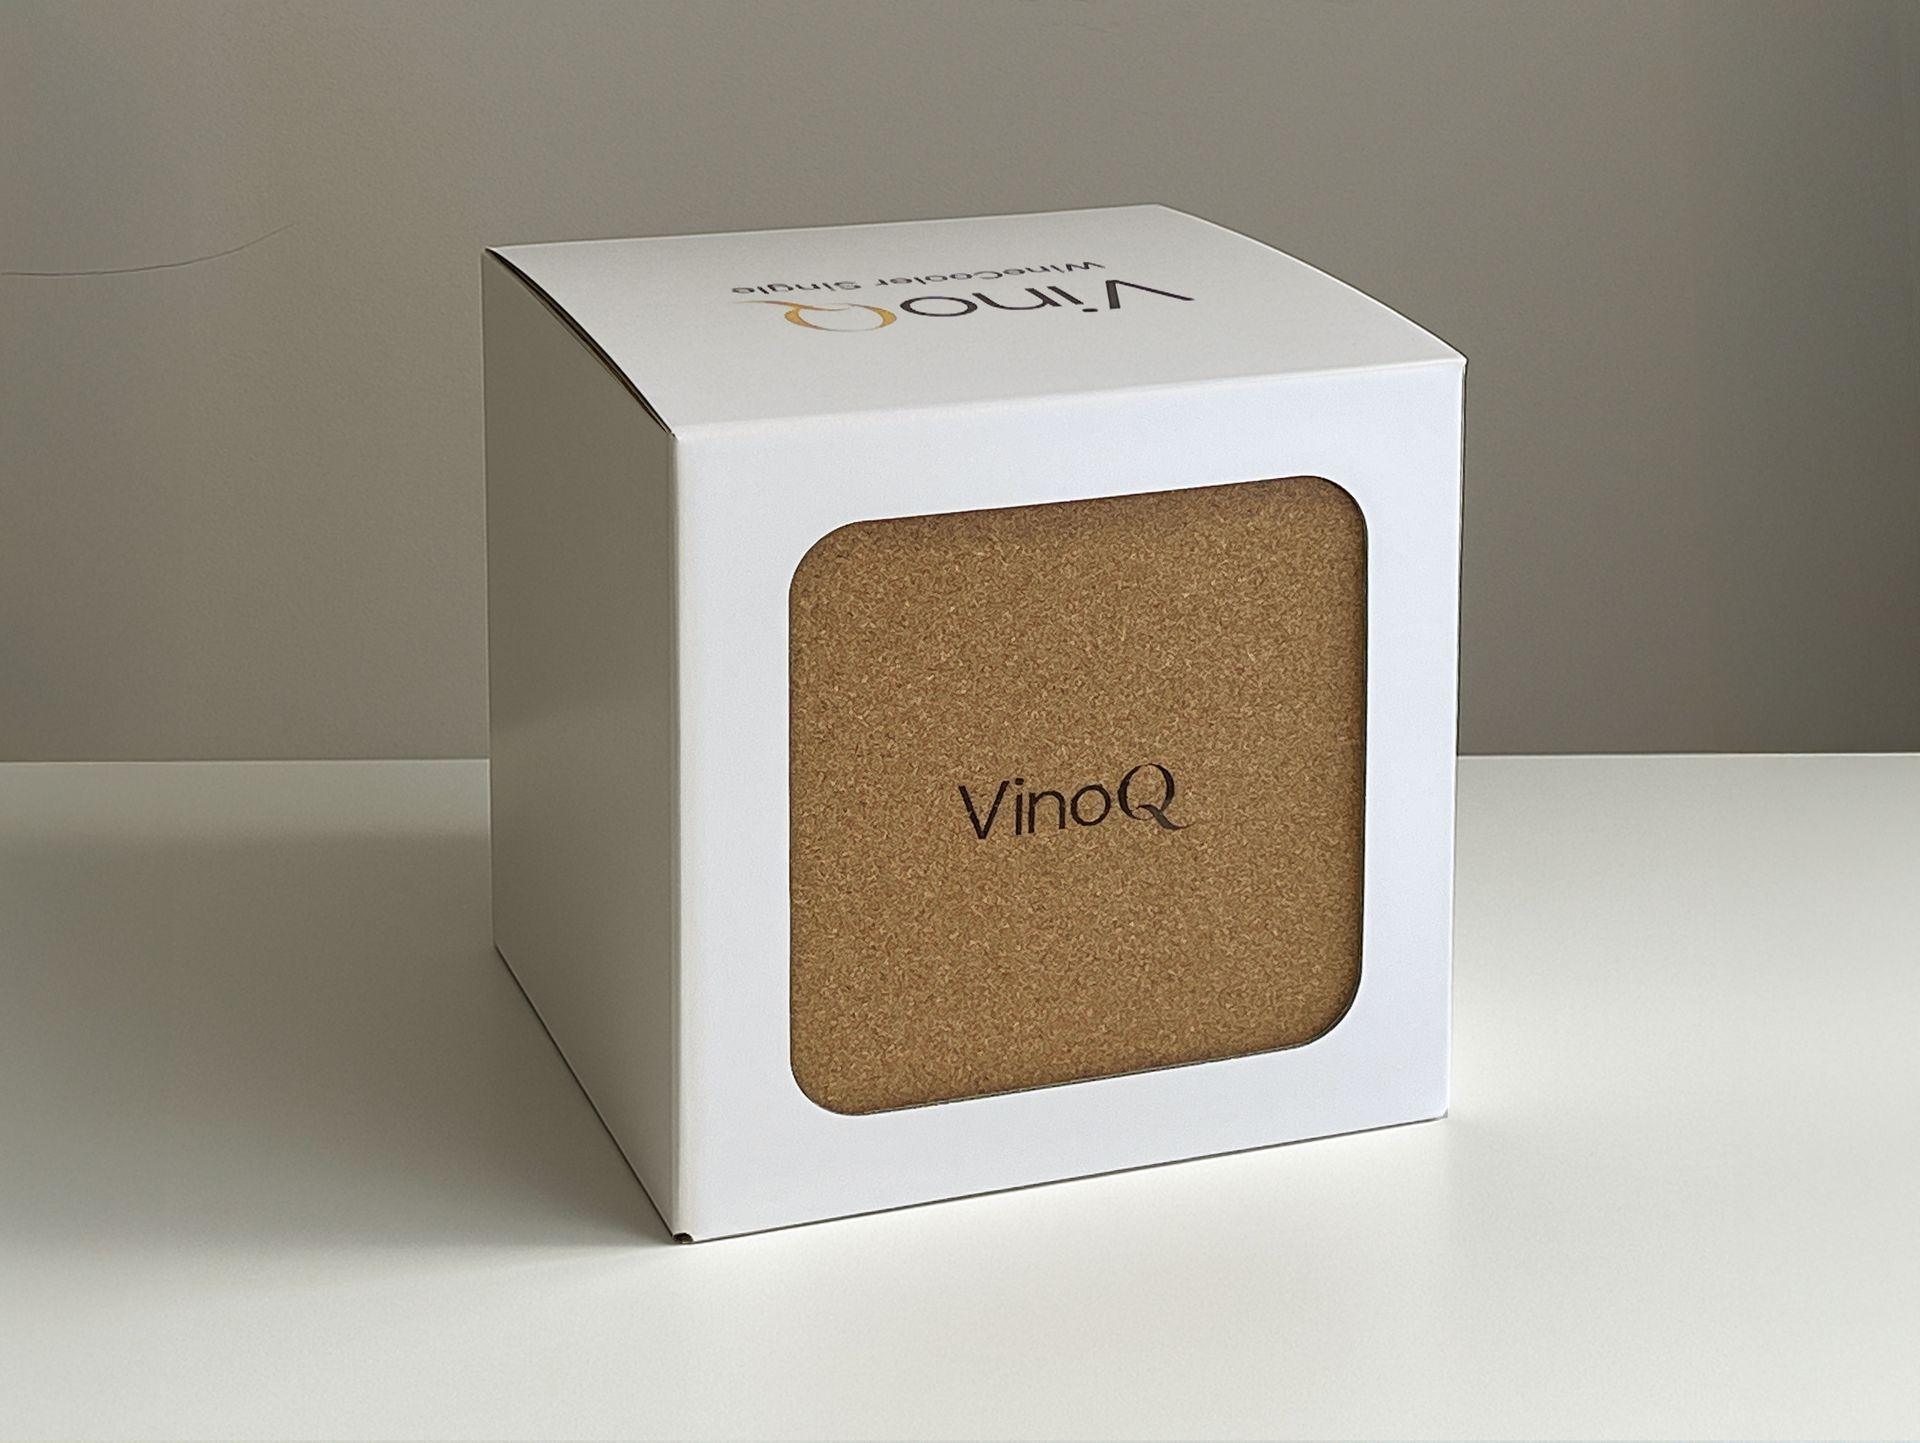
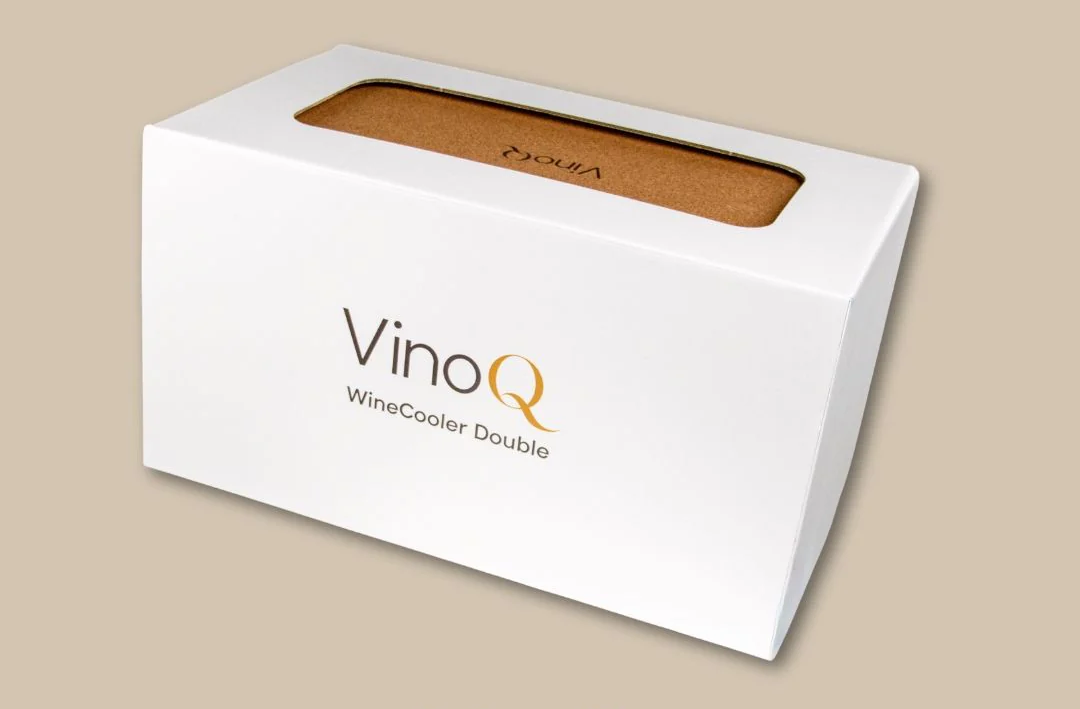
Final Packagings
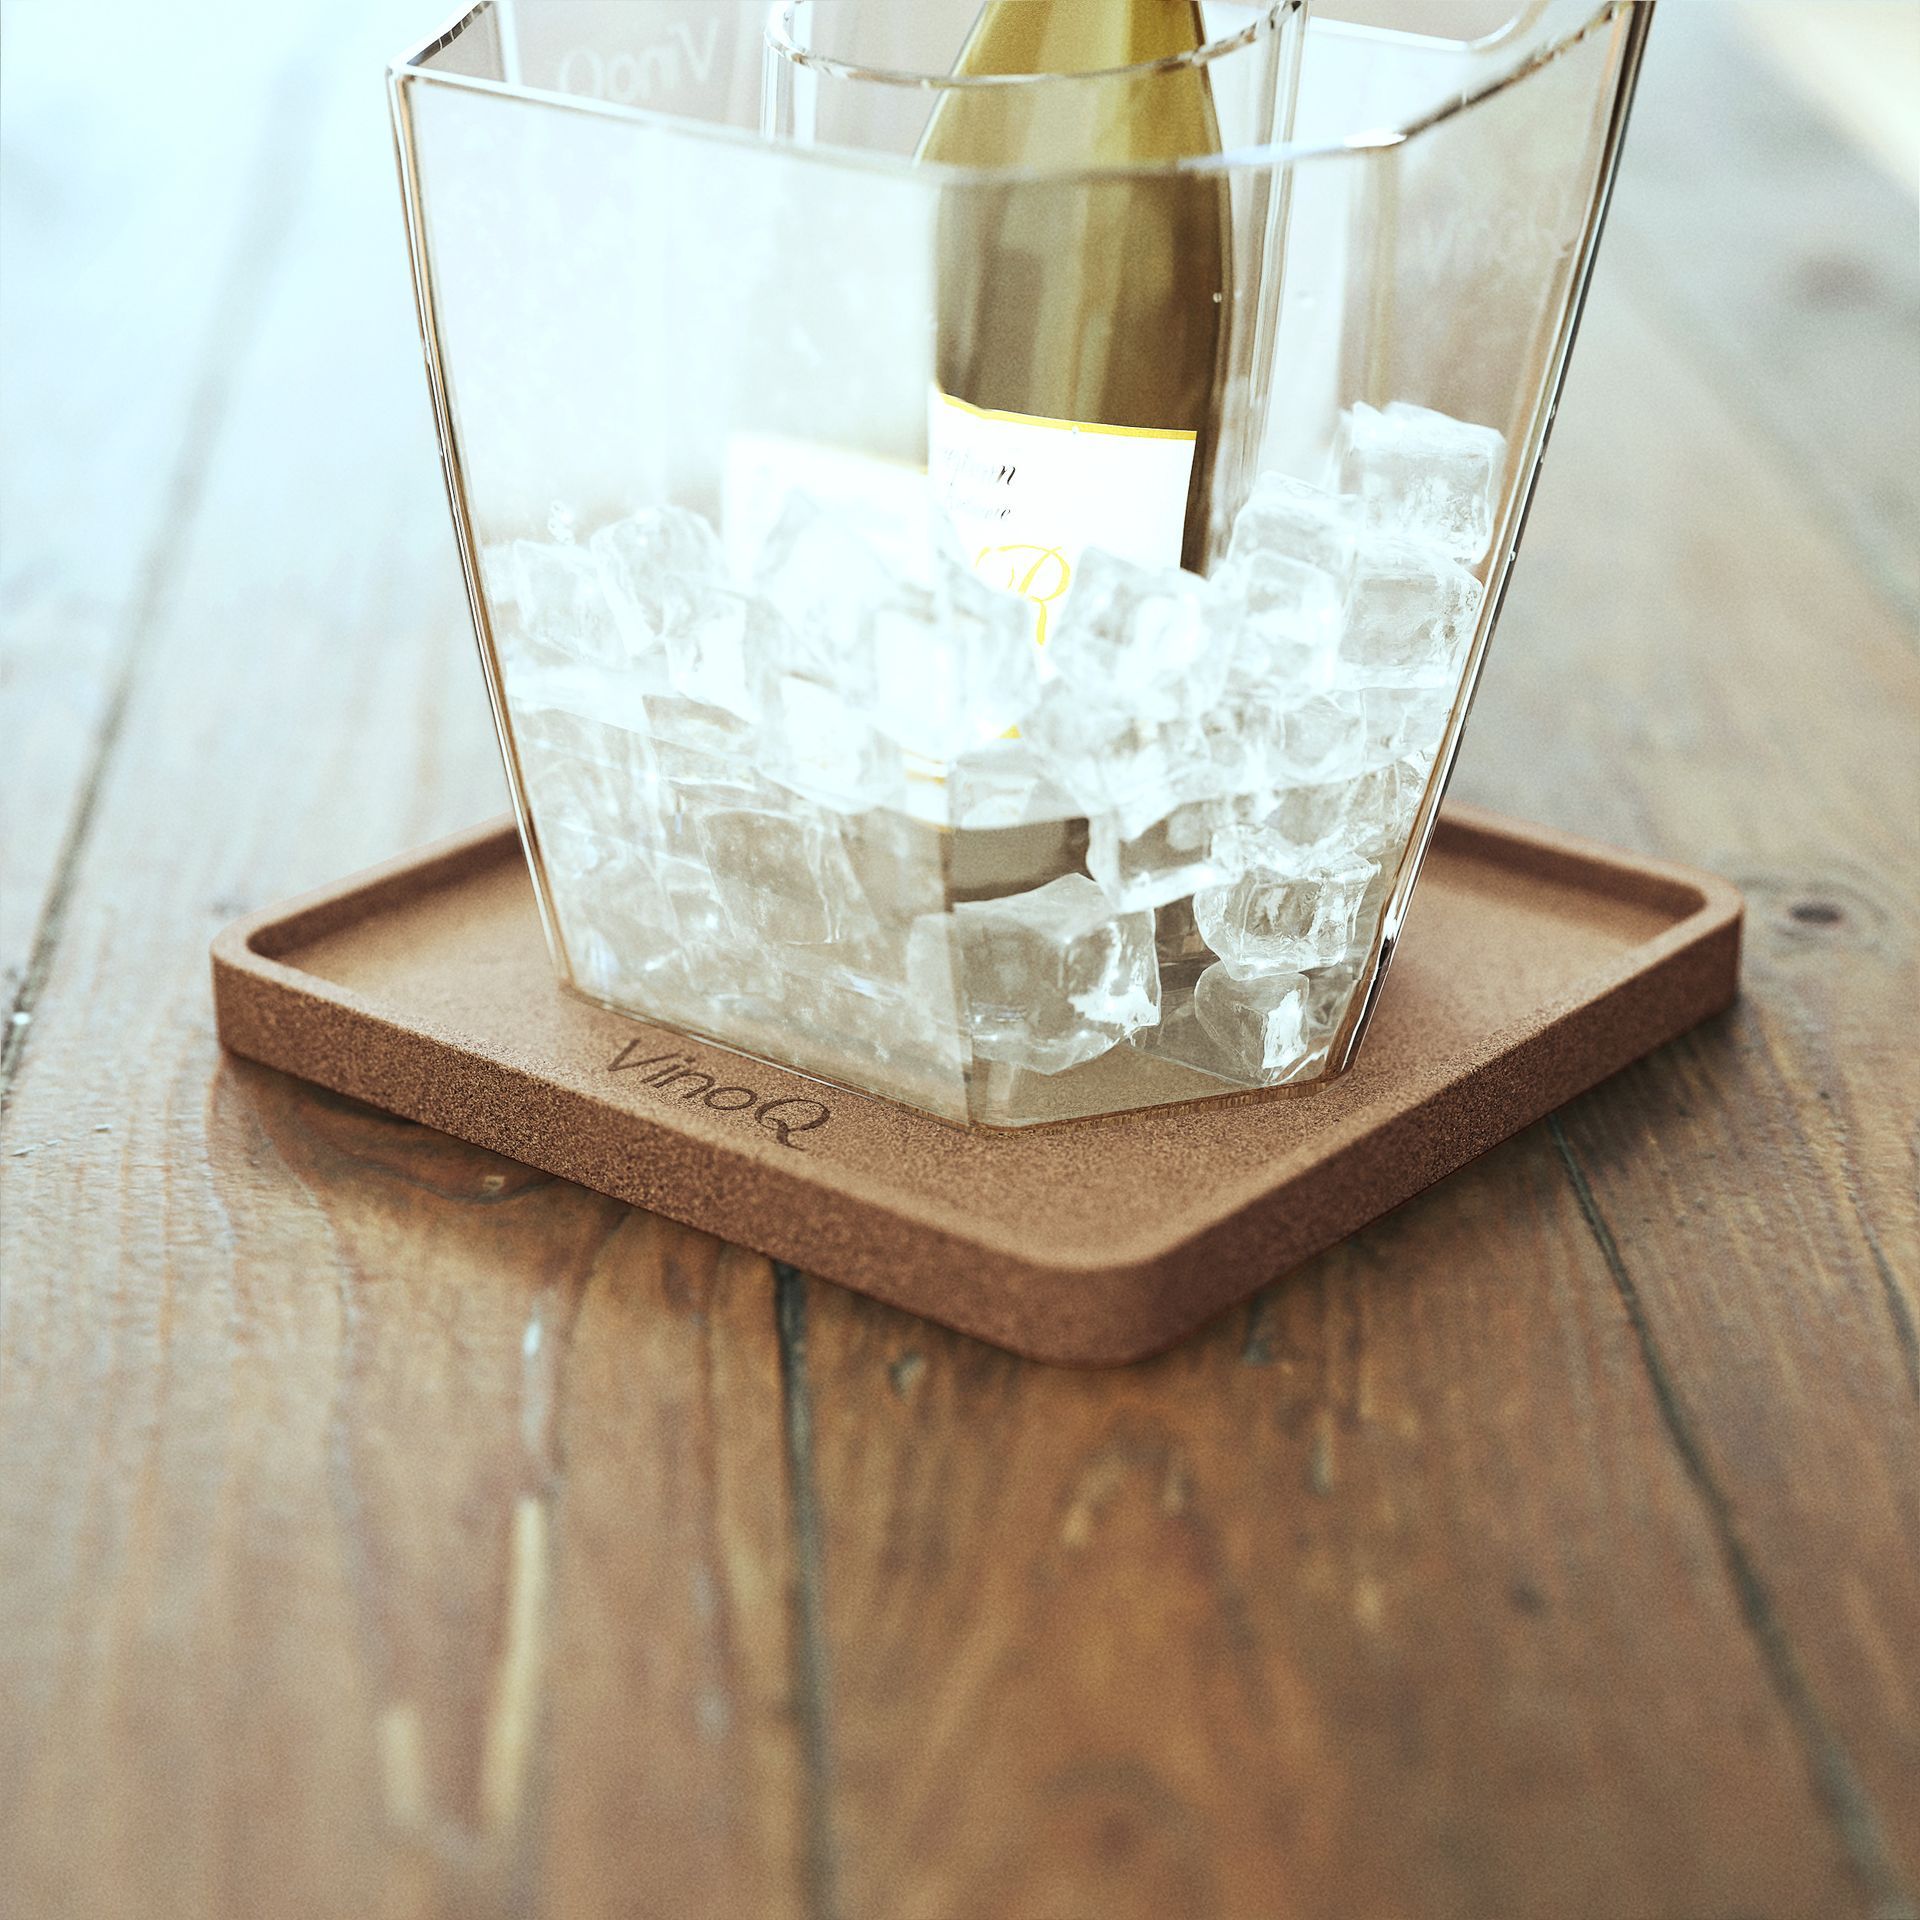
The images here show the final packagings including cork coasters. In the design process, I also created files for printing for the brown shipping boxes (logos and bar codes, including positioning), which you'll see in the images too.
?Do you have a product idea
Case Study:
High-Resolution
Renderings
for VinoQ
Visual Phase
In a phase dedicated to creating realistic visuals, I render images of products for my clients to use for marketing purposes.
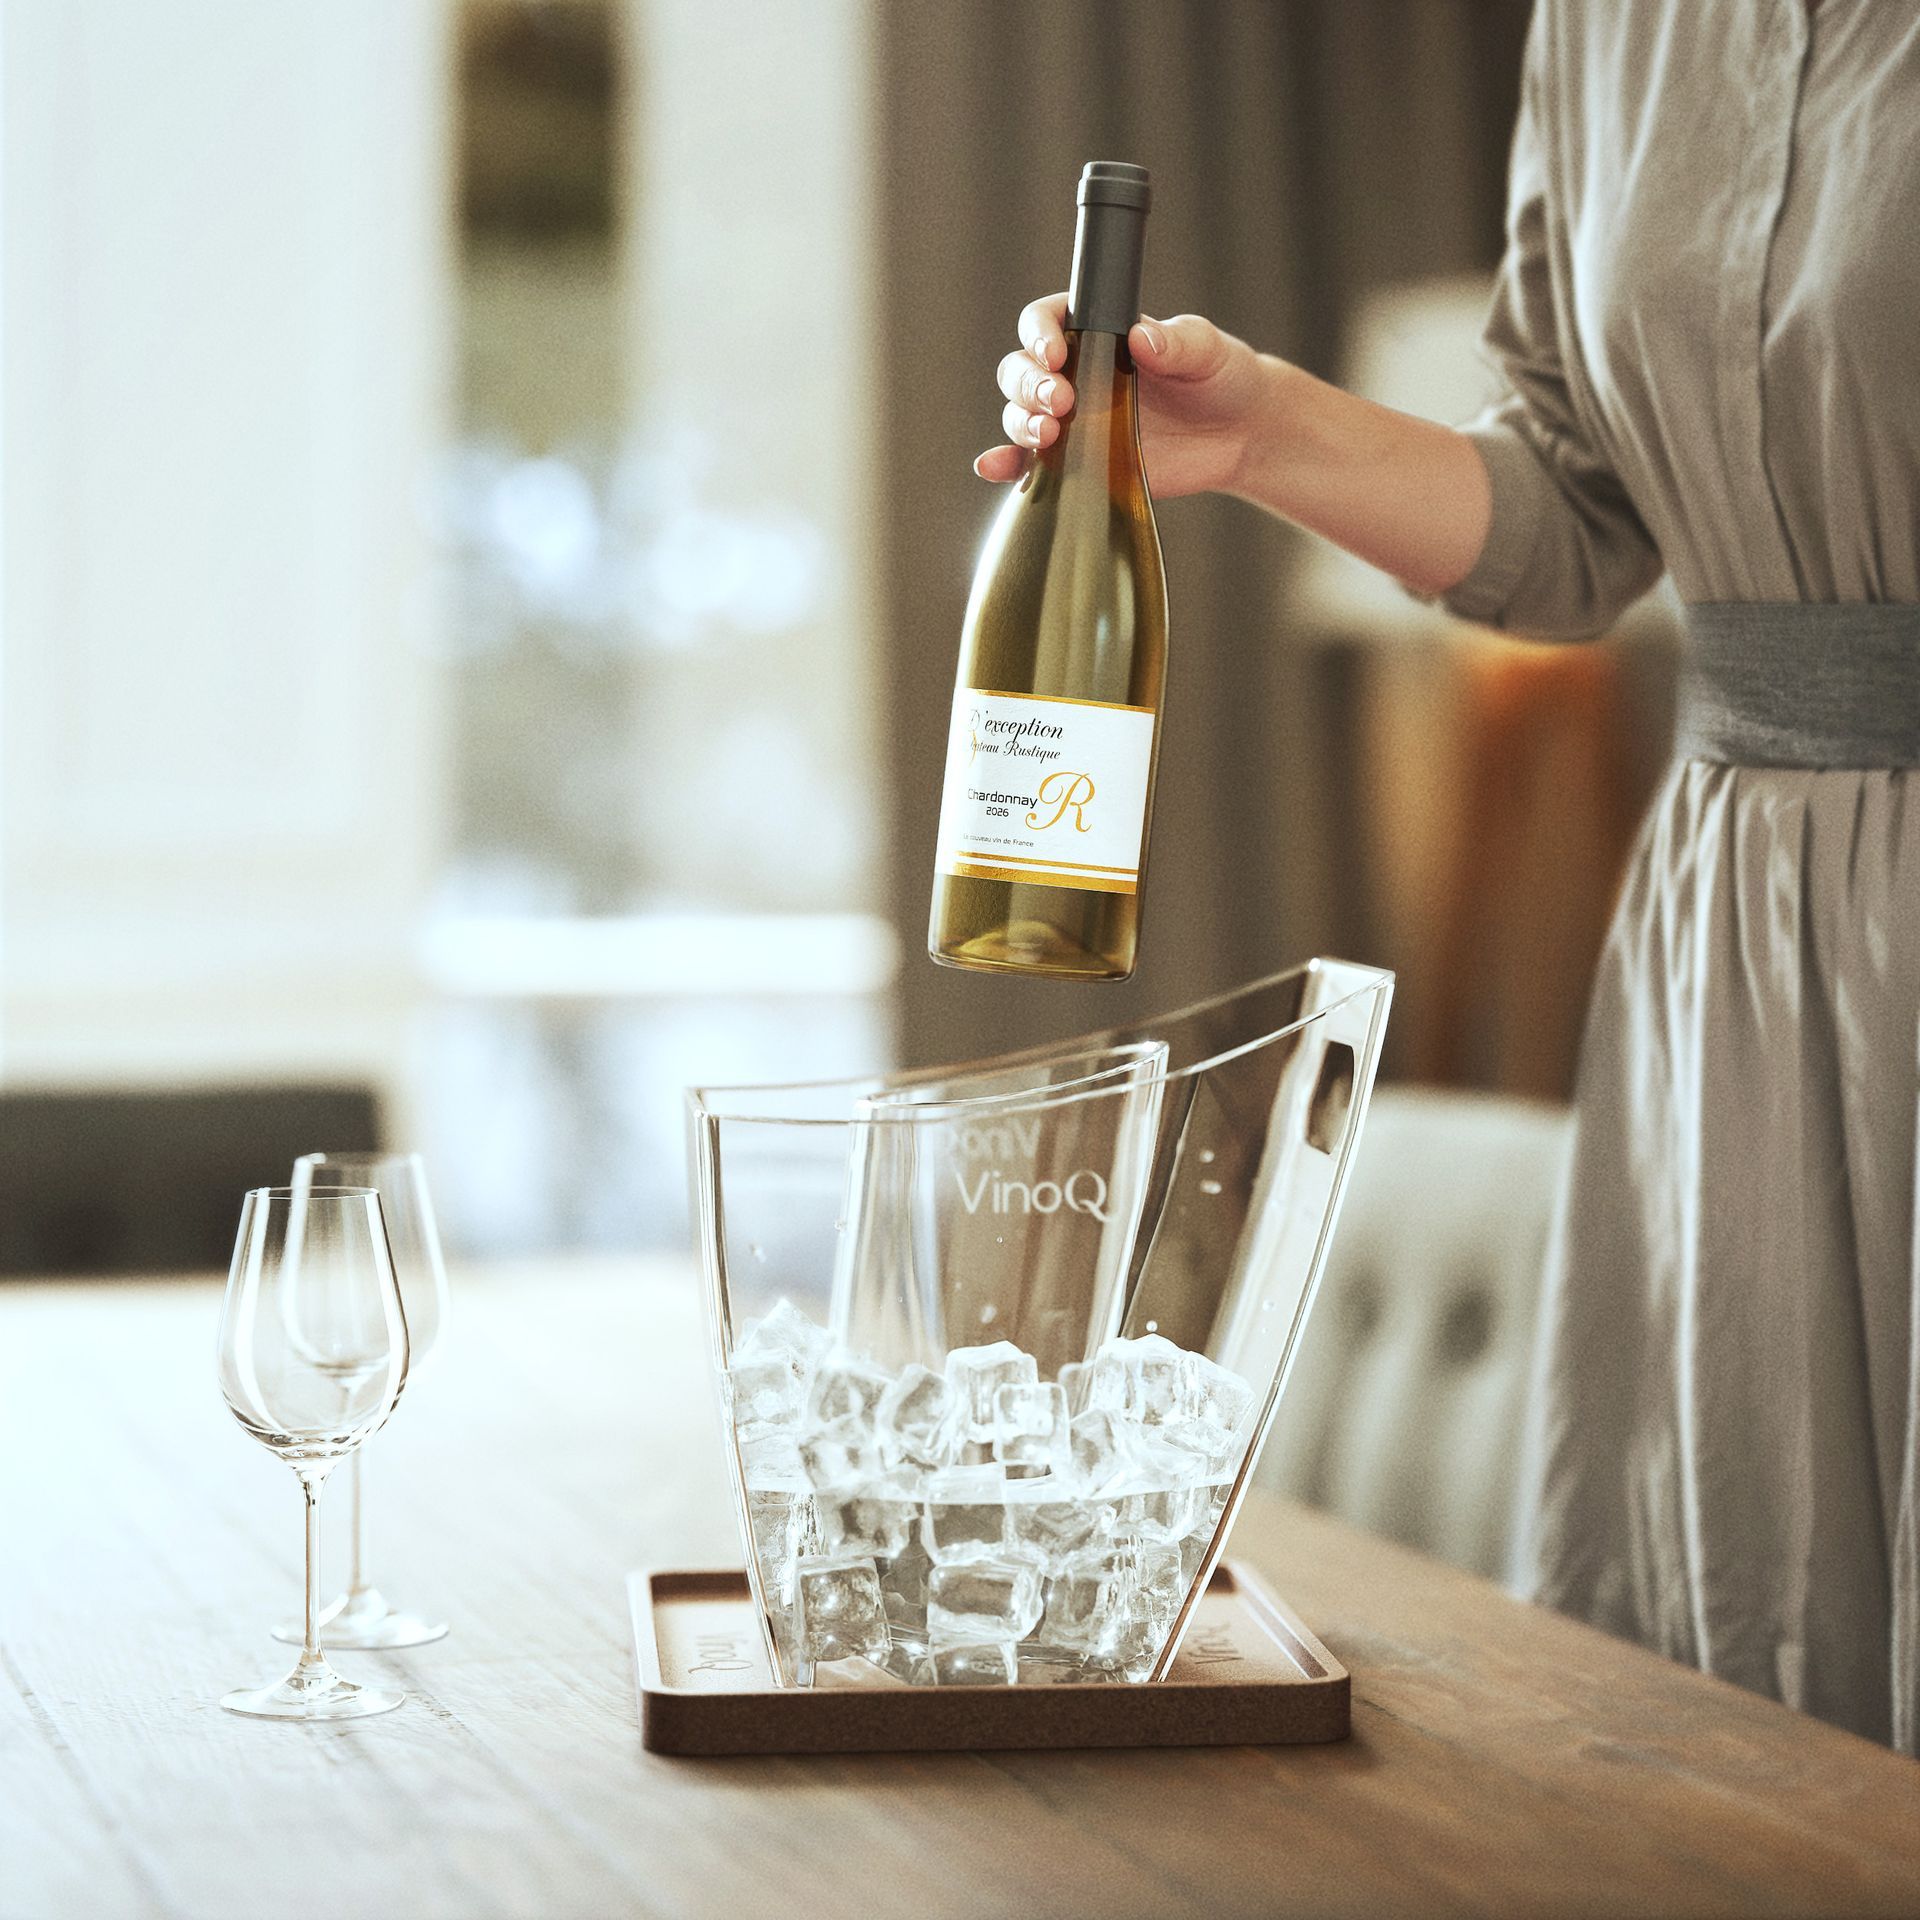
With the VinoQ team, I discussed the desired end results. They were looking for a couple of hero shots of the single wine cooler product and packaging in a cosy, premium, and intimate setting. More specifically, they determined to use a rustic-modern living room with fireplace and soft furnishings.
Process
The first steps were to create a 3D interior that matched the client requirements and then to set up lighting, to use high-quality textures for realism, and to choose a nice camera angle and professional camera settings.
I shared an initial image based on these settings. The client provided feedback and with a couple of iterations, we got to a final image. After finishing the first image, I went ahead with completing the remaining images. Less revisions were required for the remaining images, because we had already set the tone with the first one. For final details, post-processing was done: amongst other things a color check to make the images match well together as a series.

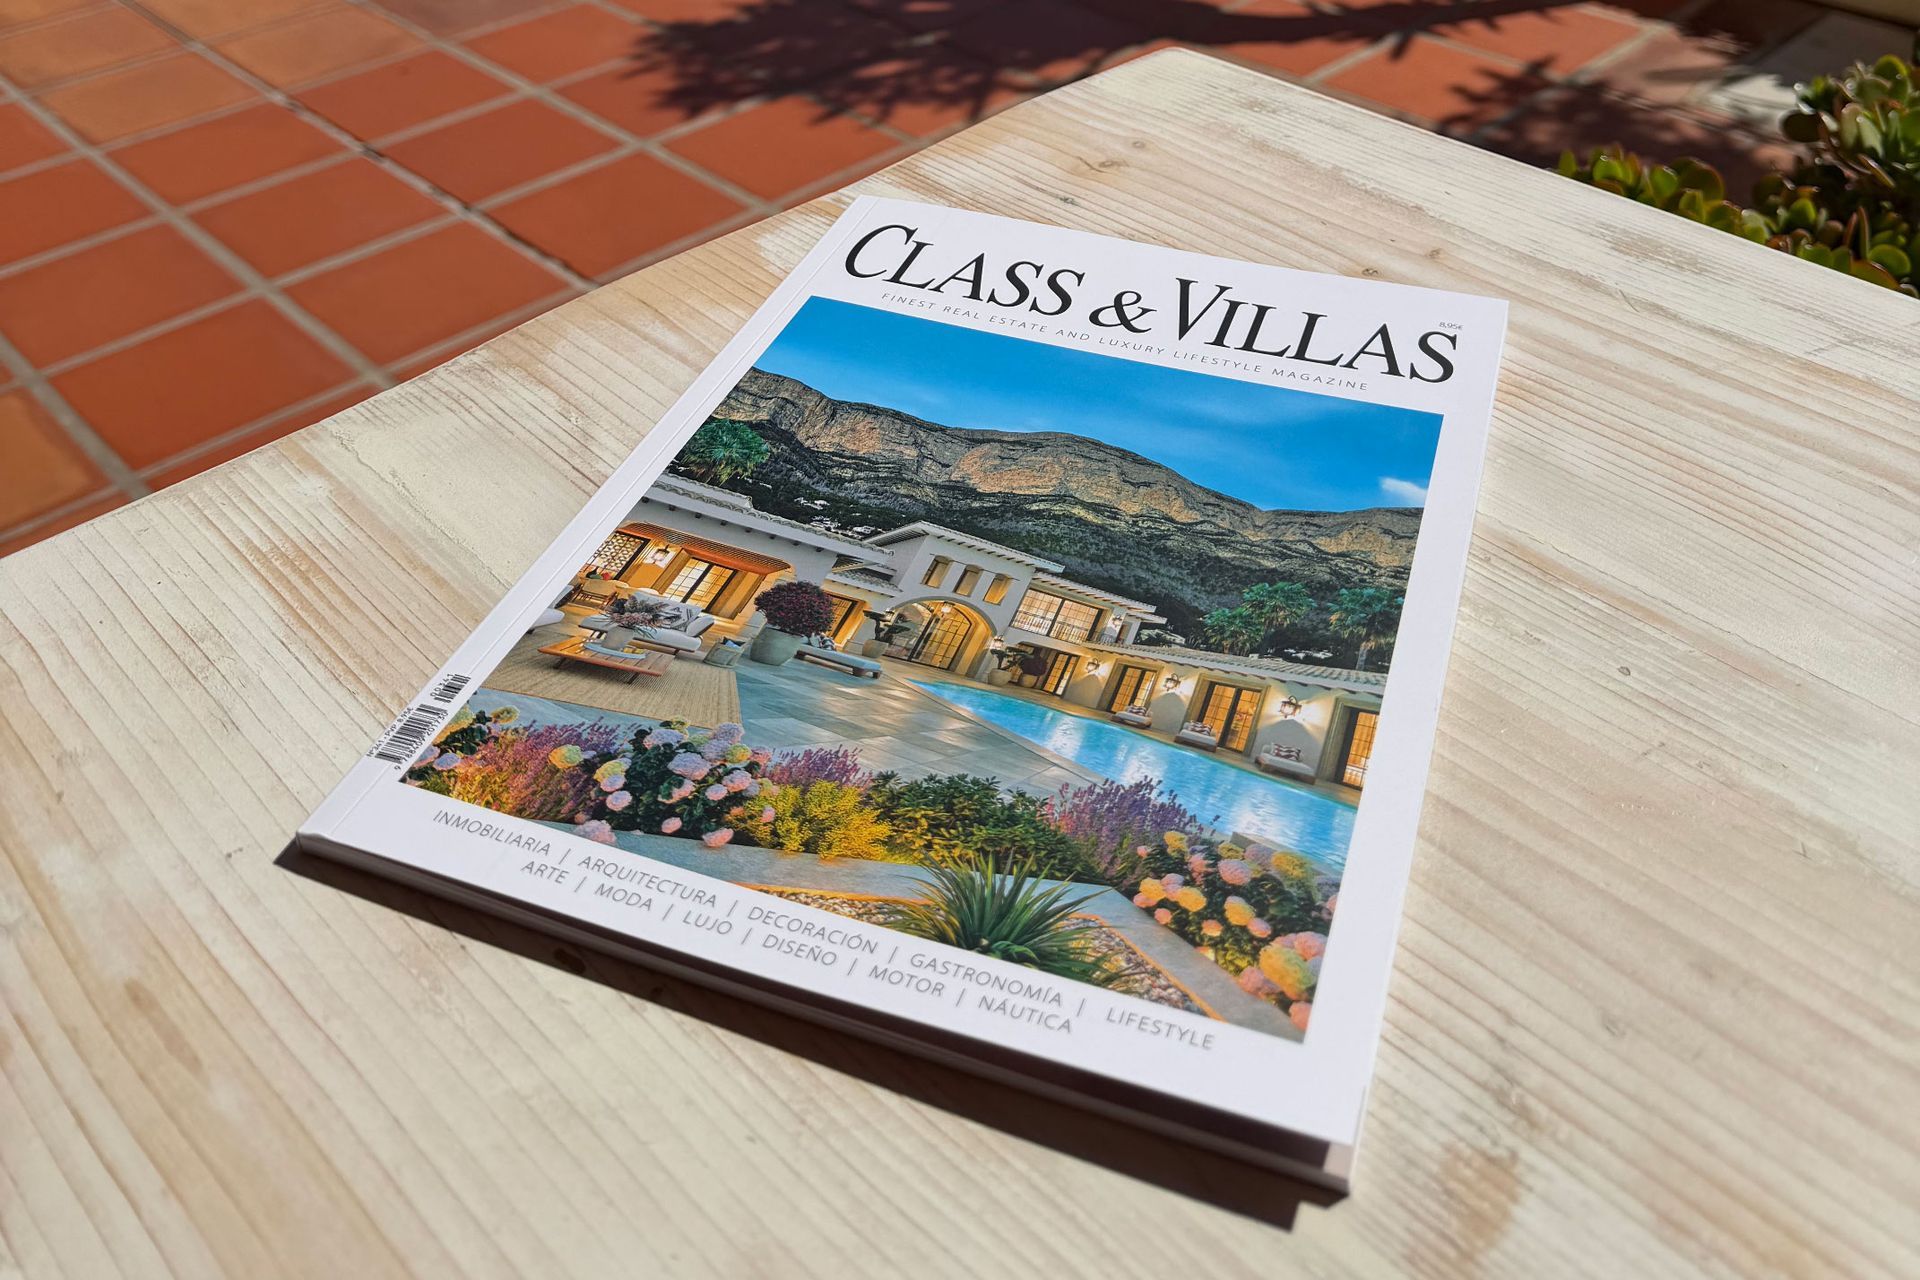
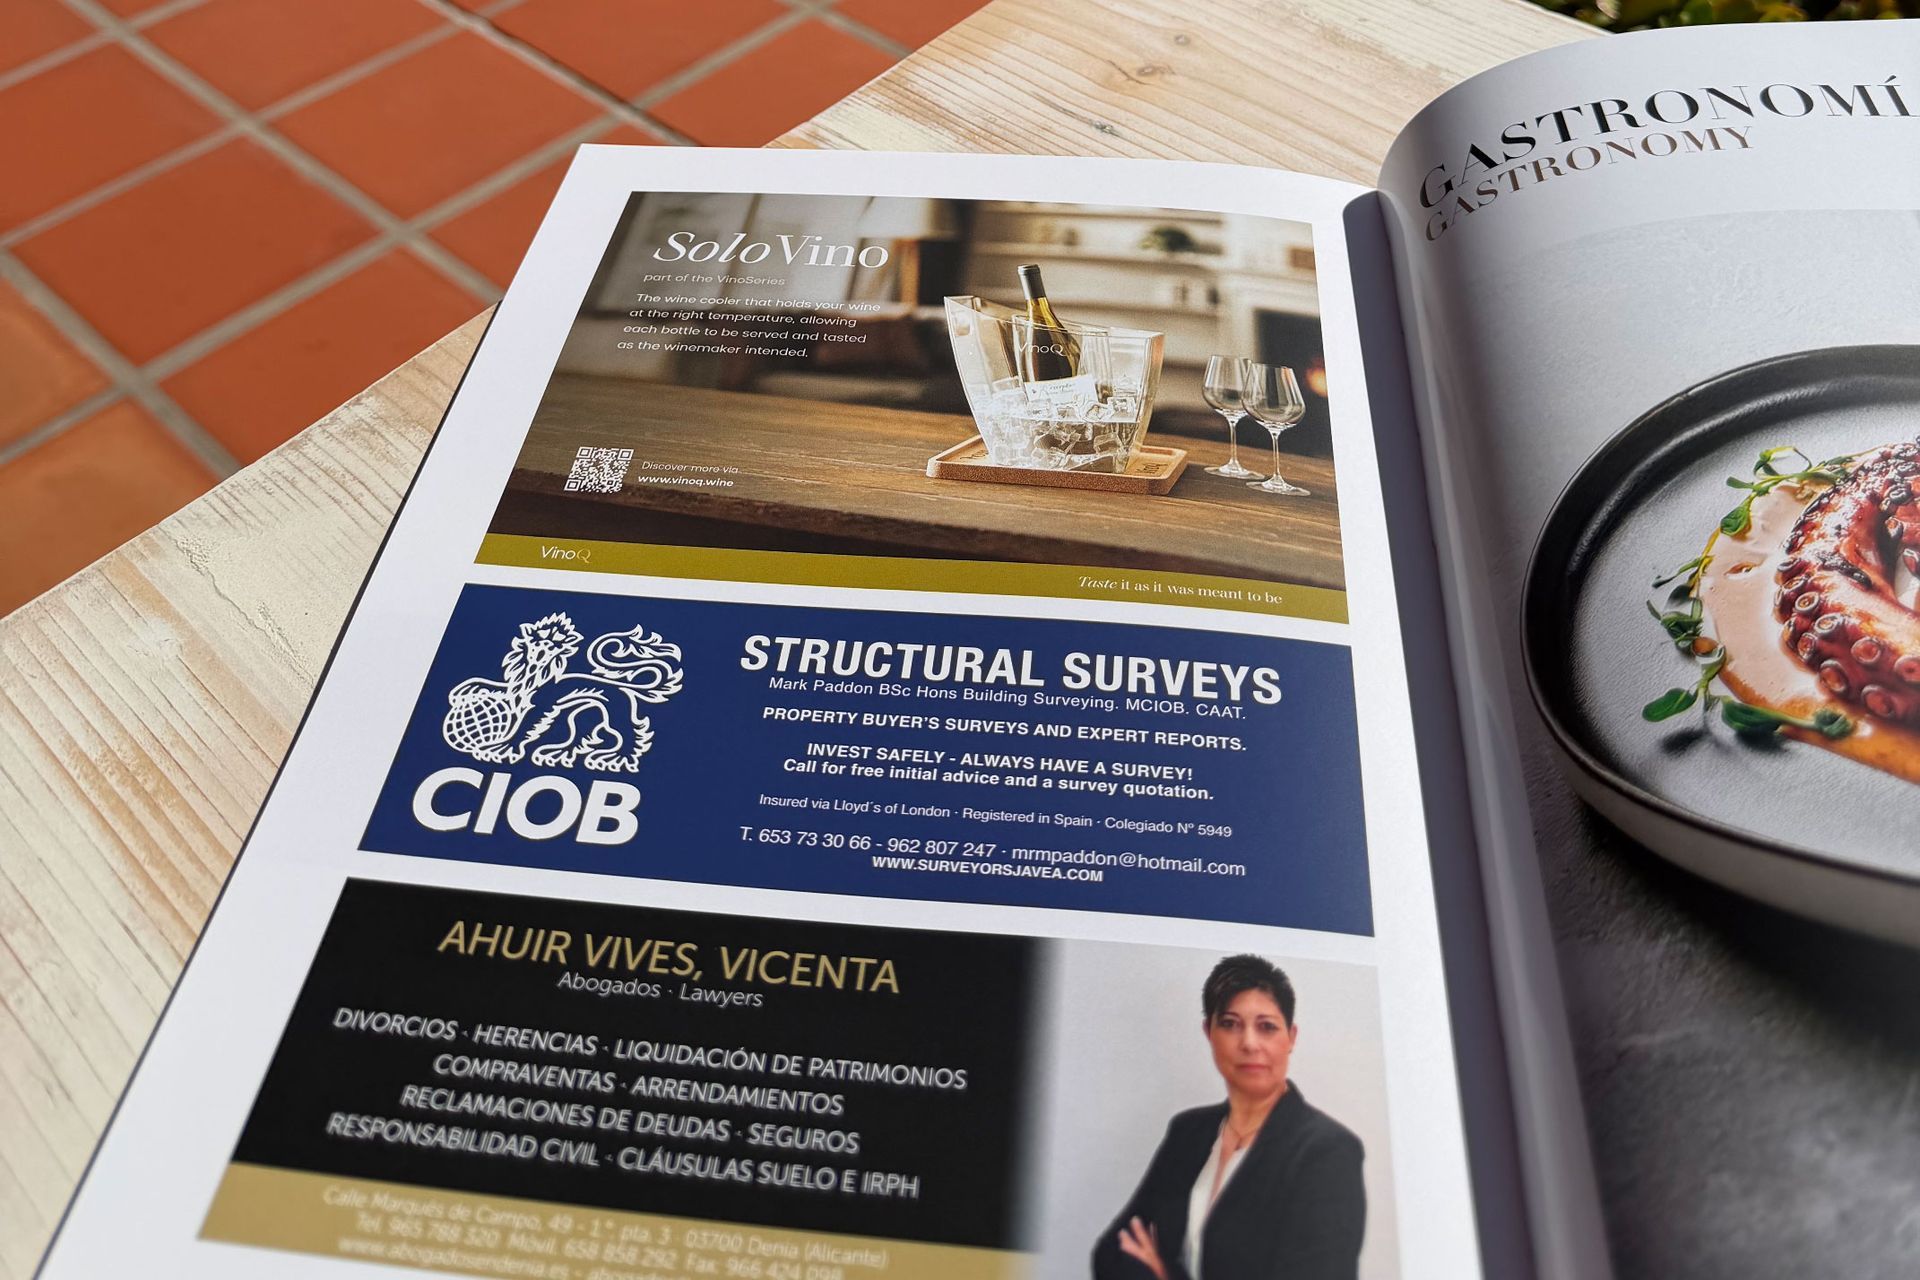
Below, you can see how one of the renderings is used in the luxury magazine Class & Villas.